
VivaReel User Guide
VivaReel is a creative platform for AI short-form drama and video production. It covers story development, digital characters, scene and asset management, storyboard generation, image generation, video generation, video assembly, and export.
This guide introduces VivaReel's main features and explains how to use them.
1. Product Overview
VivaReel includes the following main modules:
- Home creation: Enter a story idea or creative requirements to start a single-episode or multi-episode project.
- Story planning: Generate a detailed episode outline containing the narrative goal, conflict, reversal, and ending hook.
- Shots and storyboards: Break an episode into shots for subsequent image and video production.
- Asset Library: Centrally manage characters, scenes, props, and audio assets.
- Infinite Canvas: Organize images, videos, audio, and AI generation workflows through connected nodes.
- Credits: View your balance and transaction history, and purchase Credits.
- Developer Platform: Access VivaReel's image and video generation capabilities through APIs.
1.1 Creation Workflow
Enter a story idea or creative requirements
→ Choose single-episode or multi-episode creation
→ Generate a detailed episode outline
→ Review and revise the story structure
→ Open the shots and storyboard workspace
→ Generate images and videos
→ Assemble and export the final video
2. Registration, Login, and Language Settings
2.1 Create an Account
- Click
Sign upon the login page to open the account registration page. - Enter the email address you want to use for VivaReel.
- Click
Send code, then enter the code received by email inEmail verification code. - Set an account password. If you have an invitation code, enter it in
Invitation Code (Optional); this field is optional. - Click
Sign upto complete registration.
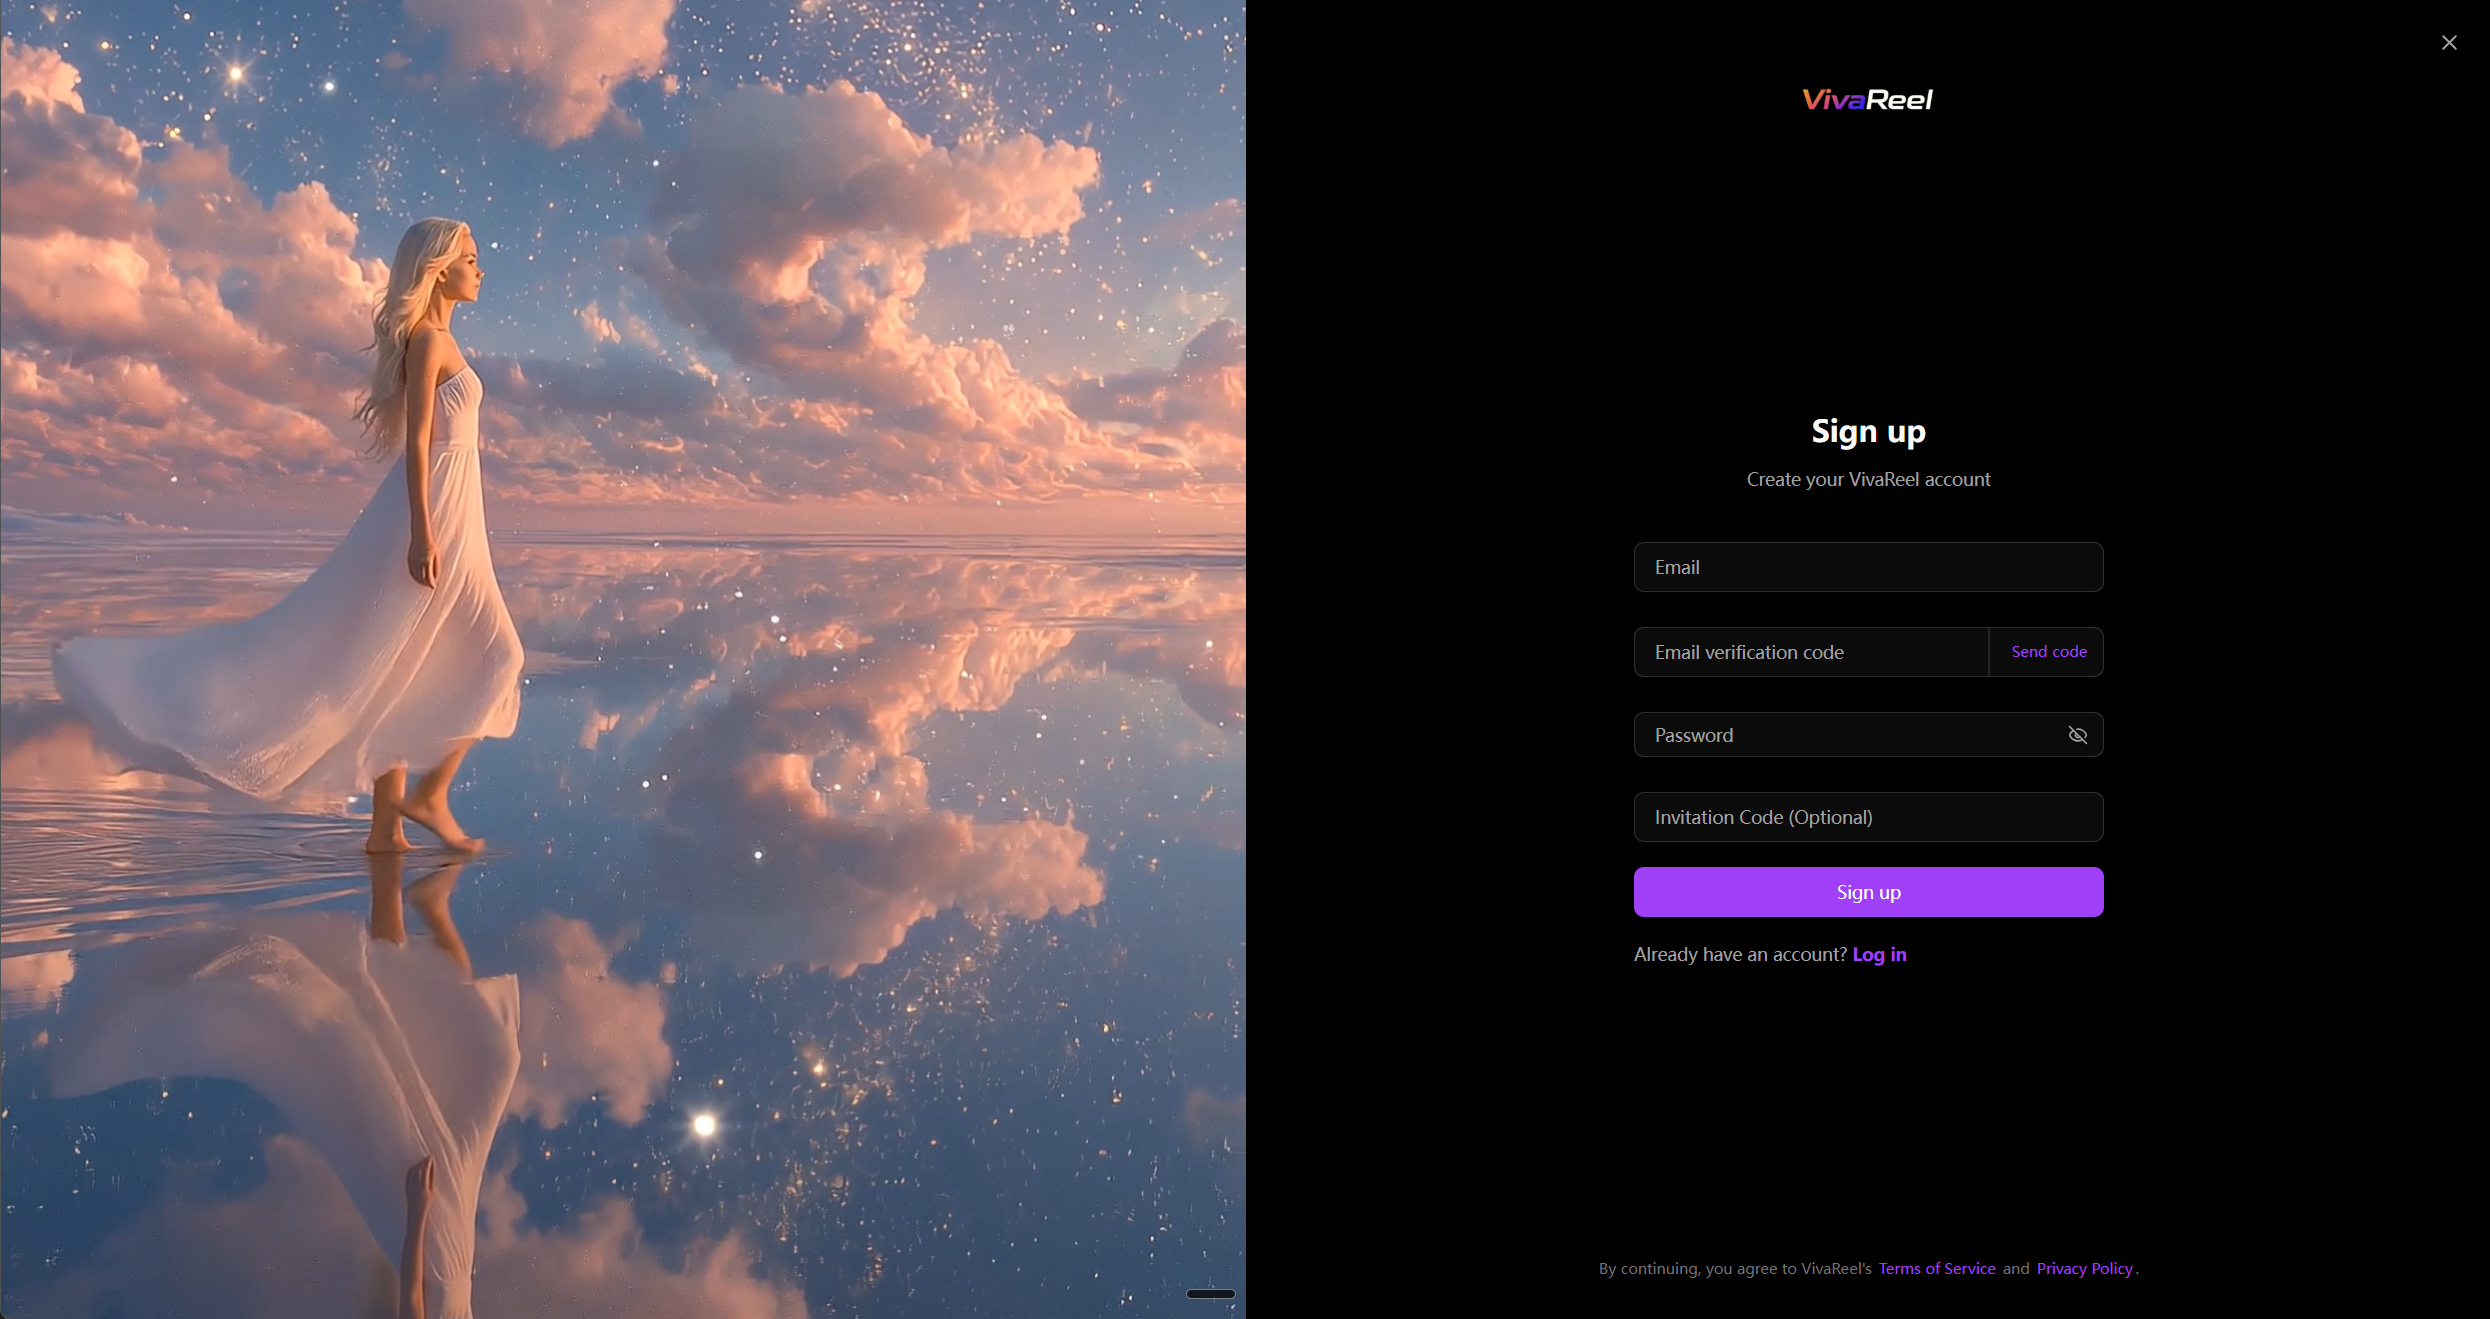
Figure 2-1 VivaReel account registration page
By signing up, you agree to the Terms of Service and Privacy Policy linked at the bottom of the page. Before registering, make sure the email address can receive verification messages and keep your password secure.
2.2 Log In
VivaReel supports the following login methods:
- Click
Continue with Googleto sign in with a Google account. - Enter your registered email address and password, then click
Login.
Use the icon on the right side of the password field to show or hide the password. If you do not yet have an account, click Sign up to open the registration page.
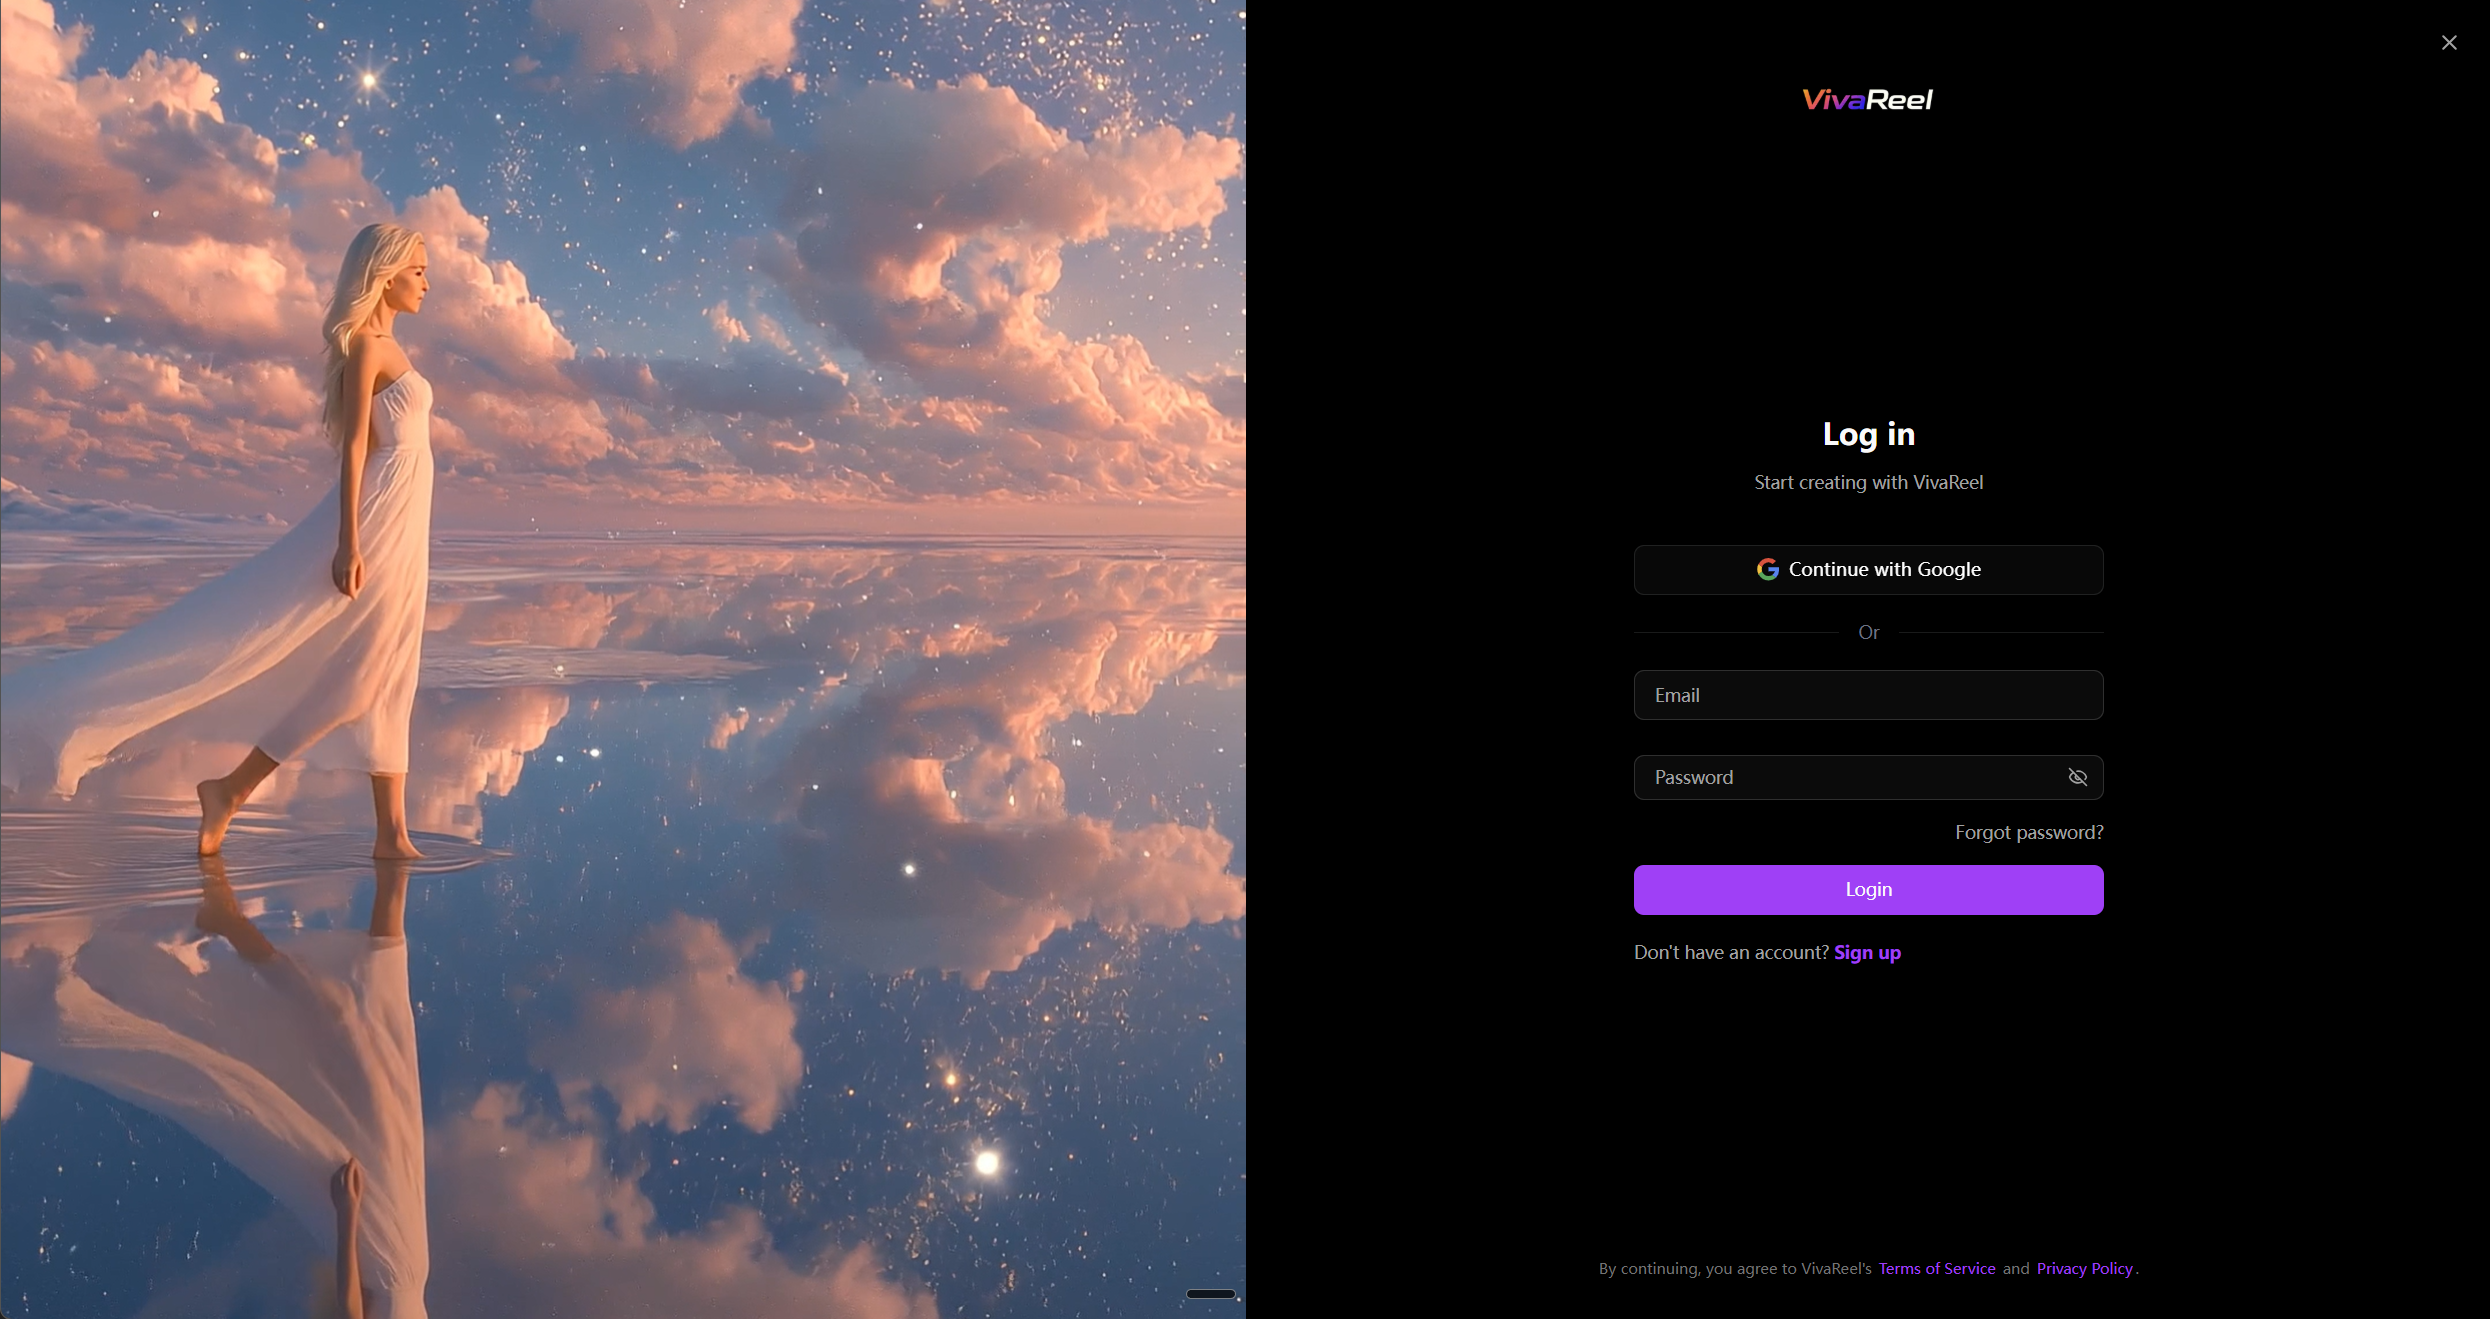
Figure 2-2 VivaReel login page
2.3 Reset a Forgotten Password
Click Forgot password? on the login page. Follow the on-screen instructions to verify your email address and set a new password, then return to the login page and sign in with the new password.
2.4 Change the Interface Language
Use the language control in the upper-right corner of the page to switch the platform interface language.
3. Creating from the Home Page
The home page is the main entry point for creating VivaReel projects. Enter a story idea, plot outline, or other creative requirements, then choose single-episode or multi-episode creation.
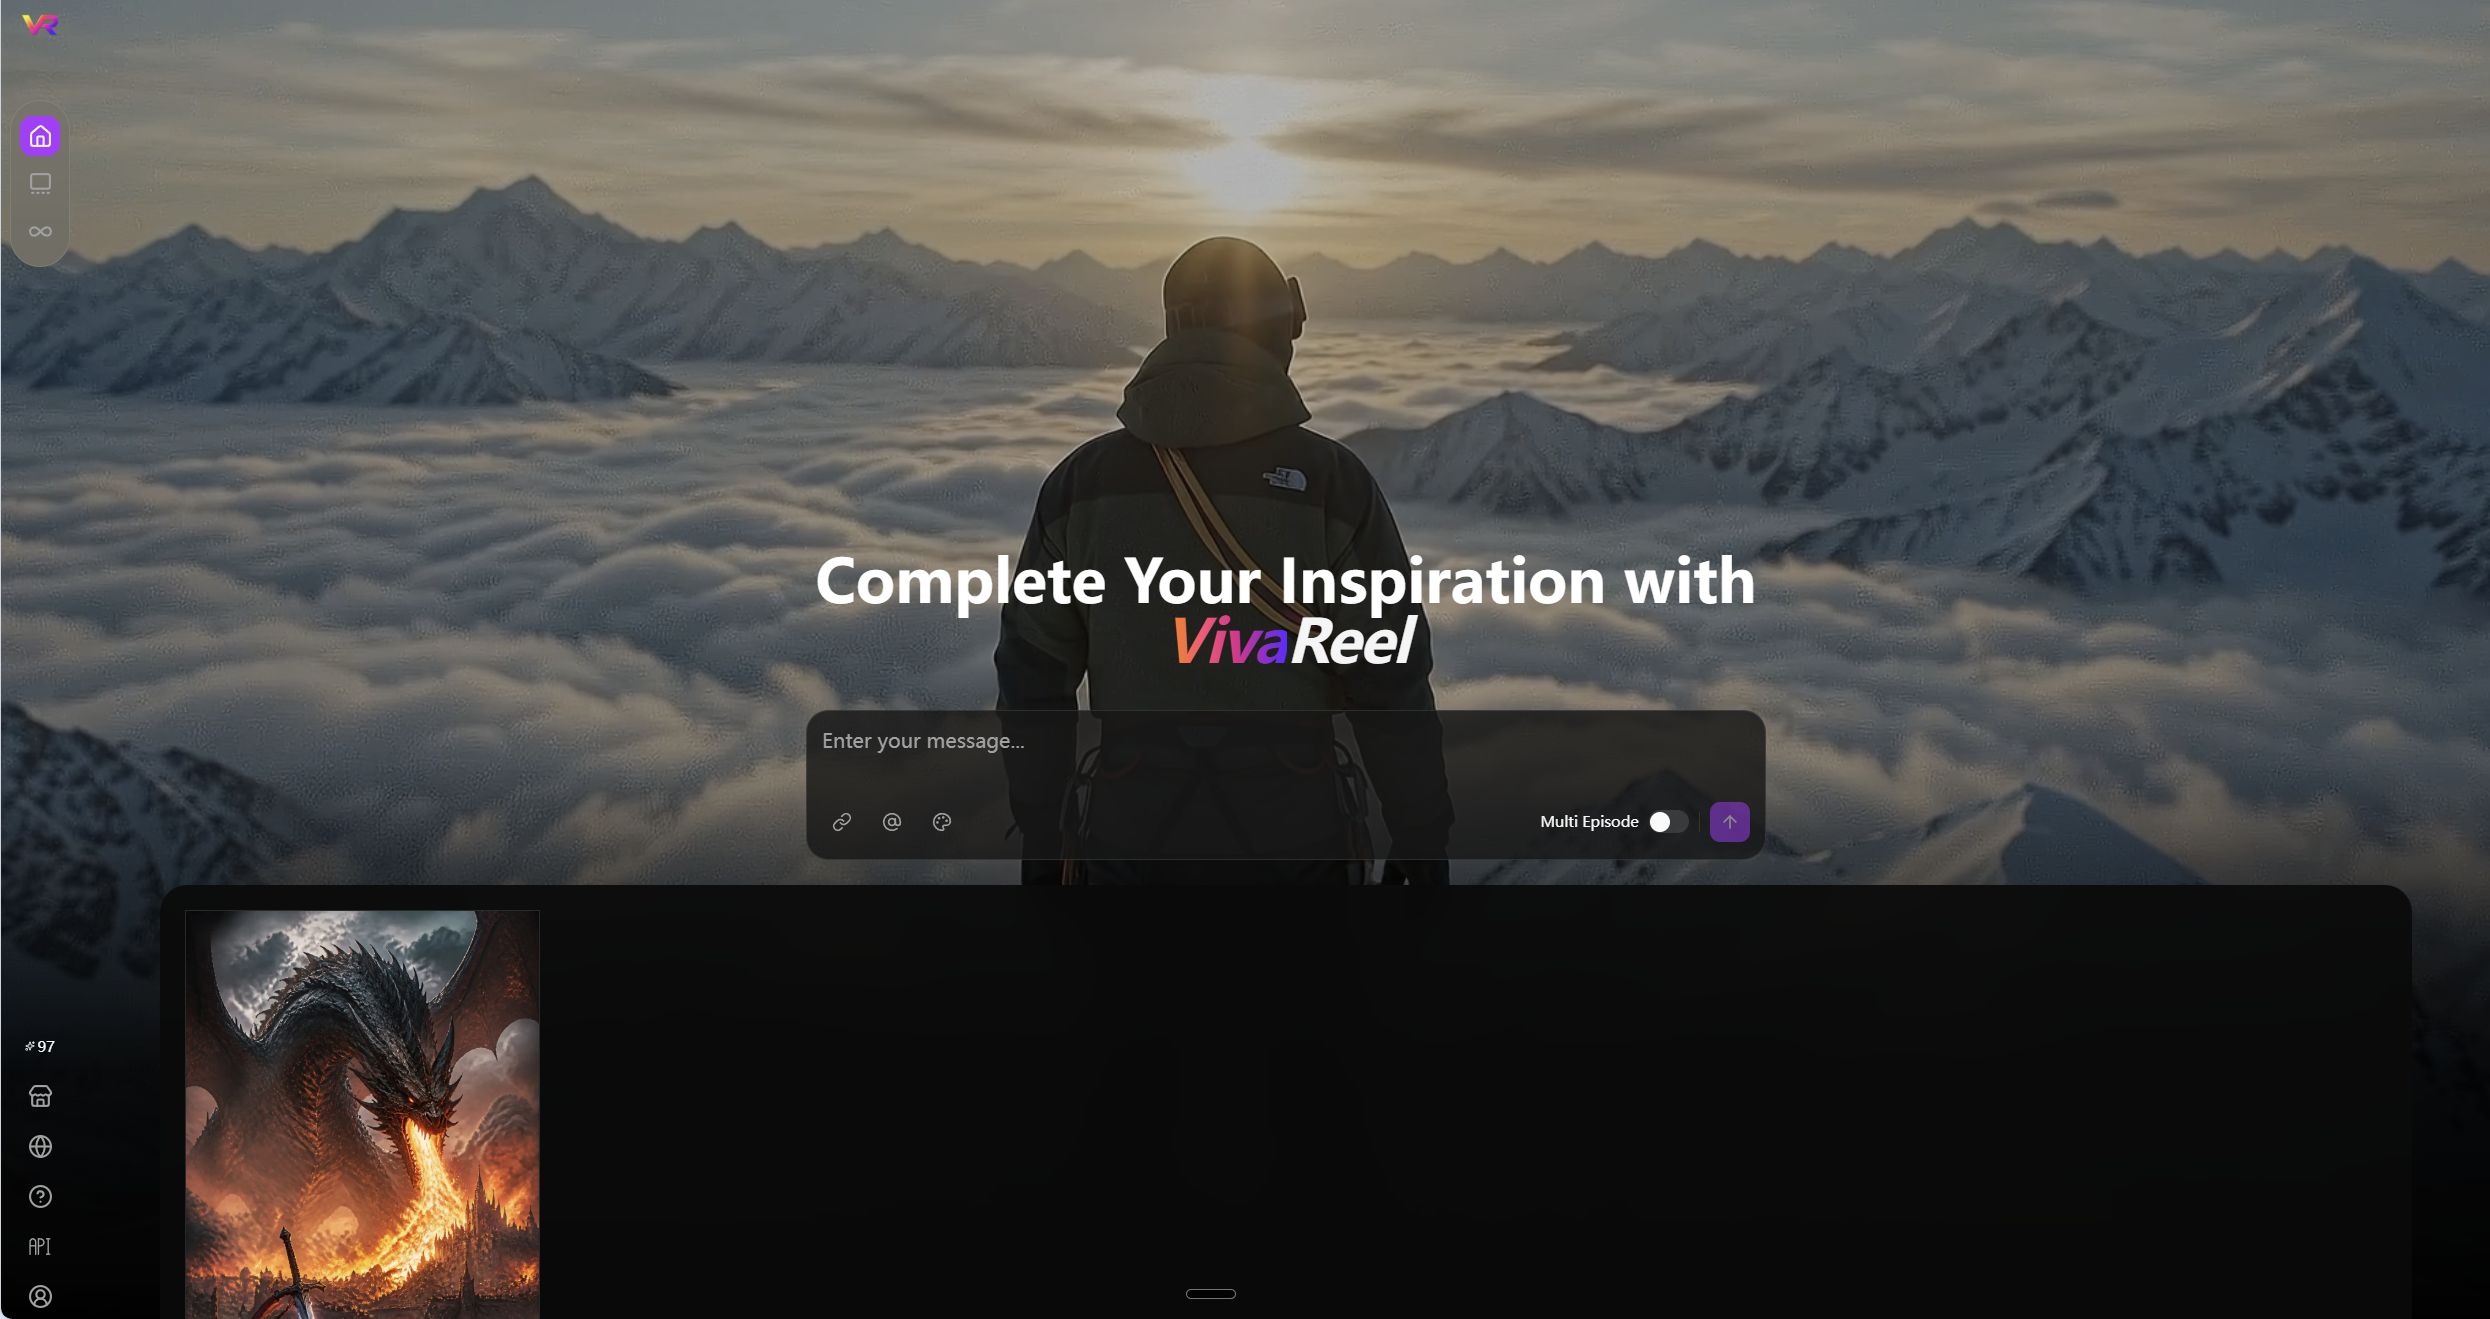
Figure 3-1 VivaReel home creation interface
3.1 Enter Creative Content
- Enter your story idea or creative requirements in the home-page input box.
- Configure any supporting options required for the project.
- Click the submit button to start generation.
Subject opens the system character library, where you can select characters to reference in your project. Art Style sets the visual direction. Available styles may include Cinematic, Modern Urban, Aesthetic Realism, Traditional Chinese, 3D Cartoon, Semi-realistic, Cyberpunk, Steampunk, Gothic, Korean Webtoon, Anime, and Pixar.
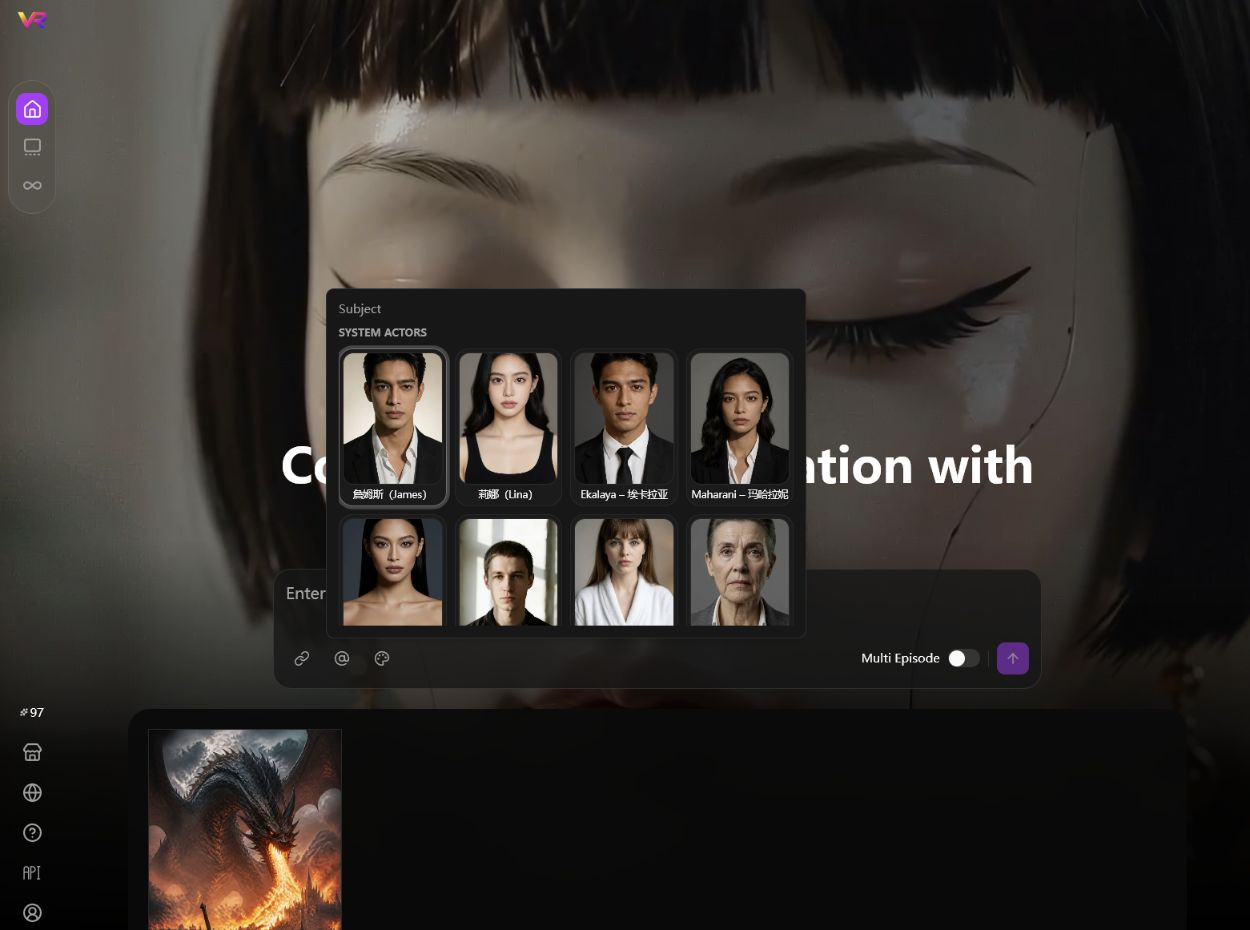
Figure 3-2 System character selector on the home page
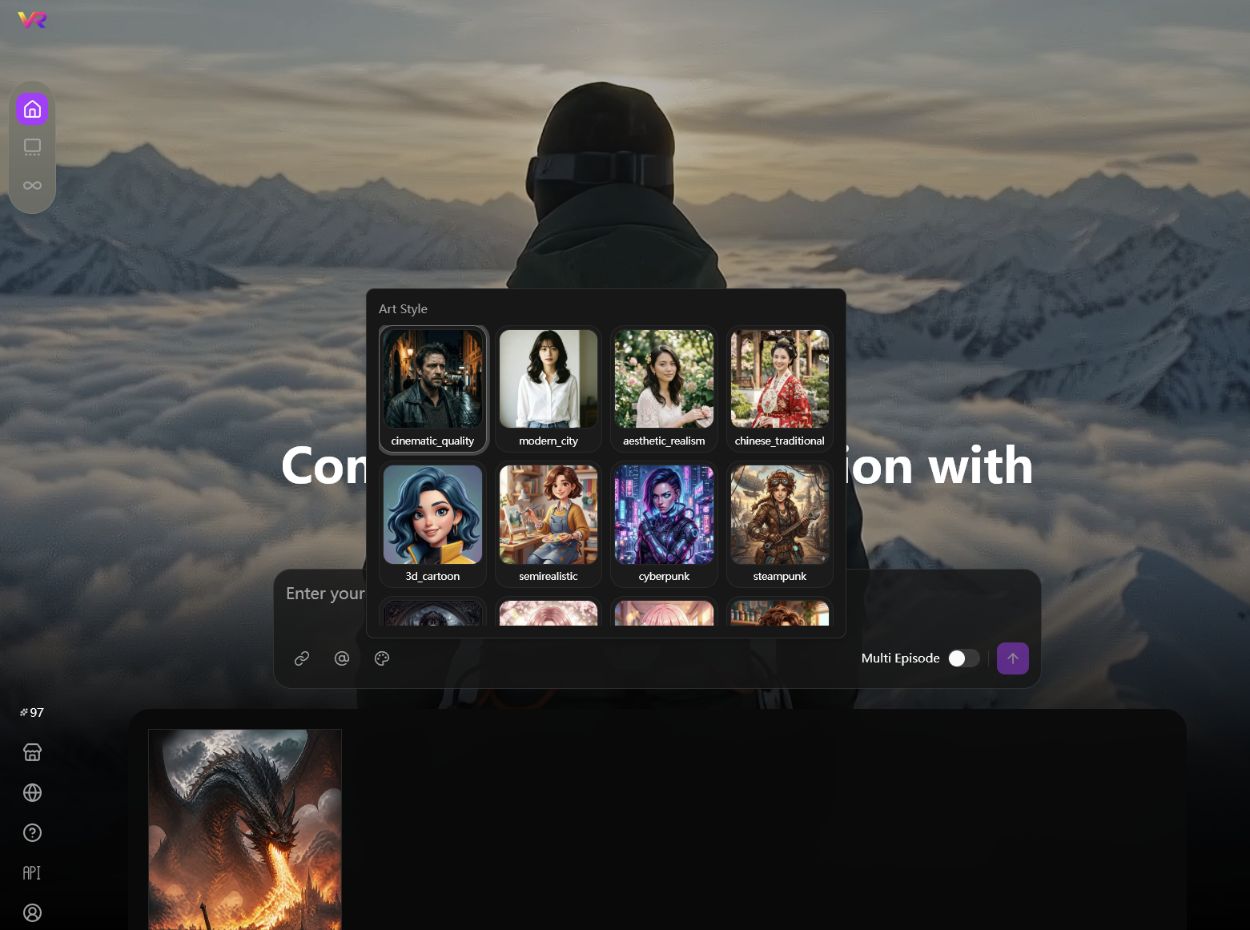
Figure 3-3 Art style selector on the home page
For a more consistent story structure, include the following information in your request:
- Genre
- World setting or historical period
- Main characters
- Central conflict
- Intended style
- Single-episode or multi-episode requirements
- Target language
- Target publishing platform
3.2 Multi-Episode Creation
Enable Multi Episode when creating a continuous series.
3.3 Home Navigation
The home-page sidebar provides access to:
- Home
- Asset Library
- Infinite Canvas
- Credits Store
- Language settings
- Help Center
- Developer Platform
- Account Center
4. Detailed Episode Outline
VivaReel generates a detailed episode outline from the story content you submit. The complete story appears on the left, while structured episode information appears on the right.
AI-generated content on this page is for creative reference only. Before proceeding, review character relationships, story logic, and content compliance.
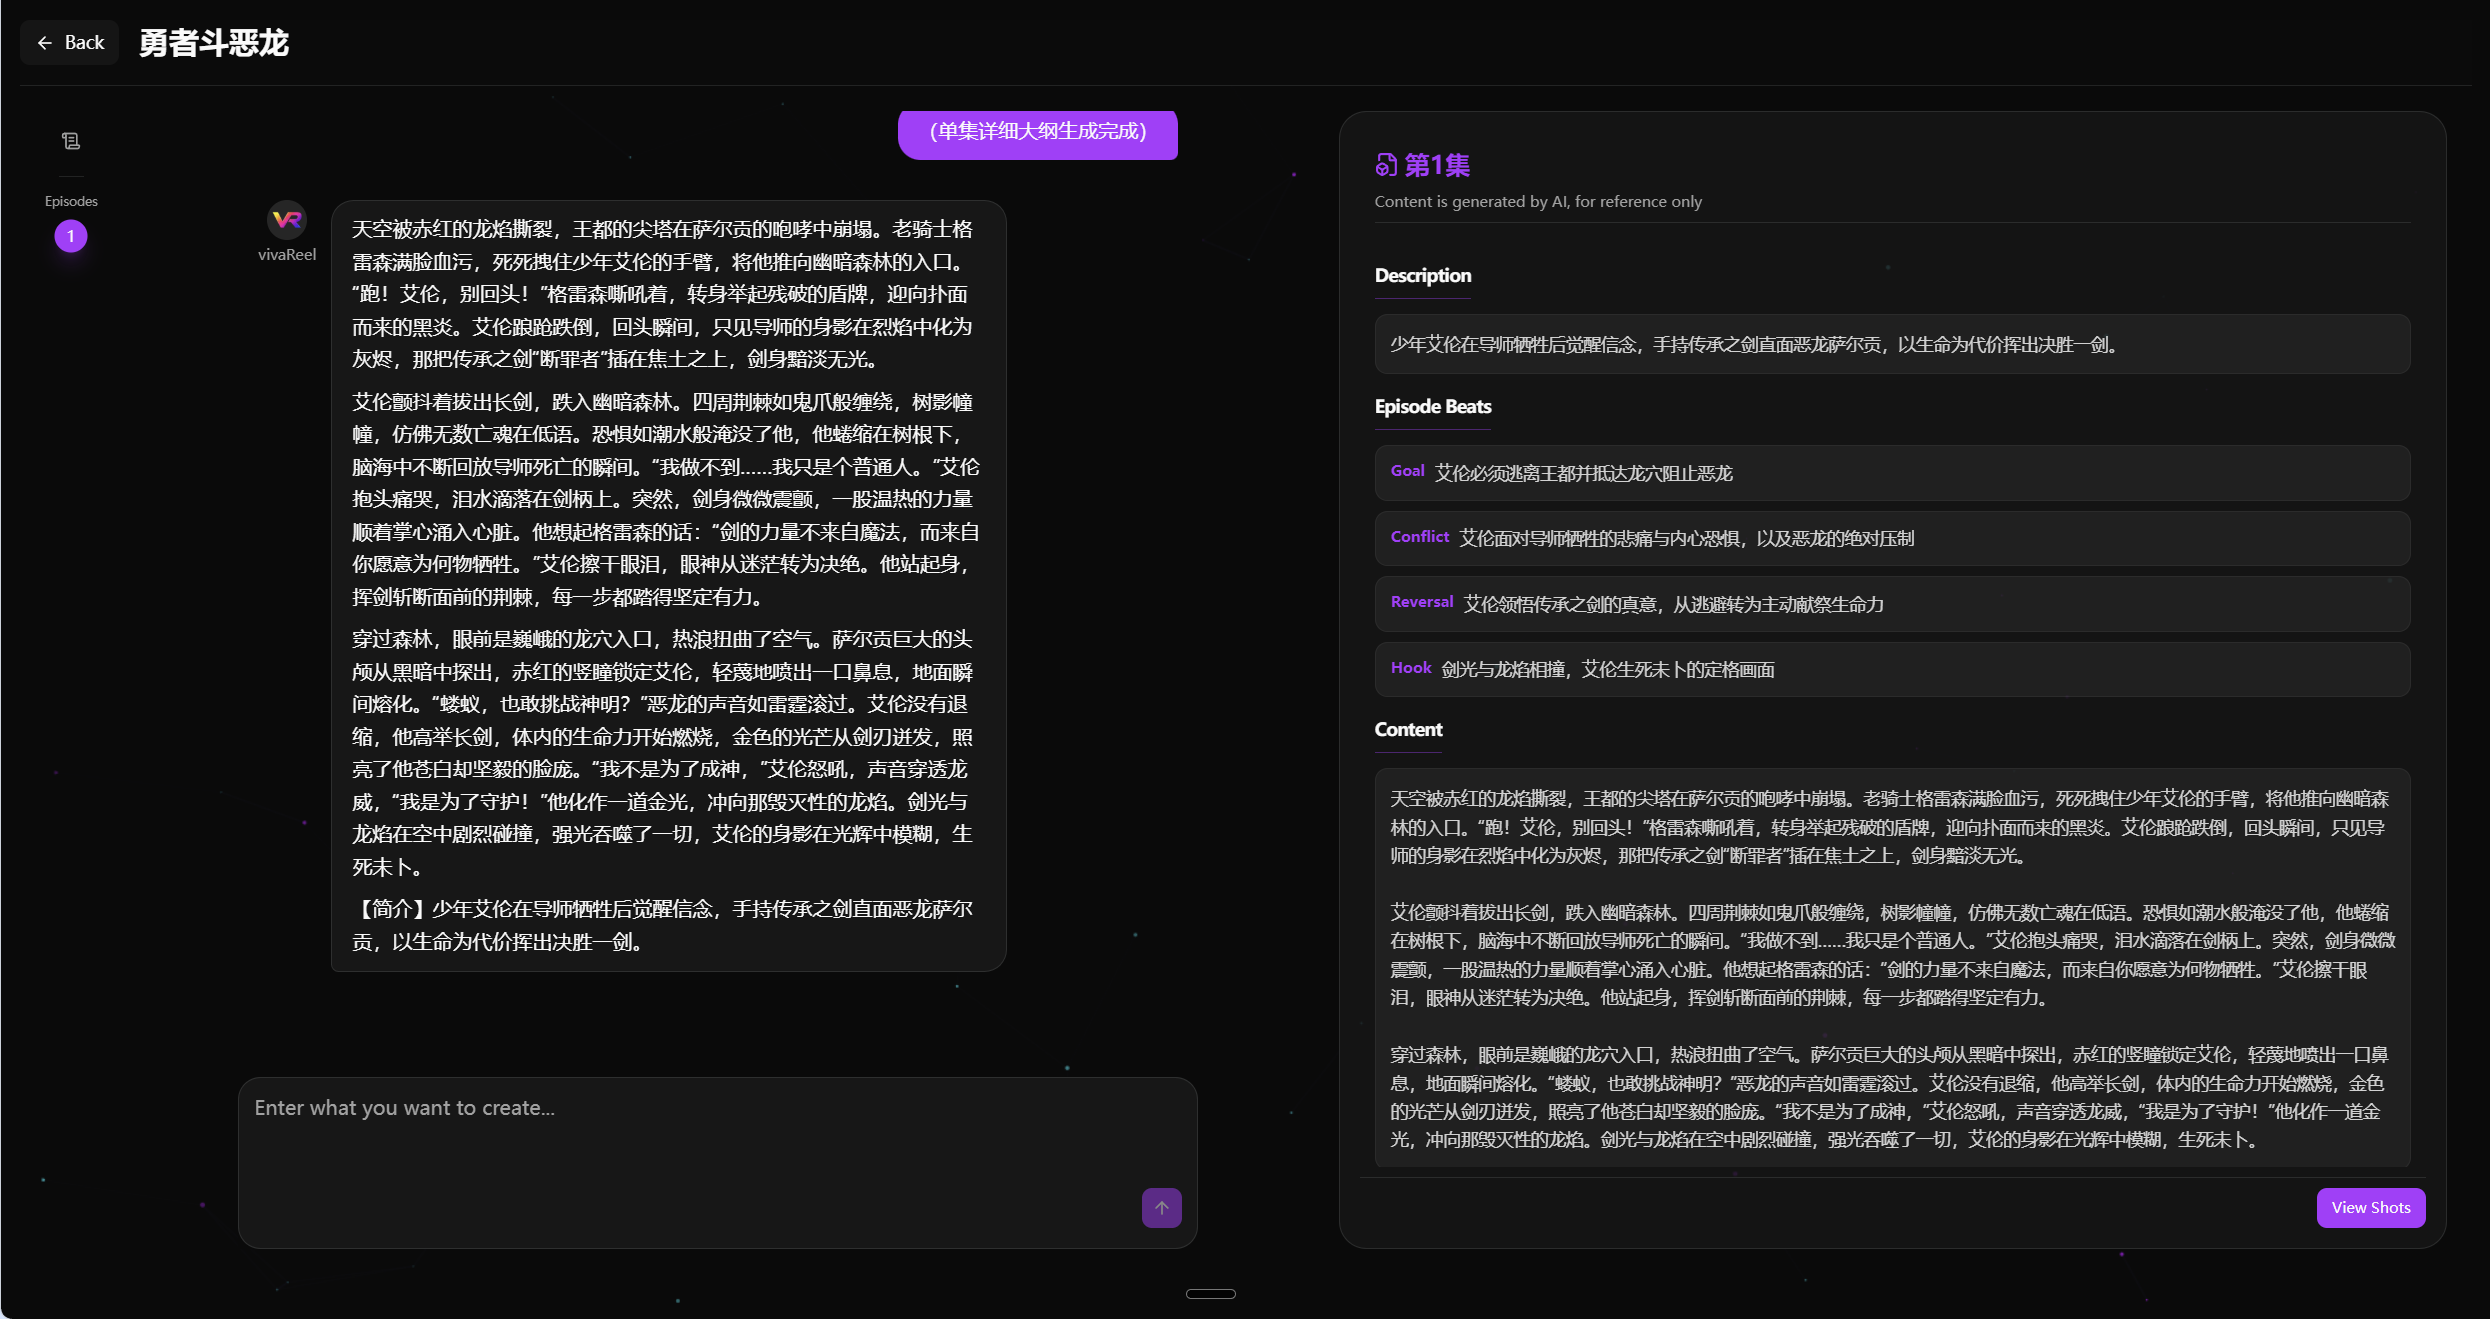
Figure 4-1 Detailed episode outline
4.1 Project Outline
Open Project Outline on the detailed outline page to review the project-level plot summary, world setting, visual direction, and main characters. This information keeps the narrative and visual tone consistent across episodes.
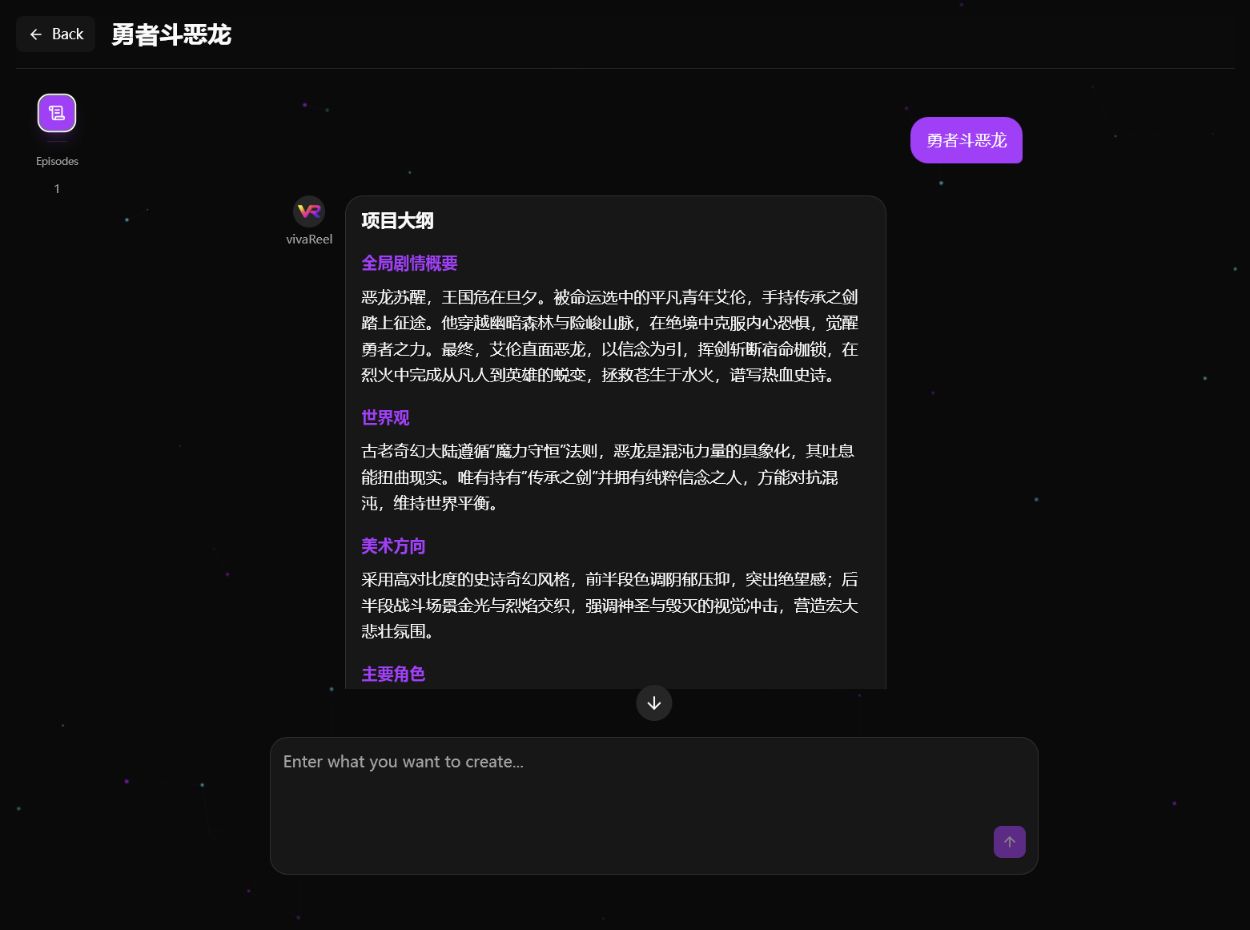
Figure 4-2 Project outline
4.2 Episode Navigation
Use the Episodes area on the left to view and switch episodes. Select an episode number to open that episode's content.
4.3 Structured Outline
An episode outline contains:
| Field | Description |
|---|---|
| Description | A concise summary of the episode |
| Goal | The objective the main character must achieve |
| Conflict | The central conflict that drives the plot |
| Reversal | A major turn or reversal in the episode |
| Hook | An ending hook designed to keep viewers watching |
| Content | The complete episode story |
The characters and scenes used in the episode are also displayed below the outline. Character and scene cards include an image, name, and description, allowing you to confirm visual consistency before producing shots.
The Shot Script area presents the scene, visual description, shot size, camera movement, and dialogue in shot order. The shot script is the basis for generating first-frame images and shot videos.
4.4 Review the Outline
After generation, verify that:
- The protagonist's goal is clear.
- The main conflict advances the story.
- The reversal is logical and consistent with earlier events.
- The ending creates a reason to continue watching.
- Character names, relationships, and profiles are consistent.
- Scenes, props, and the timeline remain consistent.
- The content length is appropriate for the intended episode duration.
- There are no repeated events, logical errors, or inappropriate content.
4.5 Revise the Outline
Enter revision instructions at the bottom of the page and submit them. Make the request as specific as possible. For example:
- Strengthen the direct conflict between the protagonist and antagonist.
- Keep the current character profiles but redesign the ending reversal.
- Shorten the setup so the central event occurs earlier.
- Change the episode ending to a suspenseful hook.
- Keep the main plot unchanged while strengthening the characters' emotional development.
4.6 Open Shots and Storyboards
After confirming the episode content, click View Shots in the lower-right corner to open the shots and storyboard stage.
5. Shots and Storyboards
5.1 View Shots
Click View Shots to enter the shot production workspace. The left side is used to edit the selected shot, the right side previews images and videos, and the bottom timeline is used to switch between shots.
The top bar displays the current episode, Credits balance, Batch Generate Videos, and Export. Click Back to Planning to return to story planning.
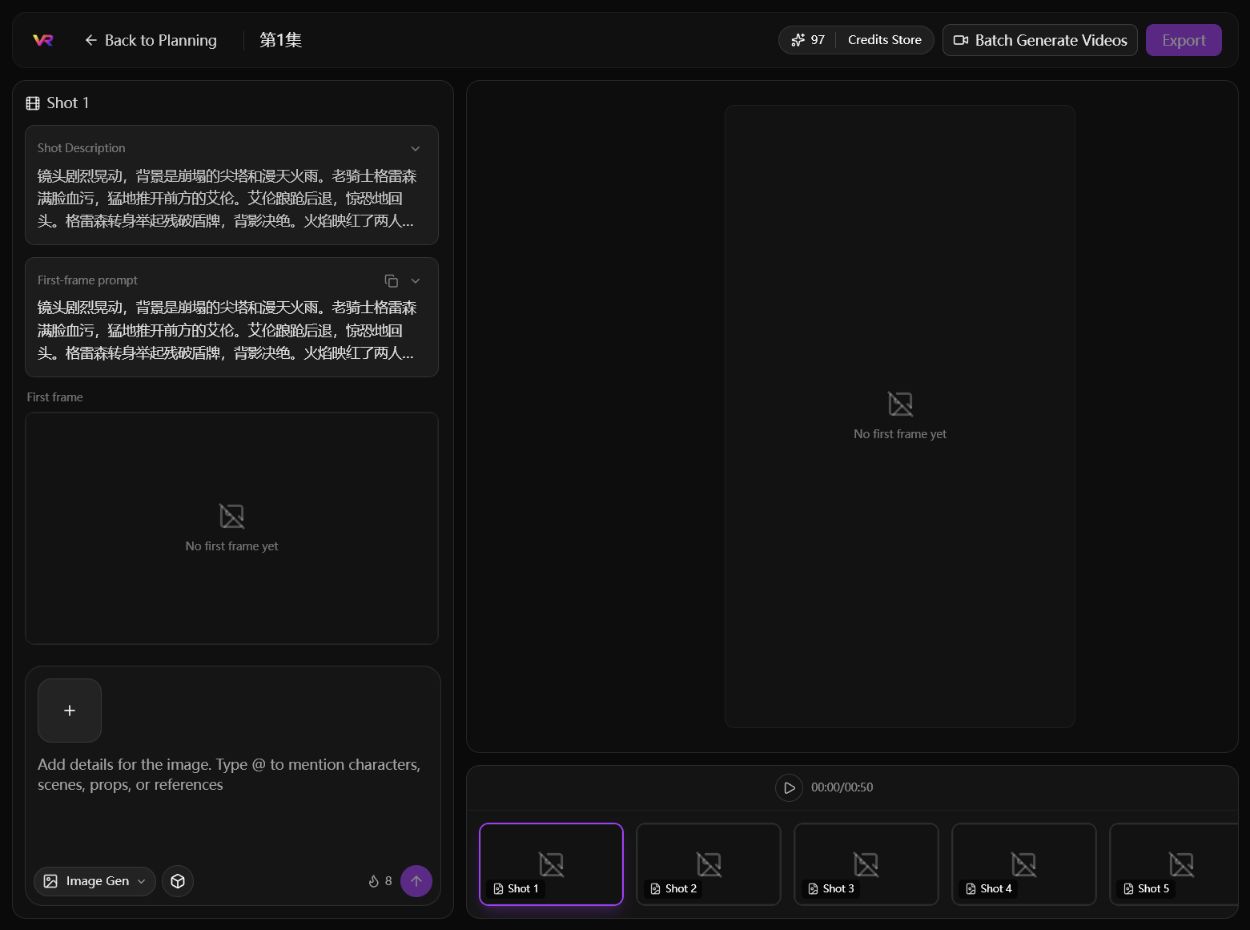
Figure 5-1 Shot production workspace
5.2 Edit Shot Content
Select a shot on the timeline to display:
Shot Description: The visual content and action in the shot.First-frame prompt: The prompt for the first-frame image.Shot prompt: The prompt for the shot video.- Asset input area: Add reference images or supplementary generation instructions.
Prompts can be copied or expanded. Type @ in an input field to reference project characters, scenes, props, or other assets.
5.3 Add, Delete, and Reorder Shots
The timeline displays all shots in the current episode in sequence. Click a shot card to select it. Click Insert Shot between adjacent shots to insert a new shot.
5.4 Generate Storyboard Images
- Select the shot that needs a first-frame image.
- Set the generation mode to
Image Gen. - Review or revise the
First-frame prompt. - Upload reference images as needed, or use
@to reference characters, scenes, props, and other assets. - Open generation settings and select an aspect ratio and image model.
- Review the estimated Credits and click submit to start generation.
When generation is complete, the first-frame image appears in the current shot's First frame area and in the image history on the right.
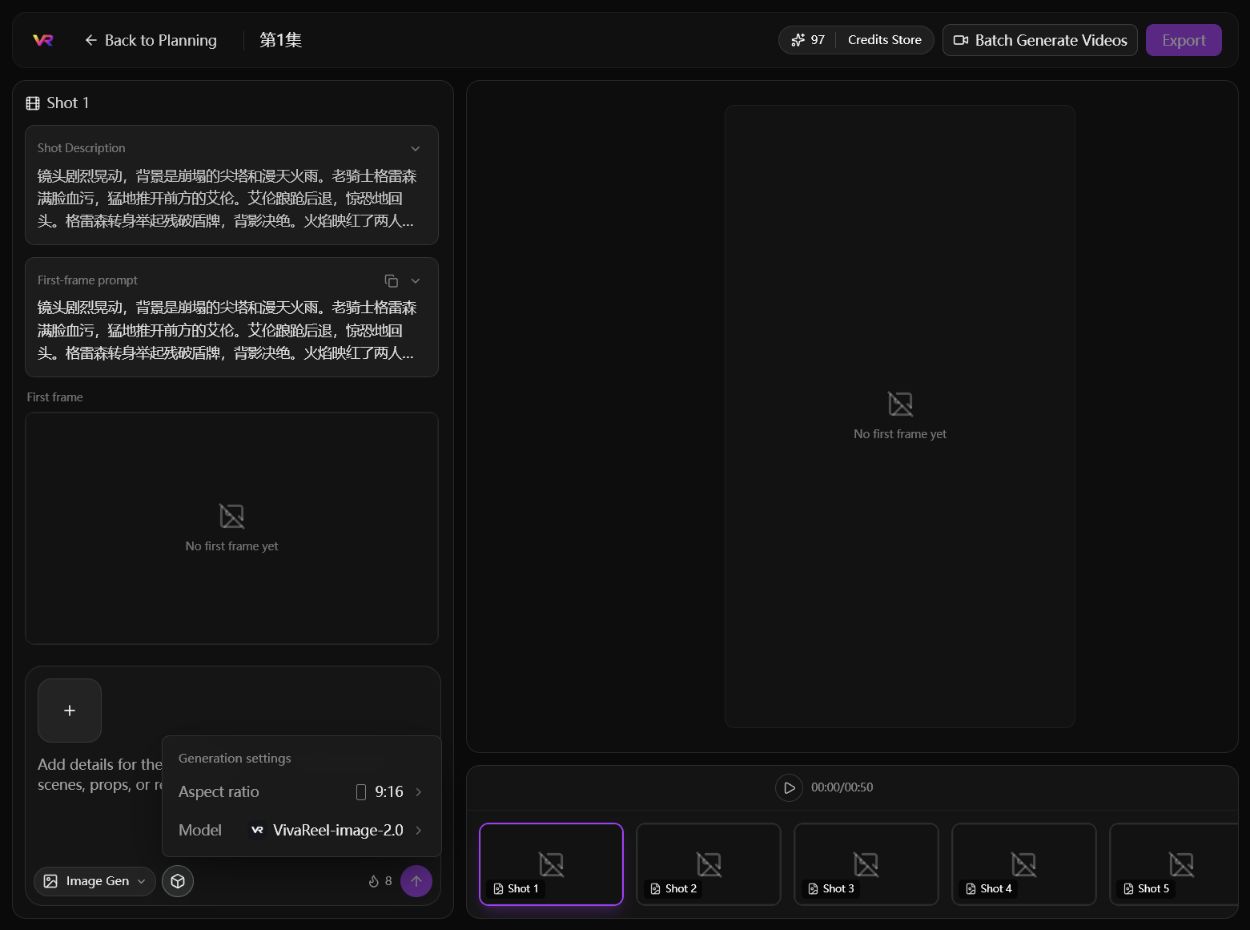
Figure 5-2 First-frame image generation settings
5.5 Generate Video from a Storyboard
Prepare a first-frame image before generating a video. After switching to Video Gen, choose one of the following modes:
Frames: Generate a video from the first frame and, optionally, an ending frame.Reference: Upload reference images to guide video generation. Up to five reference images can be added to a shot.
In video generation settings, select the aspect ratio, duration, and video model. The submit button displays the estimated Credits. Actual usage is determined by the final platform settlement.
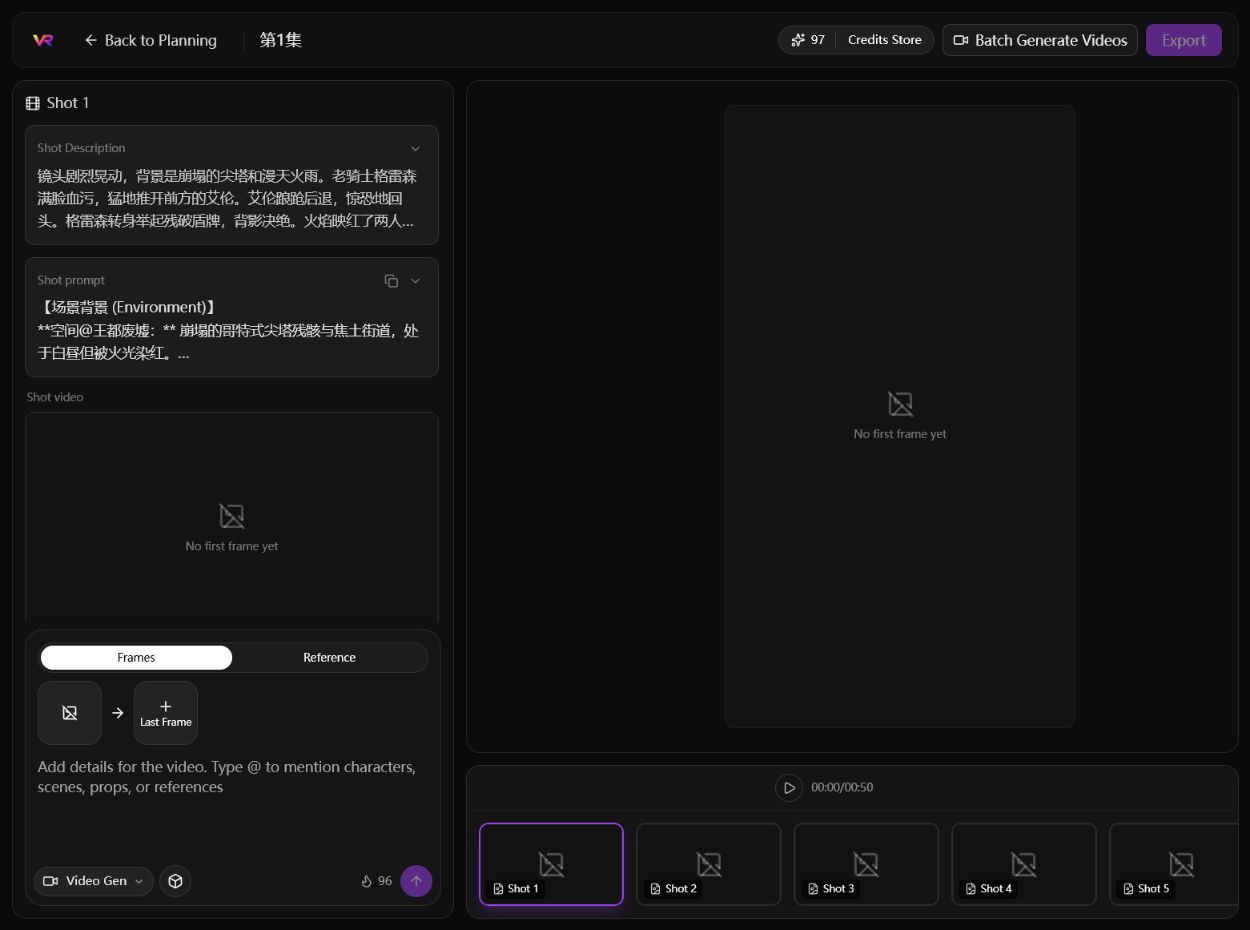
Figure 5-3 Generating a shot video from first and ending frames
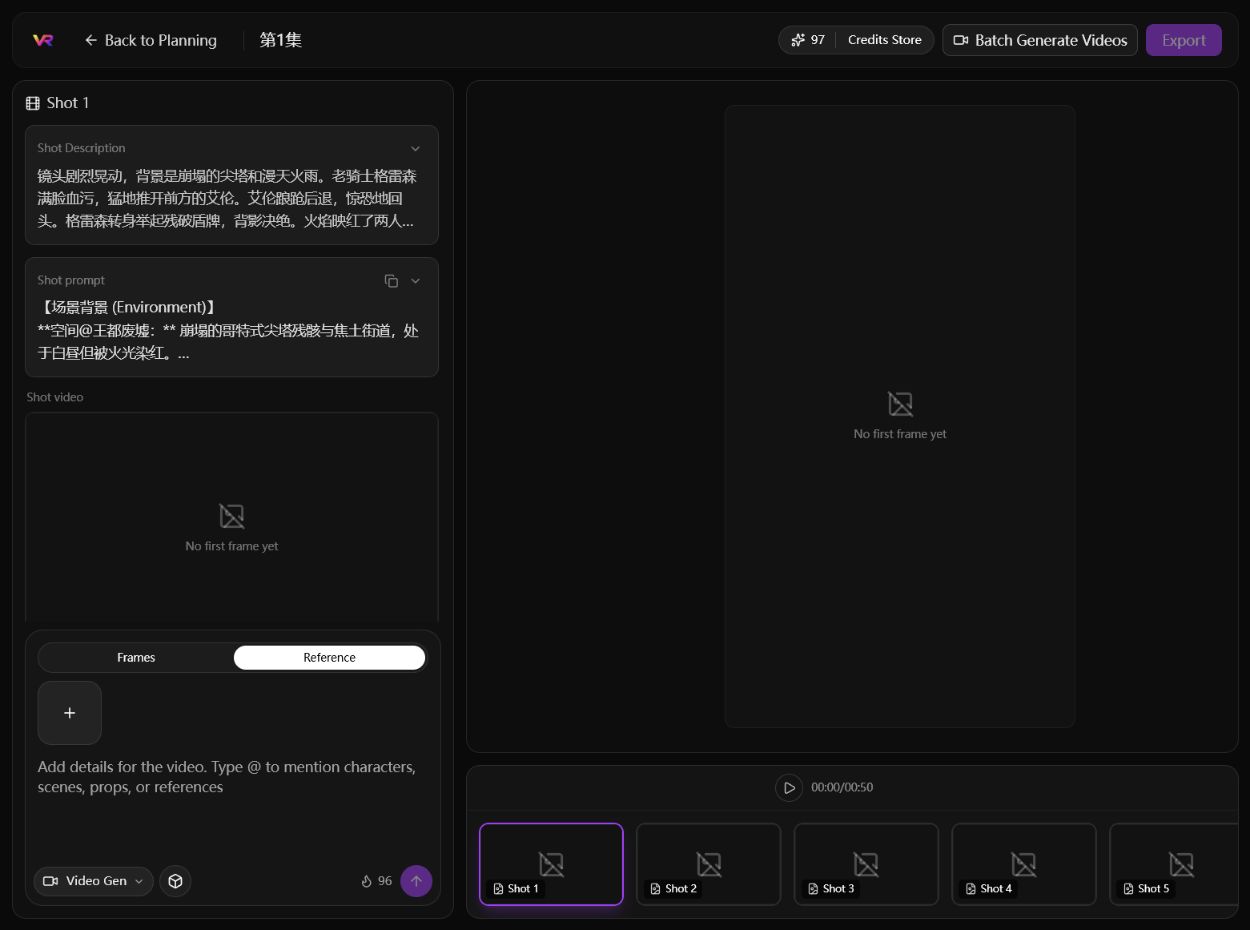
Figure 5-4 Generating a video with reference assets
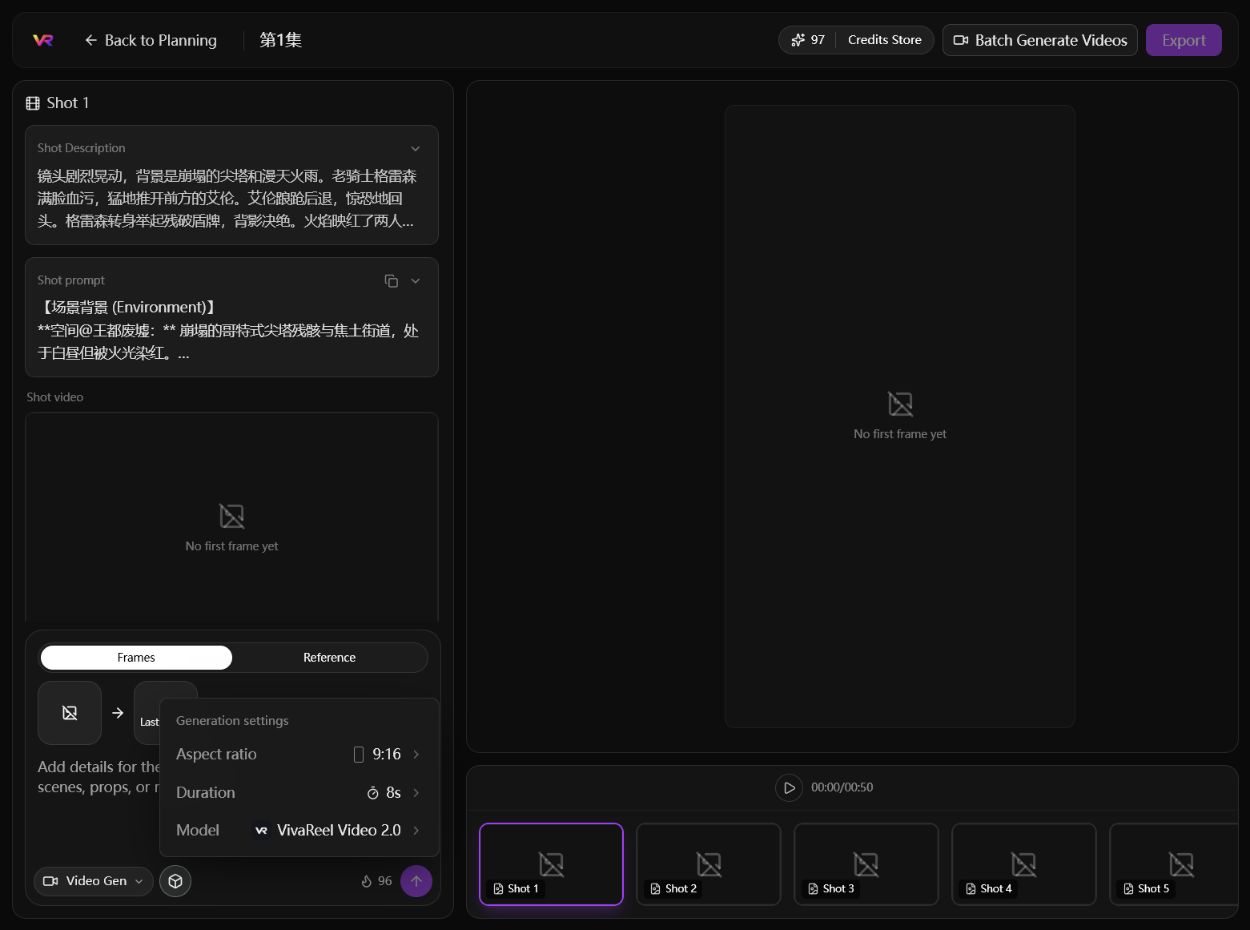
Figure 5-5 Video aspect ratio, duration, and model settings
To generate multiple shots at once, click Batch Generate Videos:
- Select shots that already have first-frame images.
- Select a video model and aspect ratio.
- Review the estimated total Credits.
- Click
Confirmto submit the batch task.
Shots without a first-frame image cannot be added to a batch generation task.
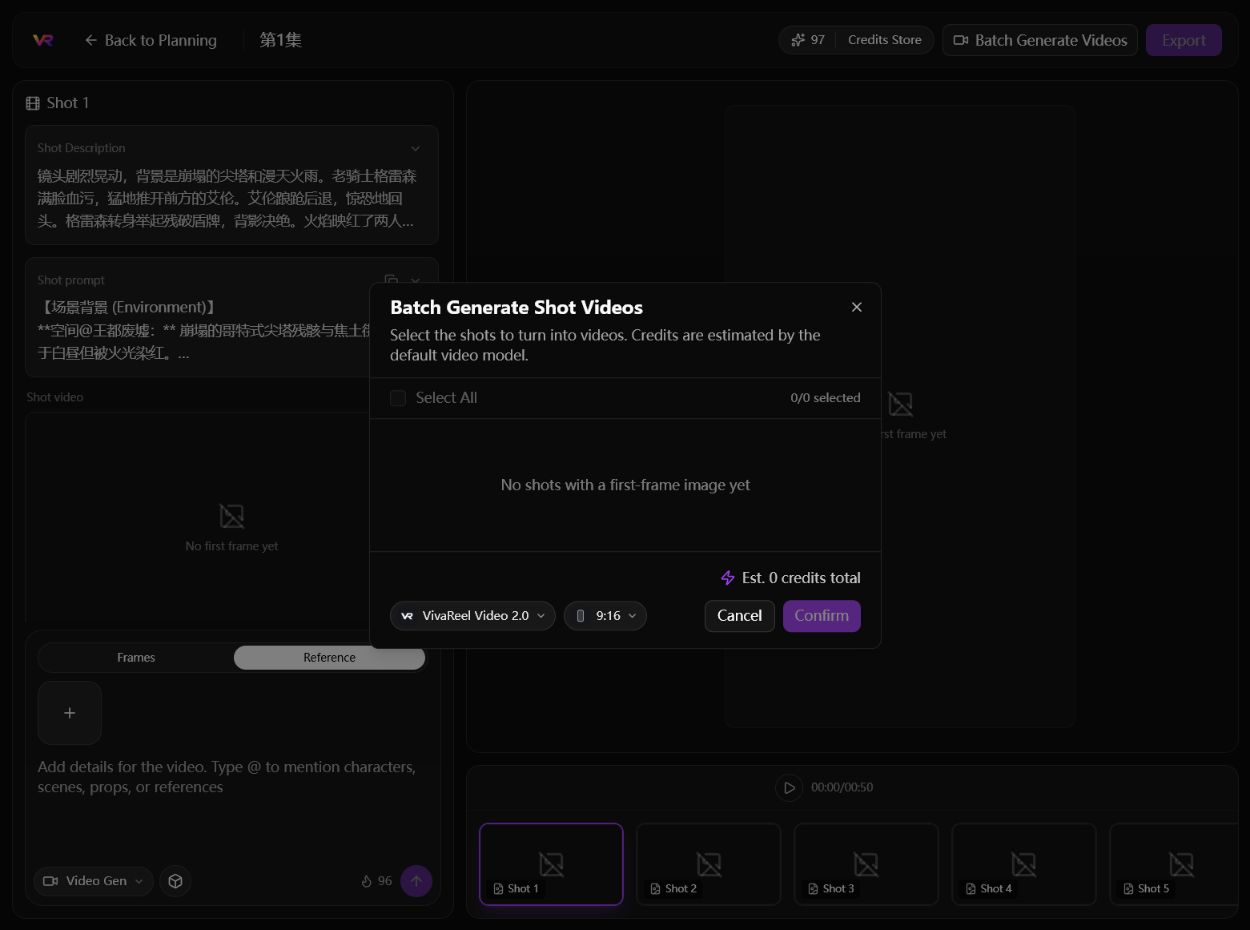
Figure 5-6 Batch video generation
6. Asset Library
The Asset Library centrally manages assets generated or uploaded during production. Characters, scenes, props, and audio generated in projects are stored in their corresponding categories for reuse in other projects and Infinite Canvas.
6.1 Asset Categories
The Asset Library contains:
Characters: Character assetsScenes: Scene assetsProps: Prop assetsAudio: Audio assetsTrash: Deleted assets
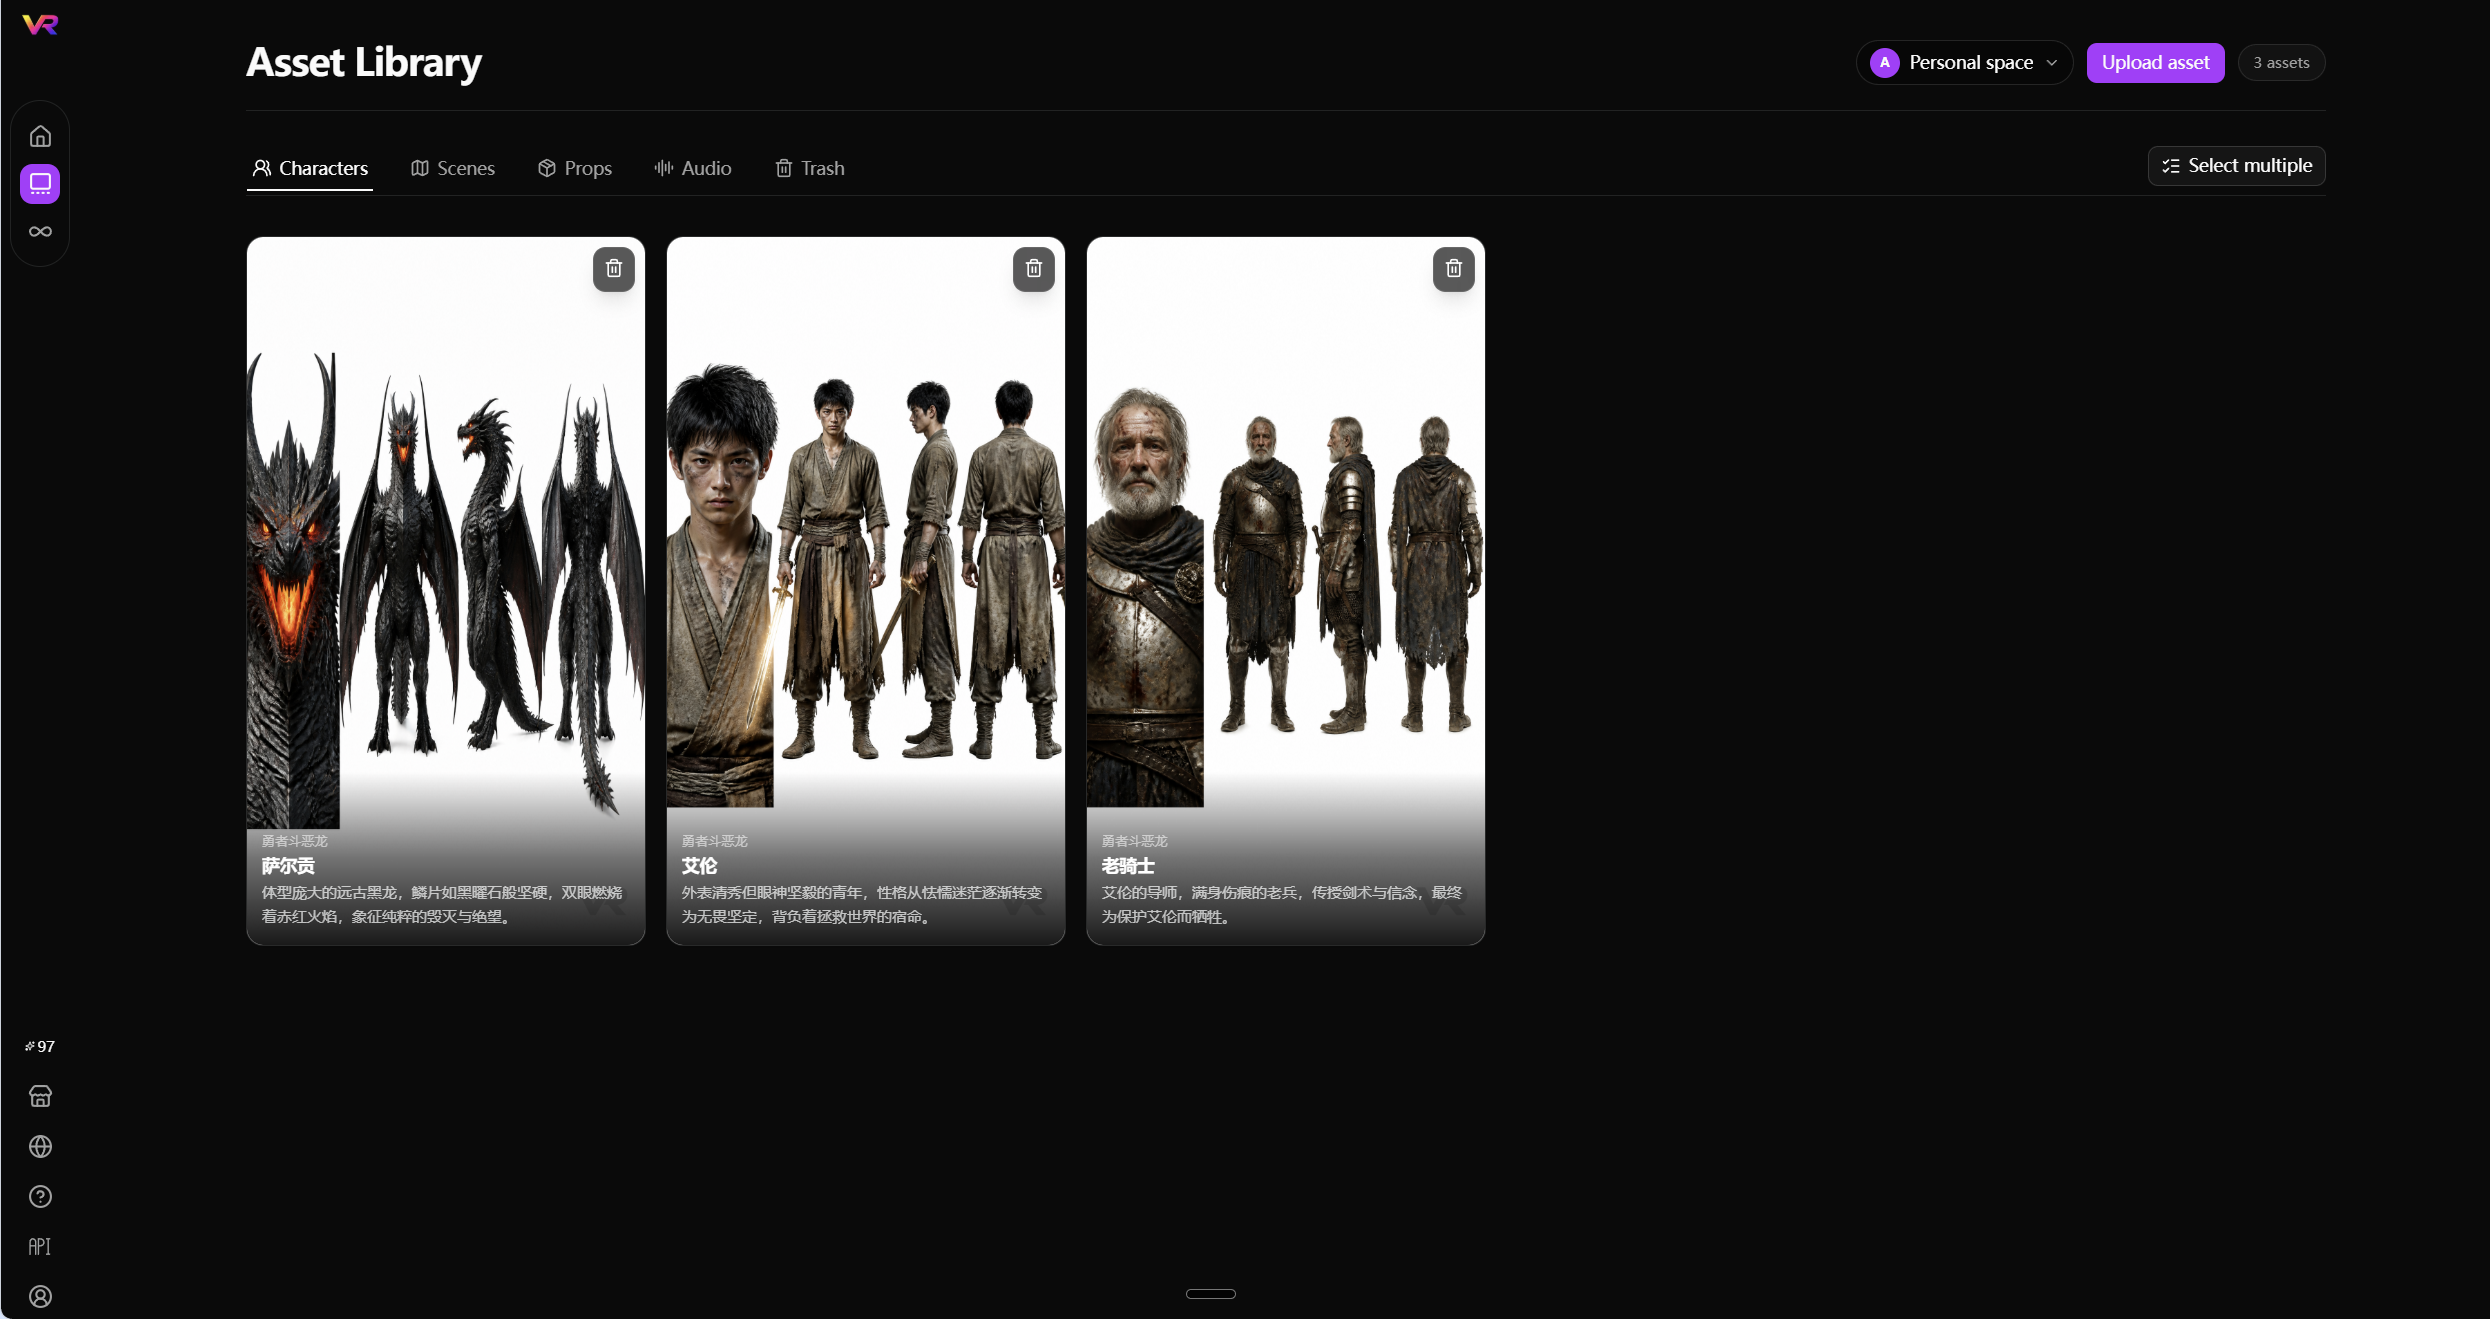
Figure 6-1 Character assets
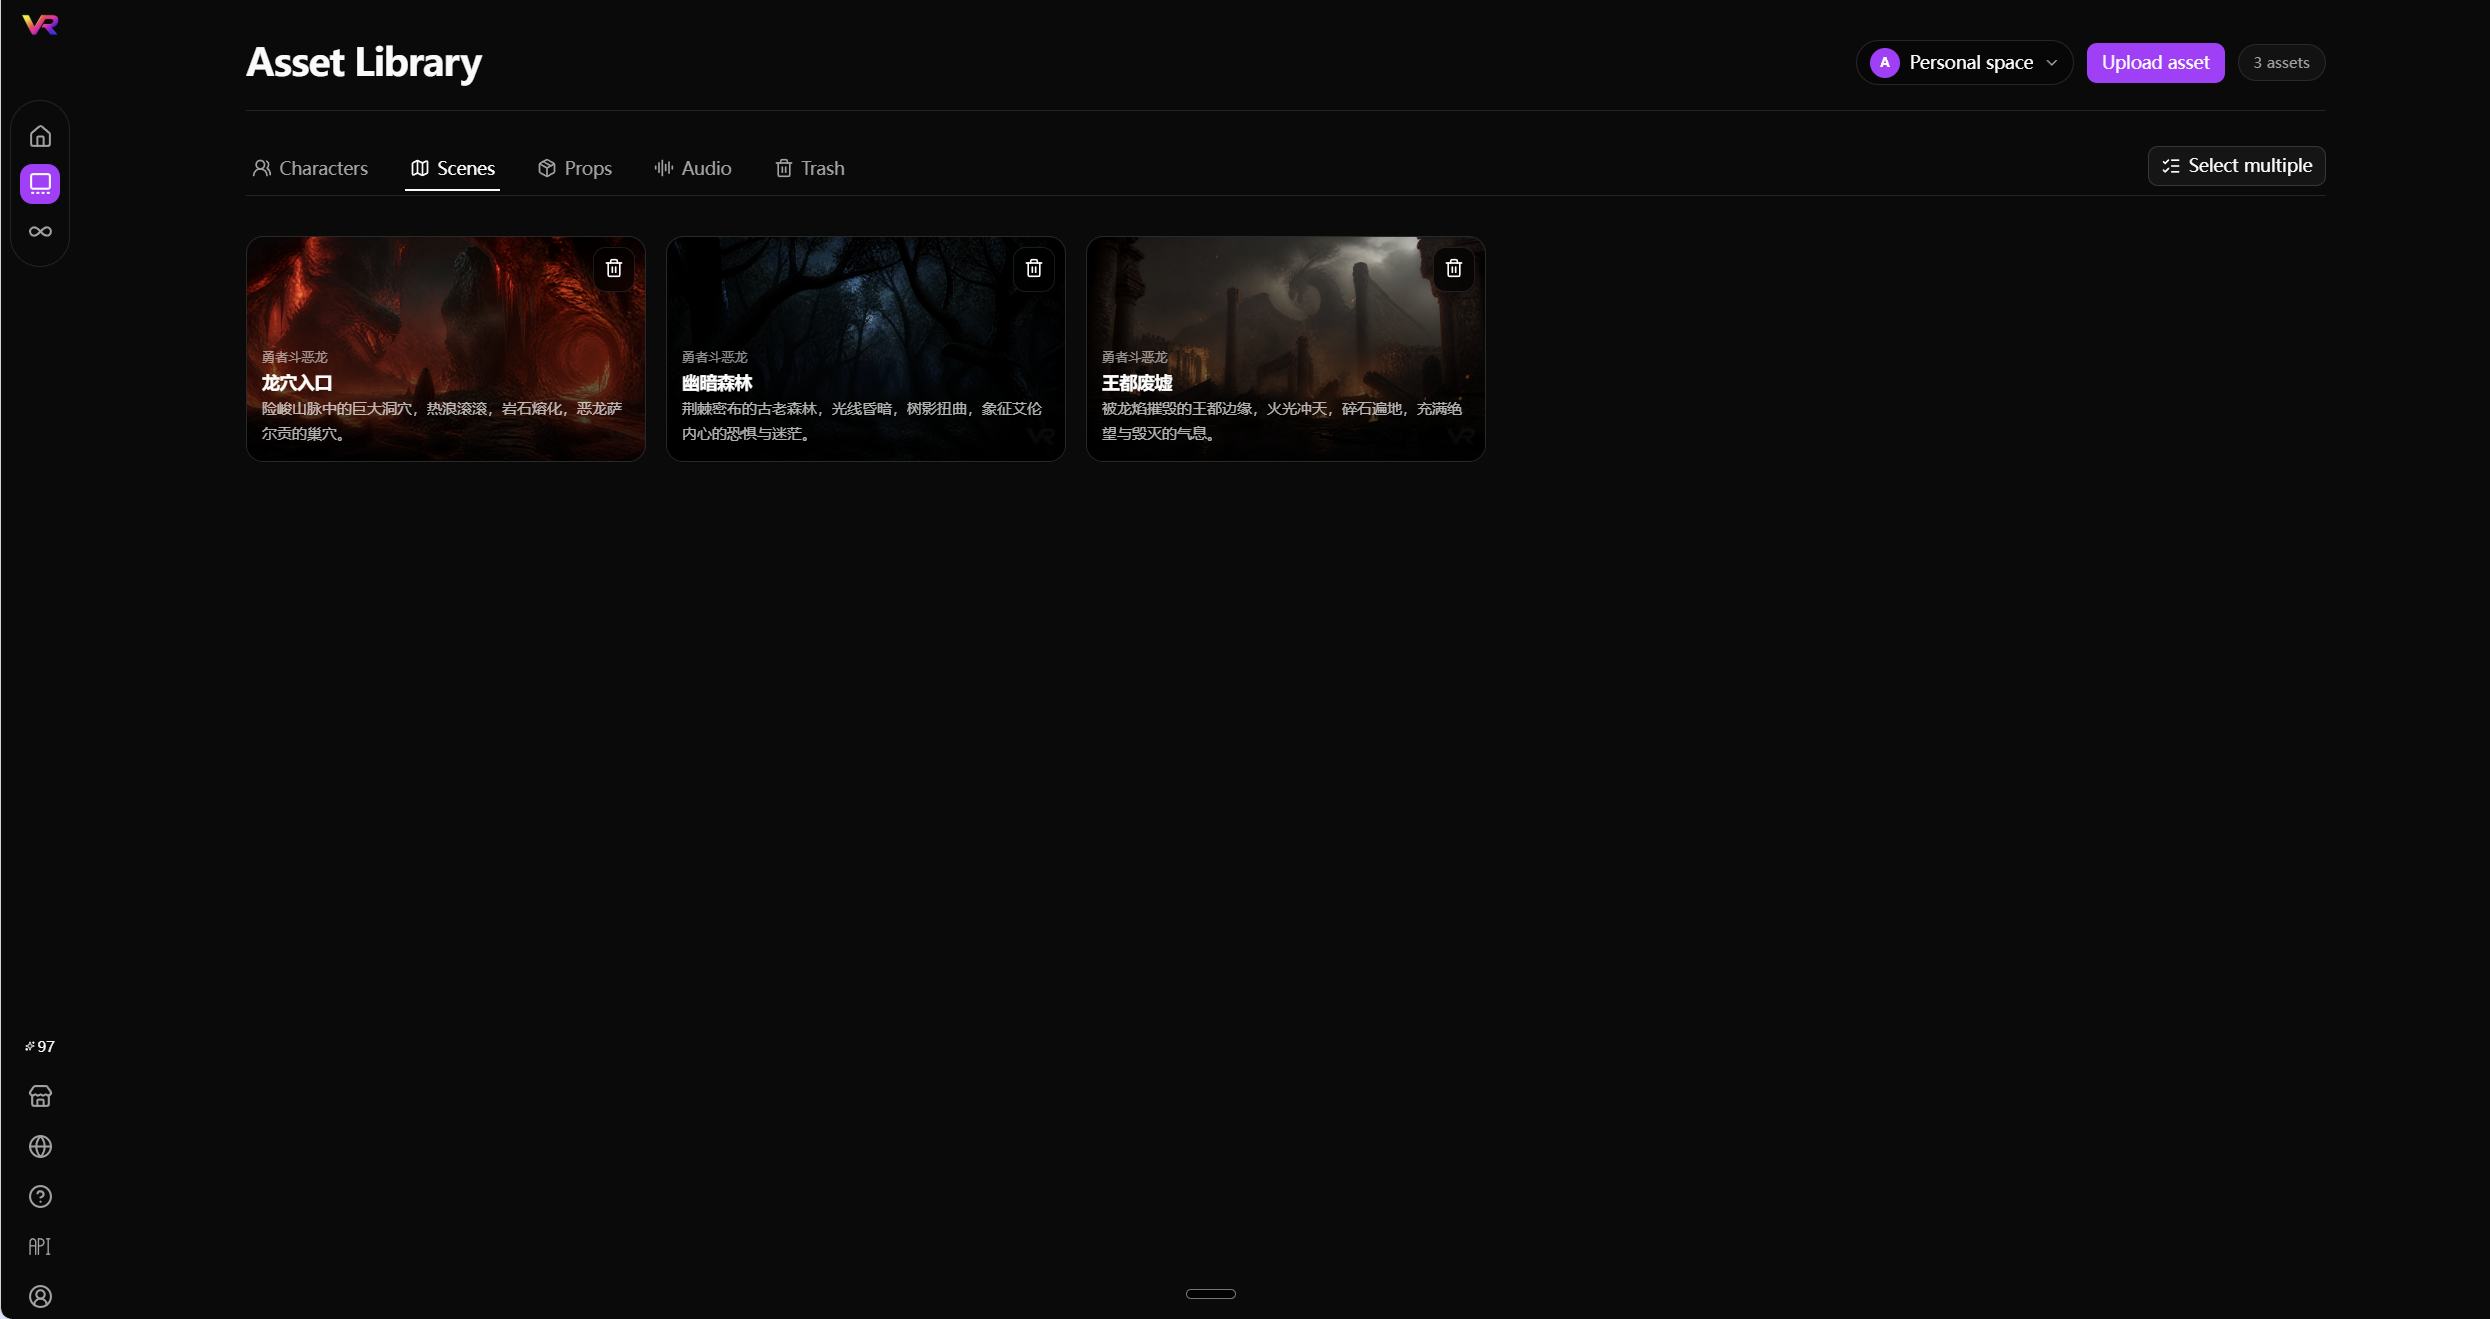
Figure 6-2 Scene assets
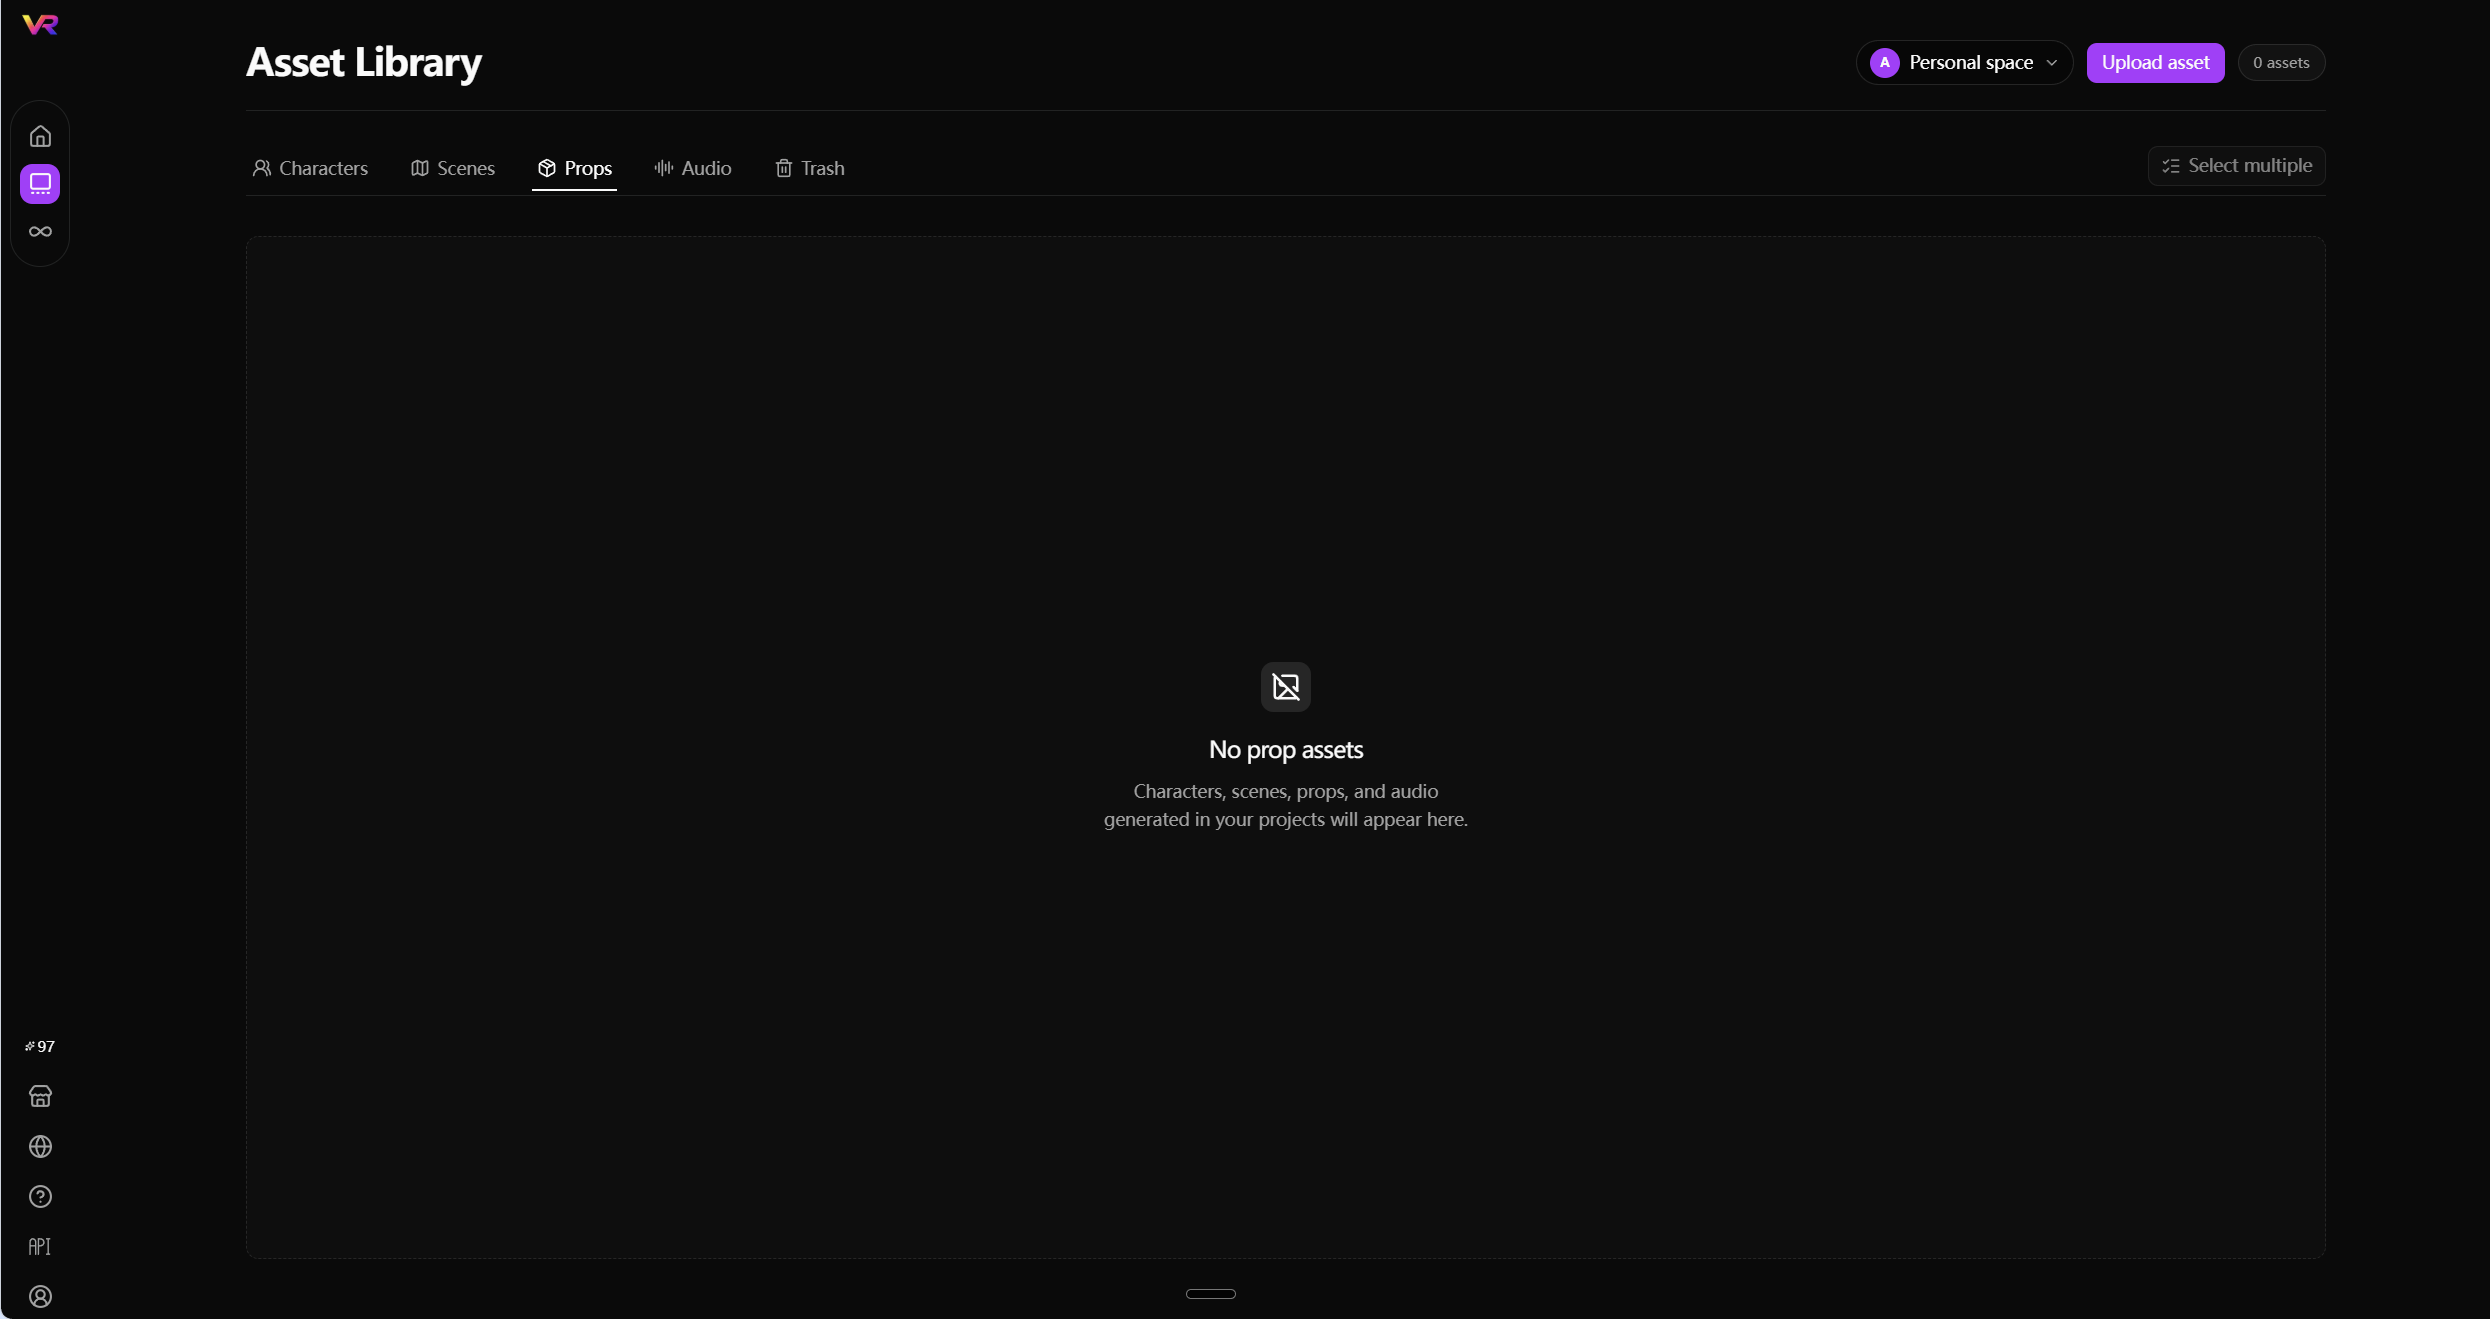
Figure 6-3 Prop assets
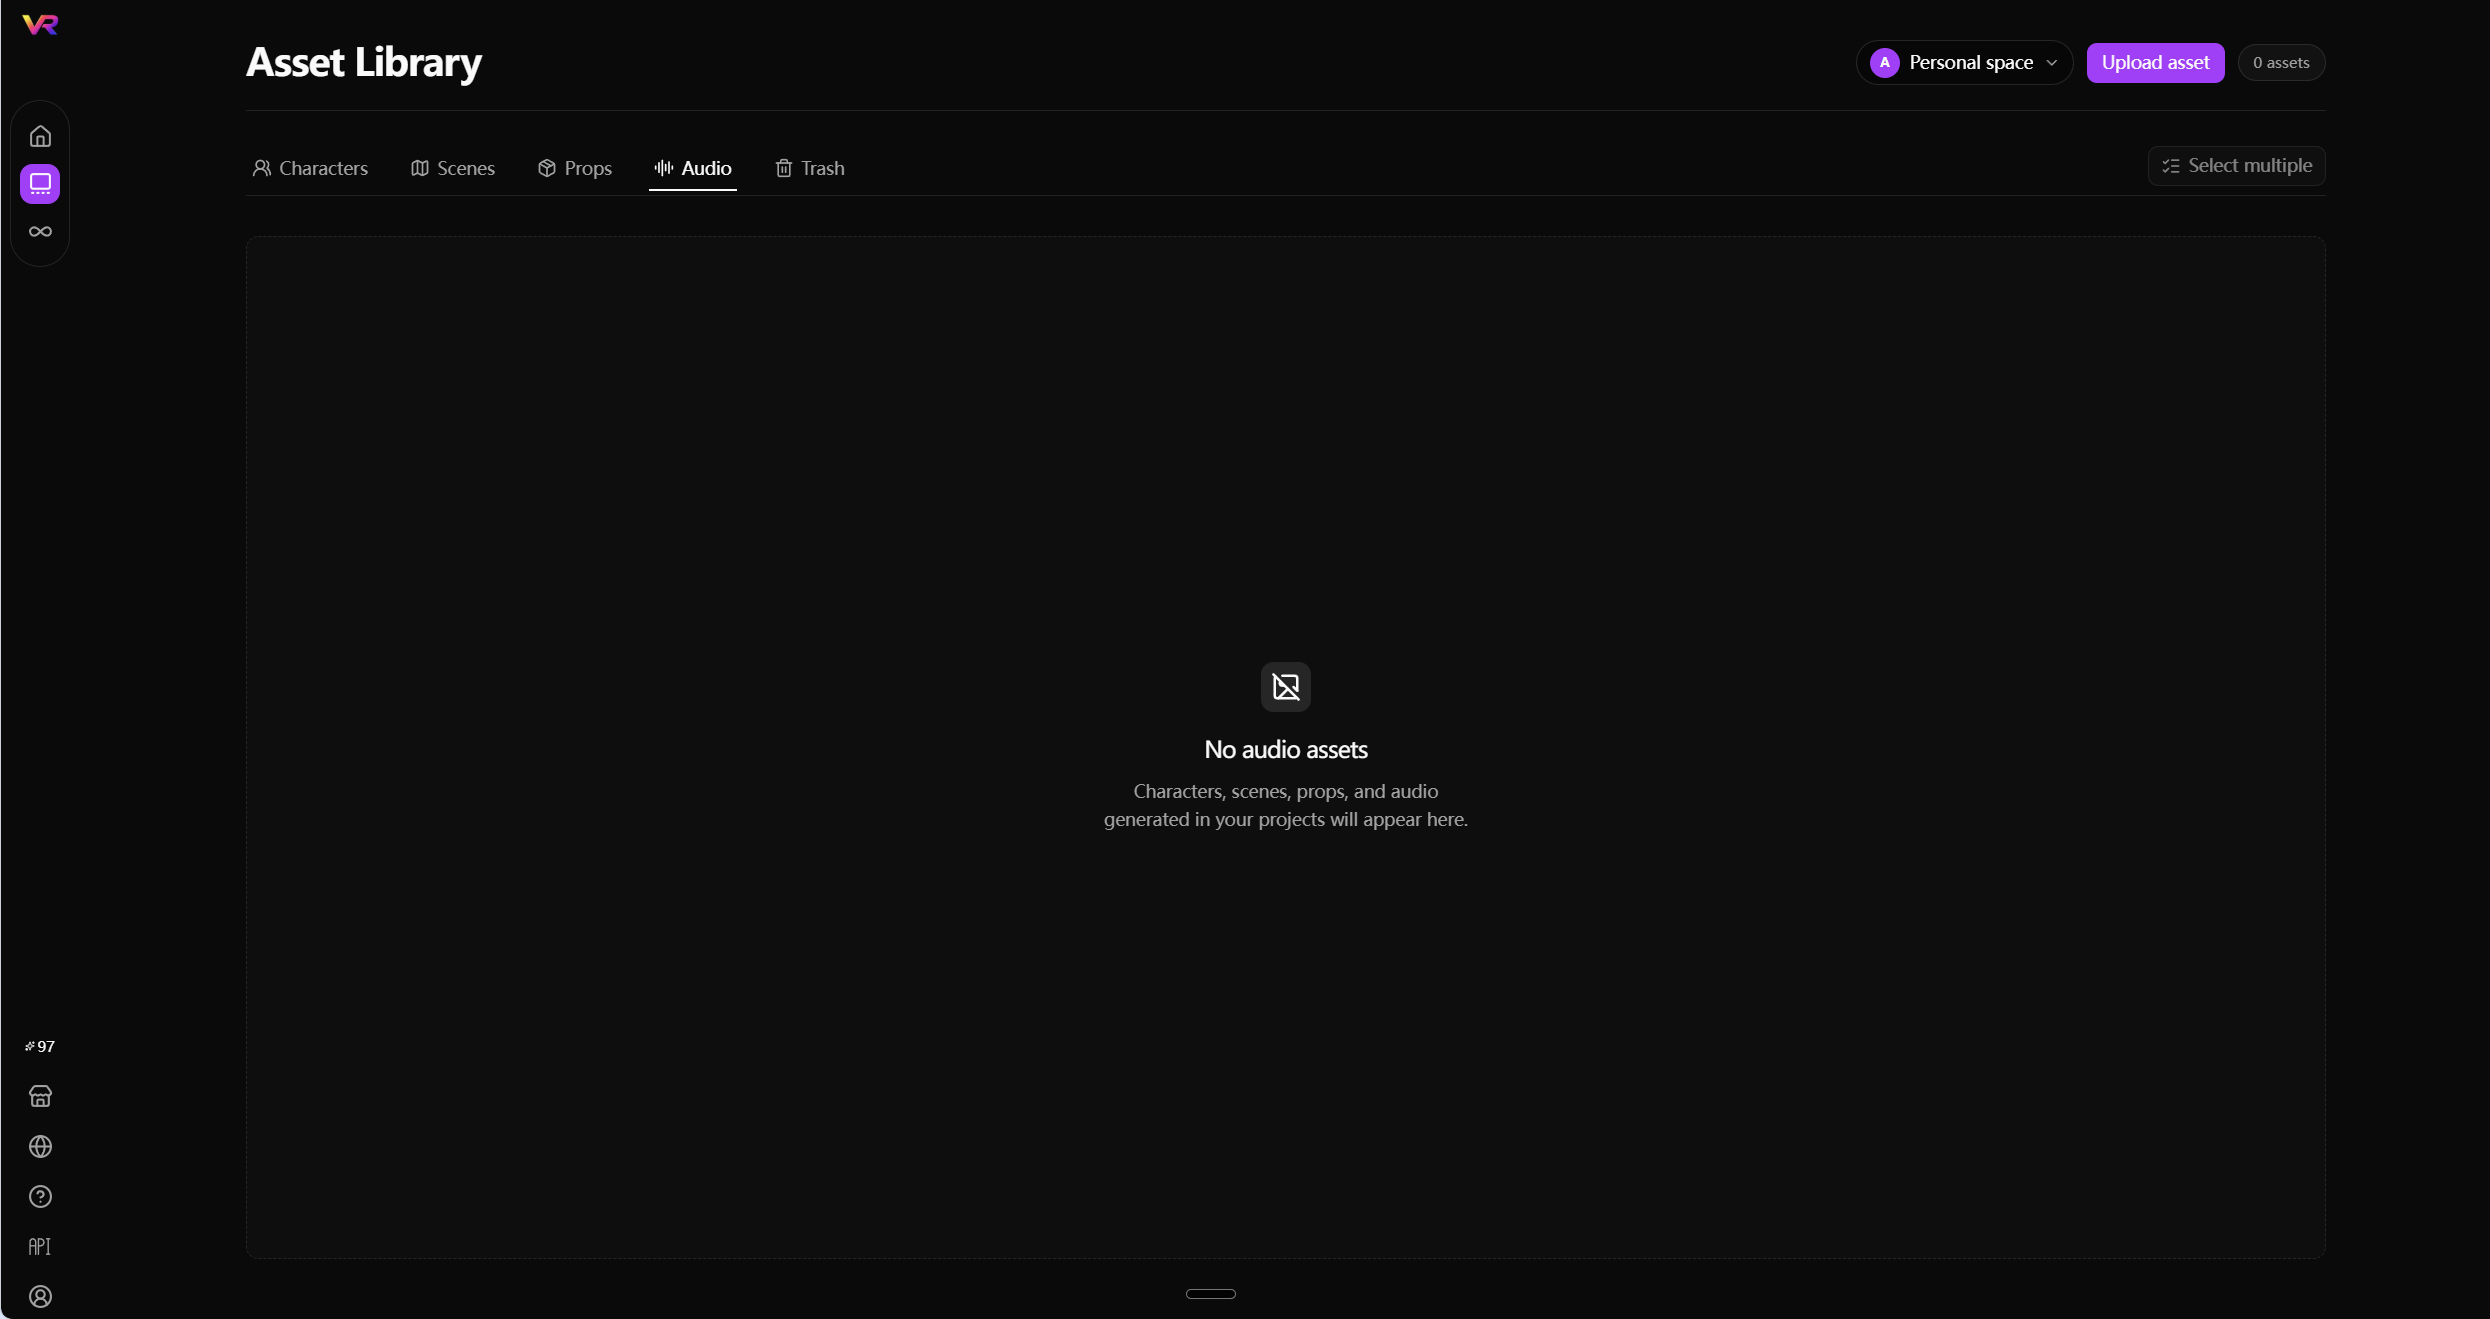
Figure 6-4 Audio assets
6.2 View Assets
Character and scene assets are displayed as cards. Each card includes a thumbnail, name, source project, and description.
Select a category to view all assets in that category. The asset count appears in the upper-right corner.
Open an asset preview to inspect it in a larger window.
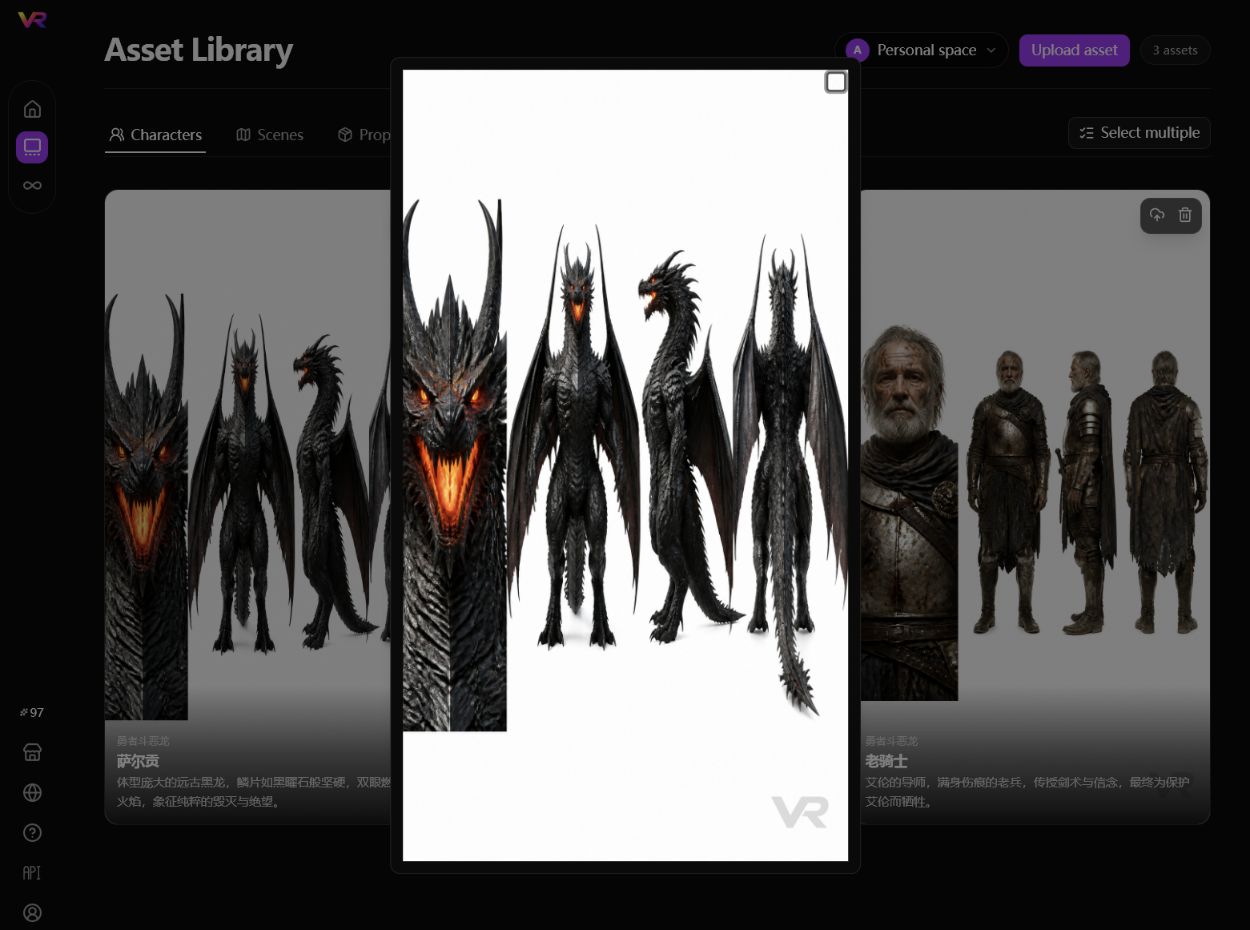
Figure 6-5 Asset preview
6.3 Switch Asset Spaces
Use the space selector in the upper-right corner to switch between assets in personal and team spaces.
6.4 Upload an Asset
- Click
Upload assetin the upper-right corner. - Select an asset type:
Character,Scene,Prop, orAudio. - Enter the asset name.
- Select a local file. The character image upload interface supports JPEG, PNG, and WebP.
- Add a description and tags as needed.
- Click
Upload and addto complete the upload.
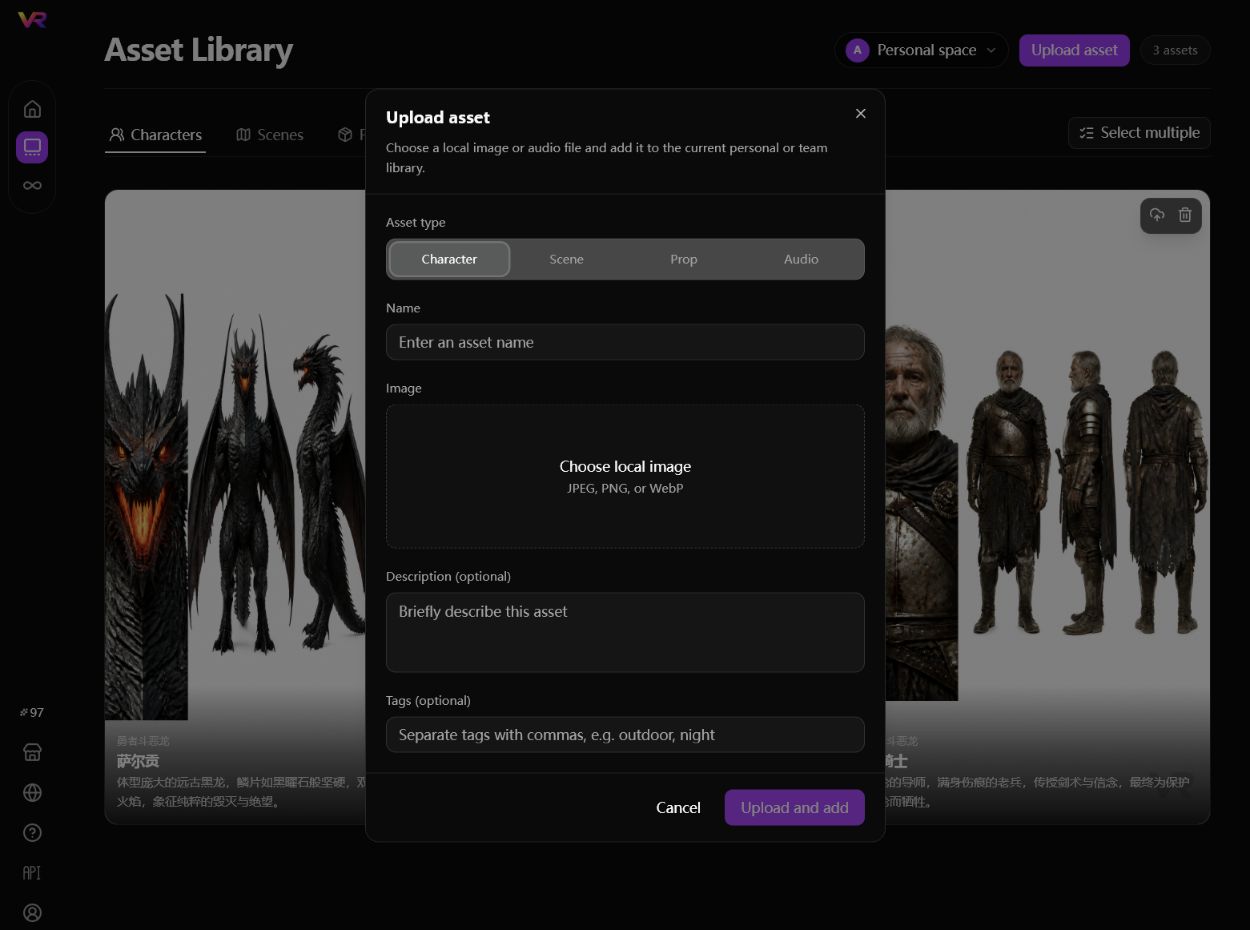
Figure 6-6 Upload asset window
6.5 Select Multiple Assets
Click Select multiple to enter multi-select mode and select several assets for a subsequent action.
6.6 Delete an Asset
Click the delete button on an asset card to move the asset to Trash.
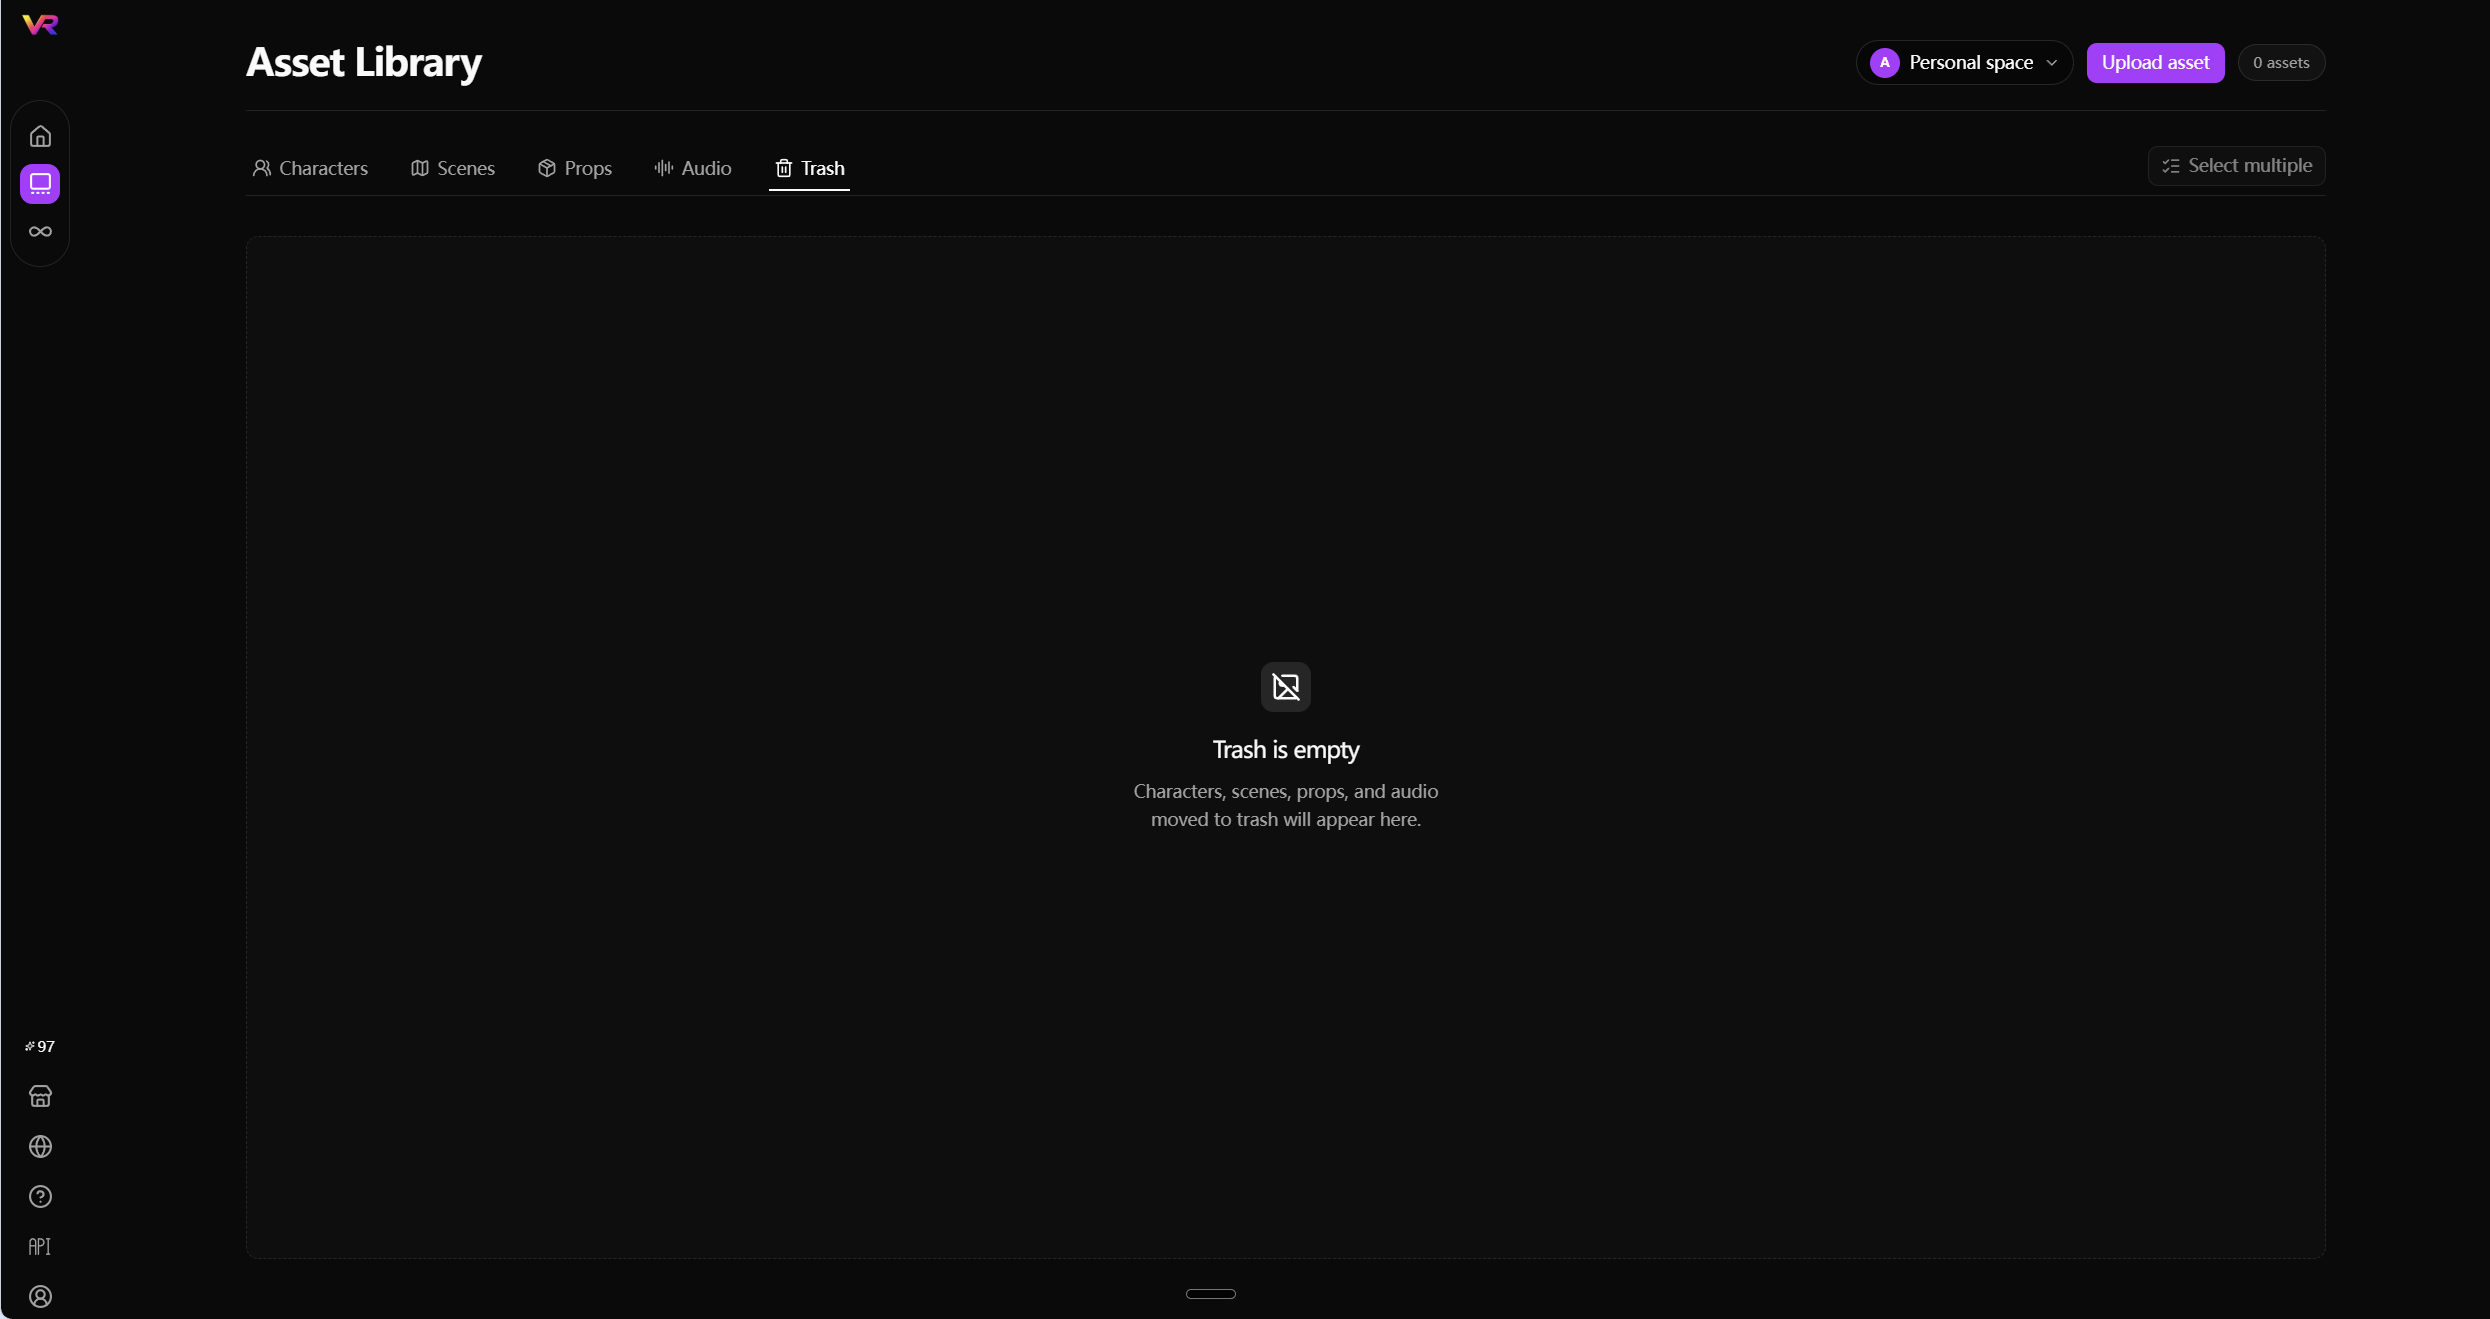
Figure 6-7 Asset Library Trash
6.7 Virtual Asset Library
Seedance 2.0-series models apply stricter safety and compliance checks to face-related assets. VivaReel's Virtual Asset Library registers and reuses eligible virtual-character images, allowing authorized virtual-character assets to be used in supported generation workflows while reducing restrictions commonly triggered by real-person face assets.
The Virtual Asset Library is not intended to bypass platform safety review. Before uploading an asset, make sure it does not contain an unauthorized real-person likeness and that you hold the necessary copyright, likeness rights, or other valid permission.
Method 1: Add an existing asset to, or remove it from, the Virtual Asset Library
- Open
Asset Libraryand select the category containing the target image. - Move the pointer to the upper-right corner of the asset card and click
Add to virtual asset library. - After the asset is added, the action changes to
Remove from virtual asset library. Click it to remove the asset from the Virtual Asset Library.
Removing an asset from the Virtual Asset Library and deleting the original asset are separate actions. The original remains in the standard Asset Library unless you use the delete button on the asset card.

Figure 6-8 Add an existing asset to the Virtual Asset Library

Figure 6-9 Remove an existing asset from the Virtual Asset Library
Method 2: Add a local image to the Virtual Asset Library during upload
- Click
Upload assetin the Asset Library. - Select an image-based asset type, enter a name, and choose a local image.
- Add an asset description and tags as needed.
- Enable
Also add to virtual asset libraryat the bottom of the upload page. - Click
Upload and add. Virtual-asset synchronization begins after the asset is saved.
This option applies to image assets only. After upload, return to the asset card to check its Virtual Asset Library status.

Figure 6-10 Upload a local image and add it to the Virtual Asset Library
Method 3: Submit an image from Infinite Canvas
In Infinite Canvas, select the target image node and click the submission control on the right side of the image's top toolbar. This entry is displayed as Add to Asset Library; after submission, follow the page status to save the asset and complete Virtual Asset Library synchronization.

Figure 6-11 Submit an image asset from Infinite Canvas
After submission, return to the Asset Library to confirm that the asset was saved. If the asset card displays Remove from virtual asset library, synchronization has completed.
7. Infinite Canvas
Infinite Canvas is VivaReel's visual node workspace. Add image, video, and audio nodes to an infinite canvas, then connect them to organize asset inputs, AI generation, and outputs.
7.1 Canvas Projects
The Infinite Canvas home page displays all Canvas projects in the selected space.
- Click a project card to open it.
- Click
New projectto create a project. - Use the space selector to switch between personal and team spaces.
- Click
Create teamto create a team space. - Click the Credits balance or
Credits Storeto open the Credits page.
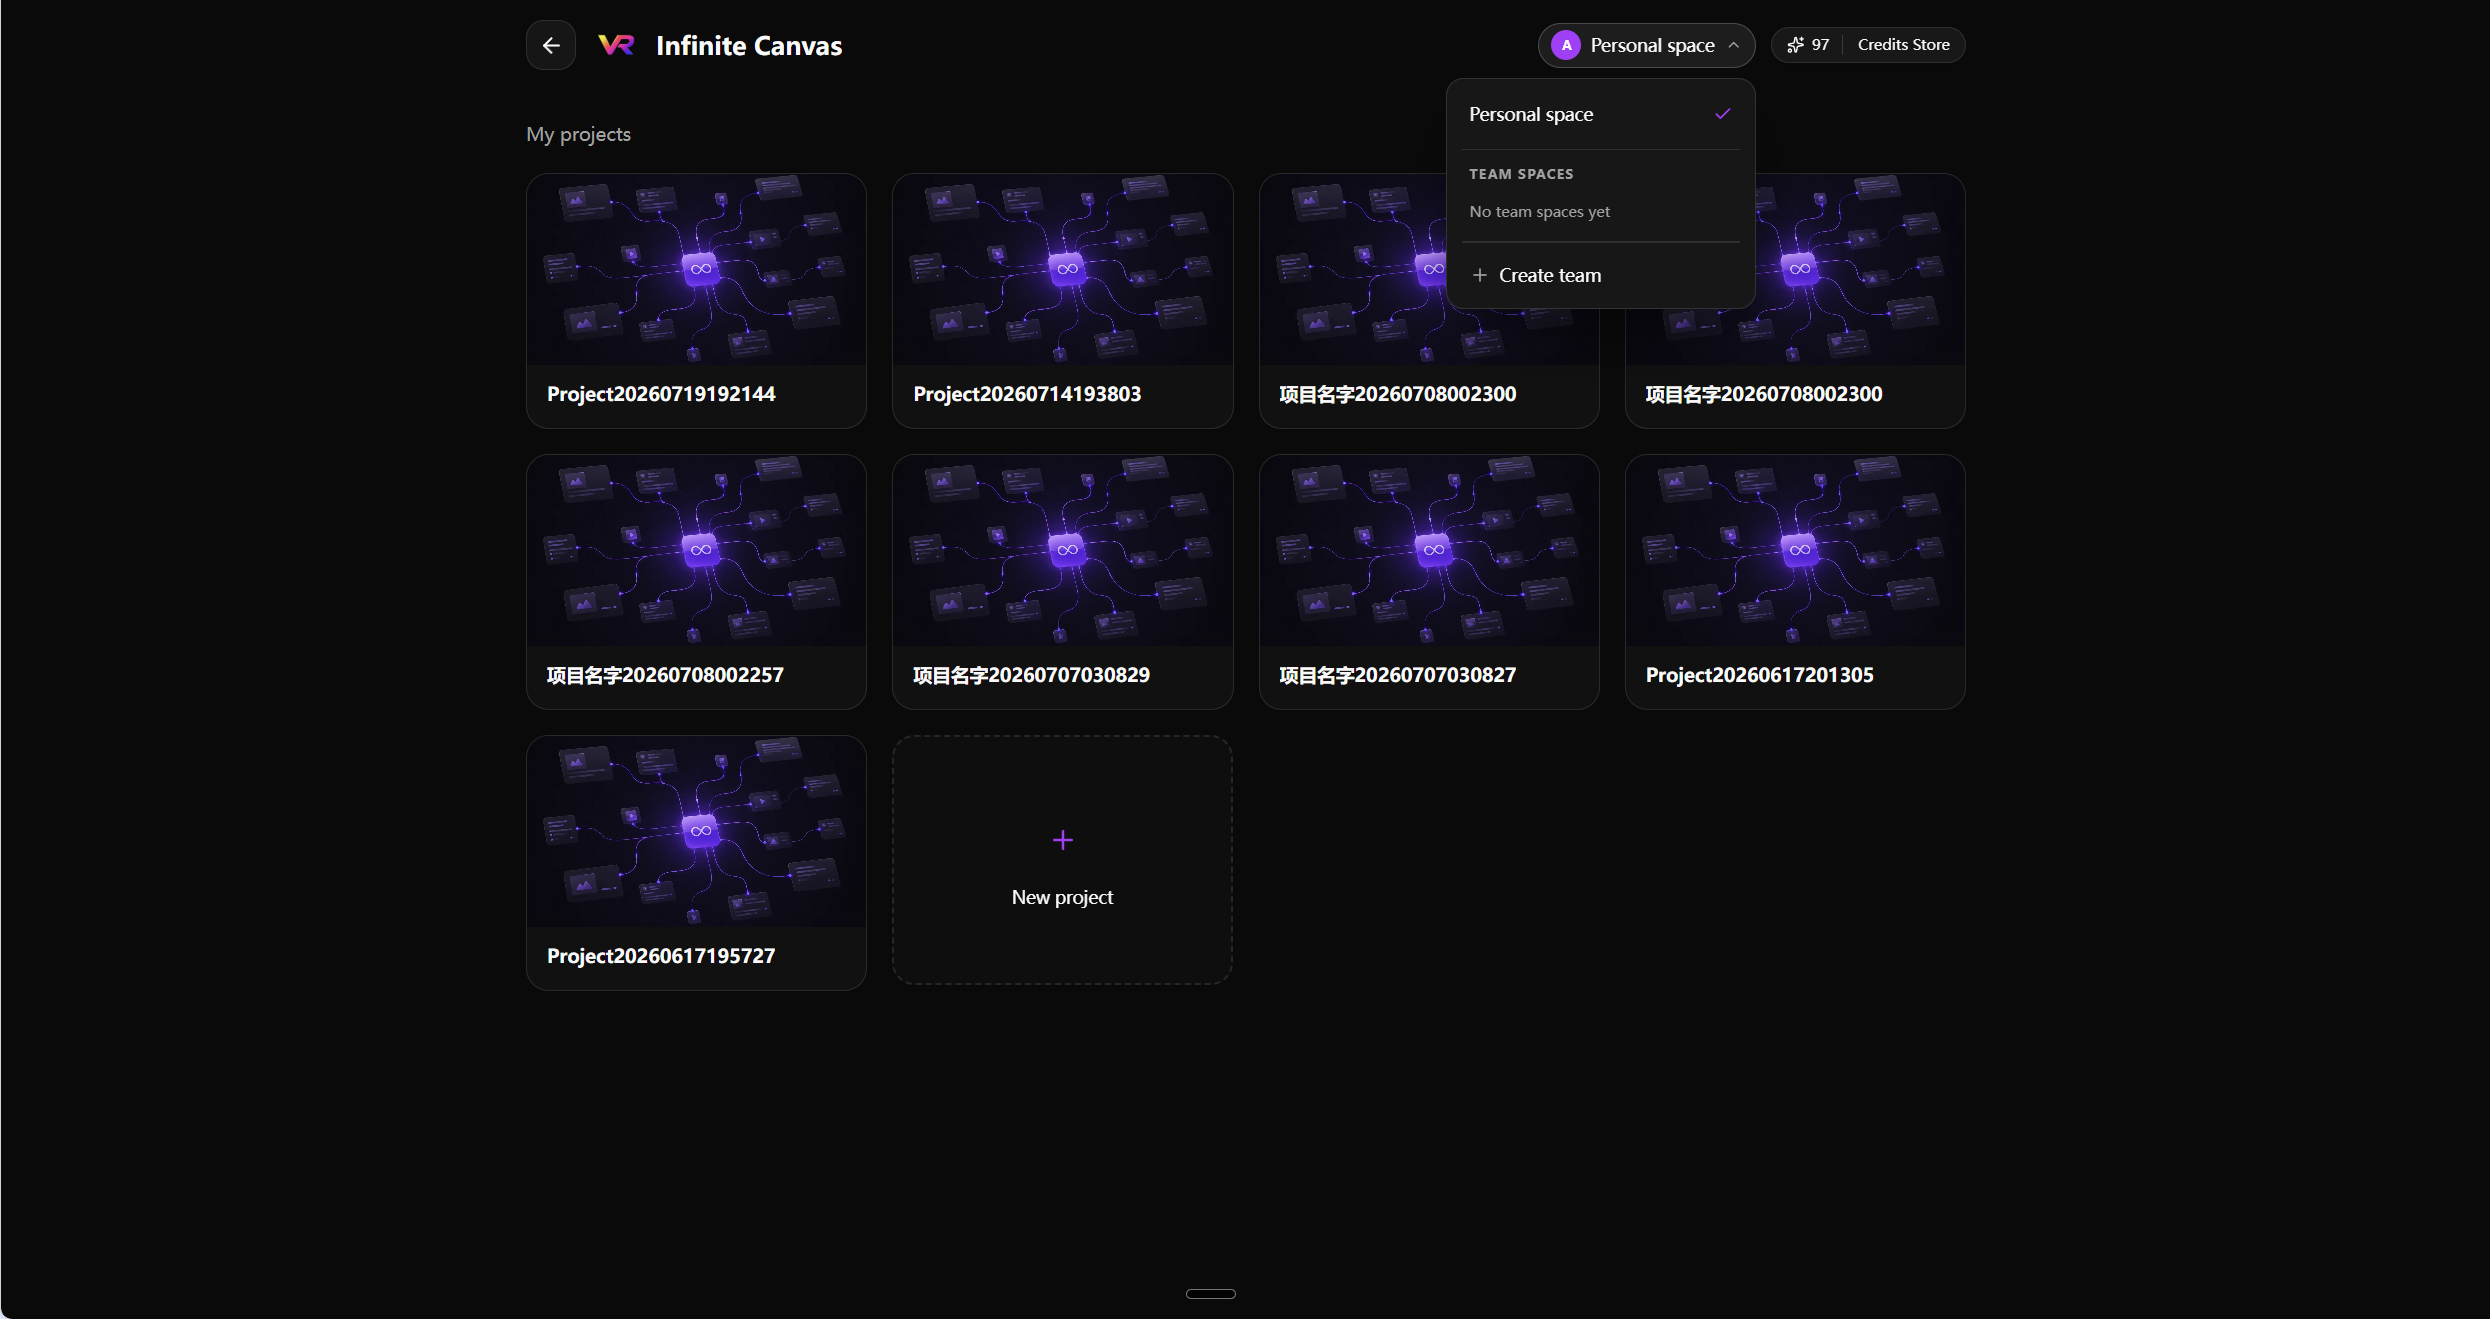
Figure 7-1 Infinite Canvas project list and space selector
7.2 Editor Interface
The Canvas editor includes:
- Project name and back control
- Infinite canvas workspace
- Left toolbar
- Node Navigator
- Credits and Credits Store
- Canvas view controls
The editor provides undo, zoom, automatic layout, minimap, and fit-to-view controls.
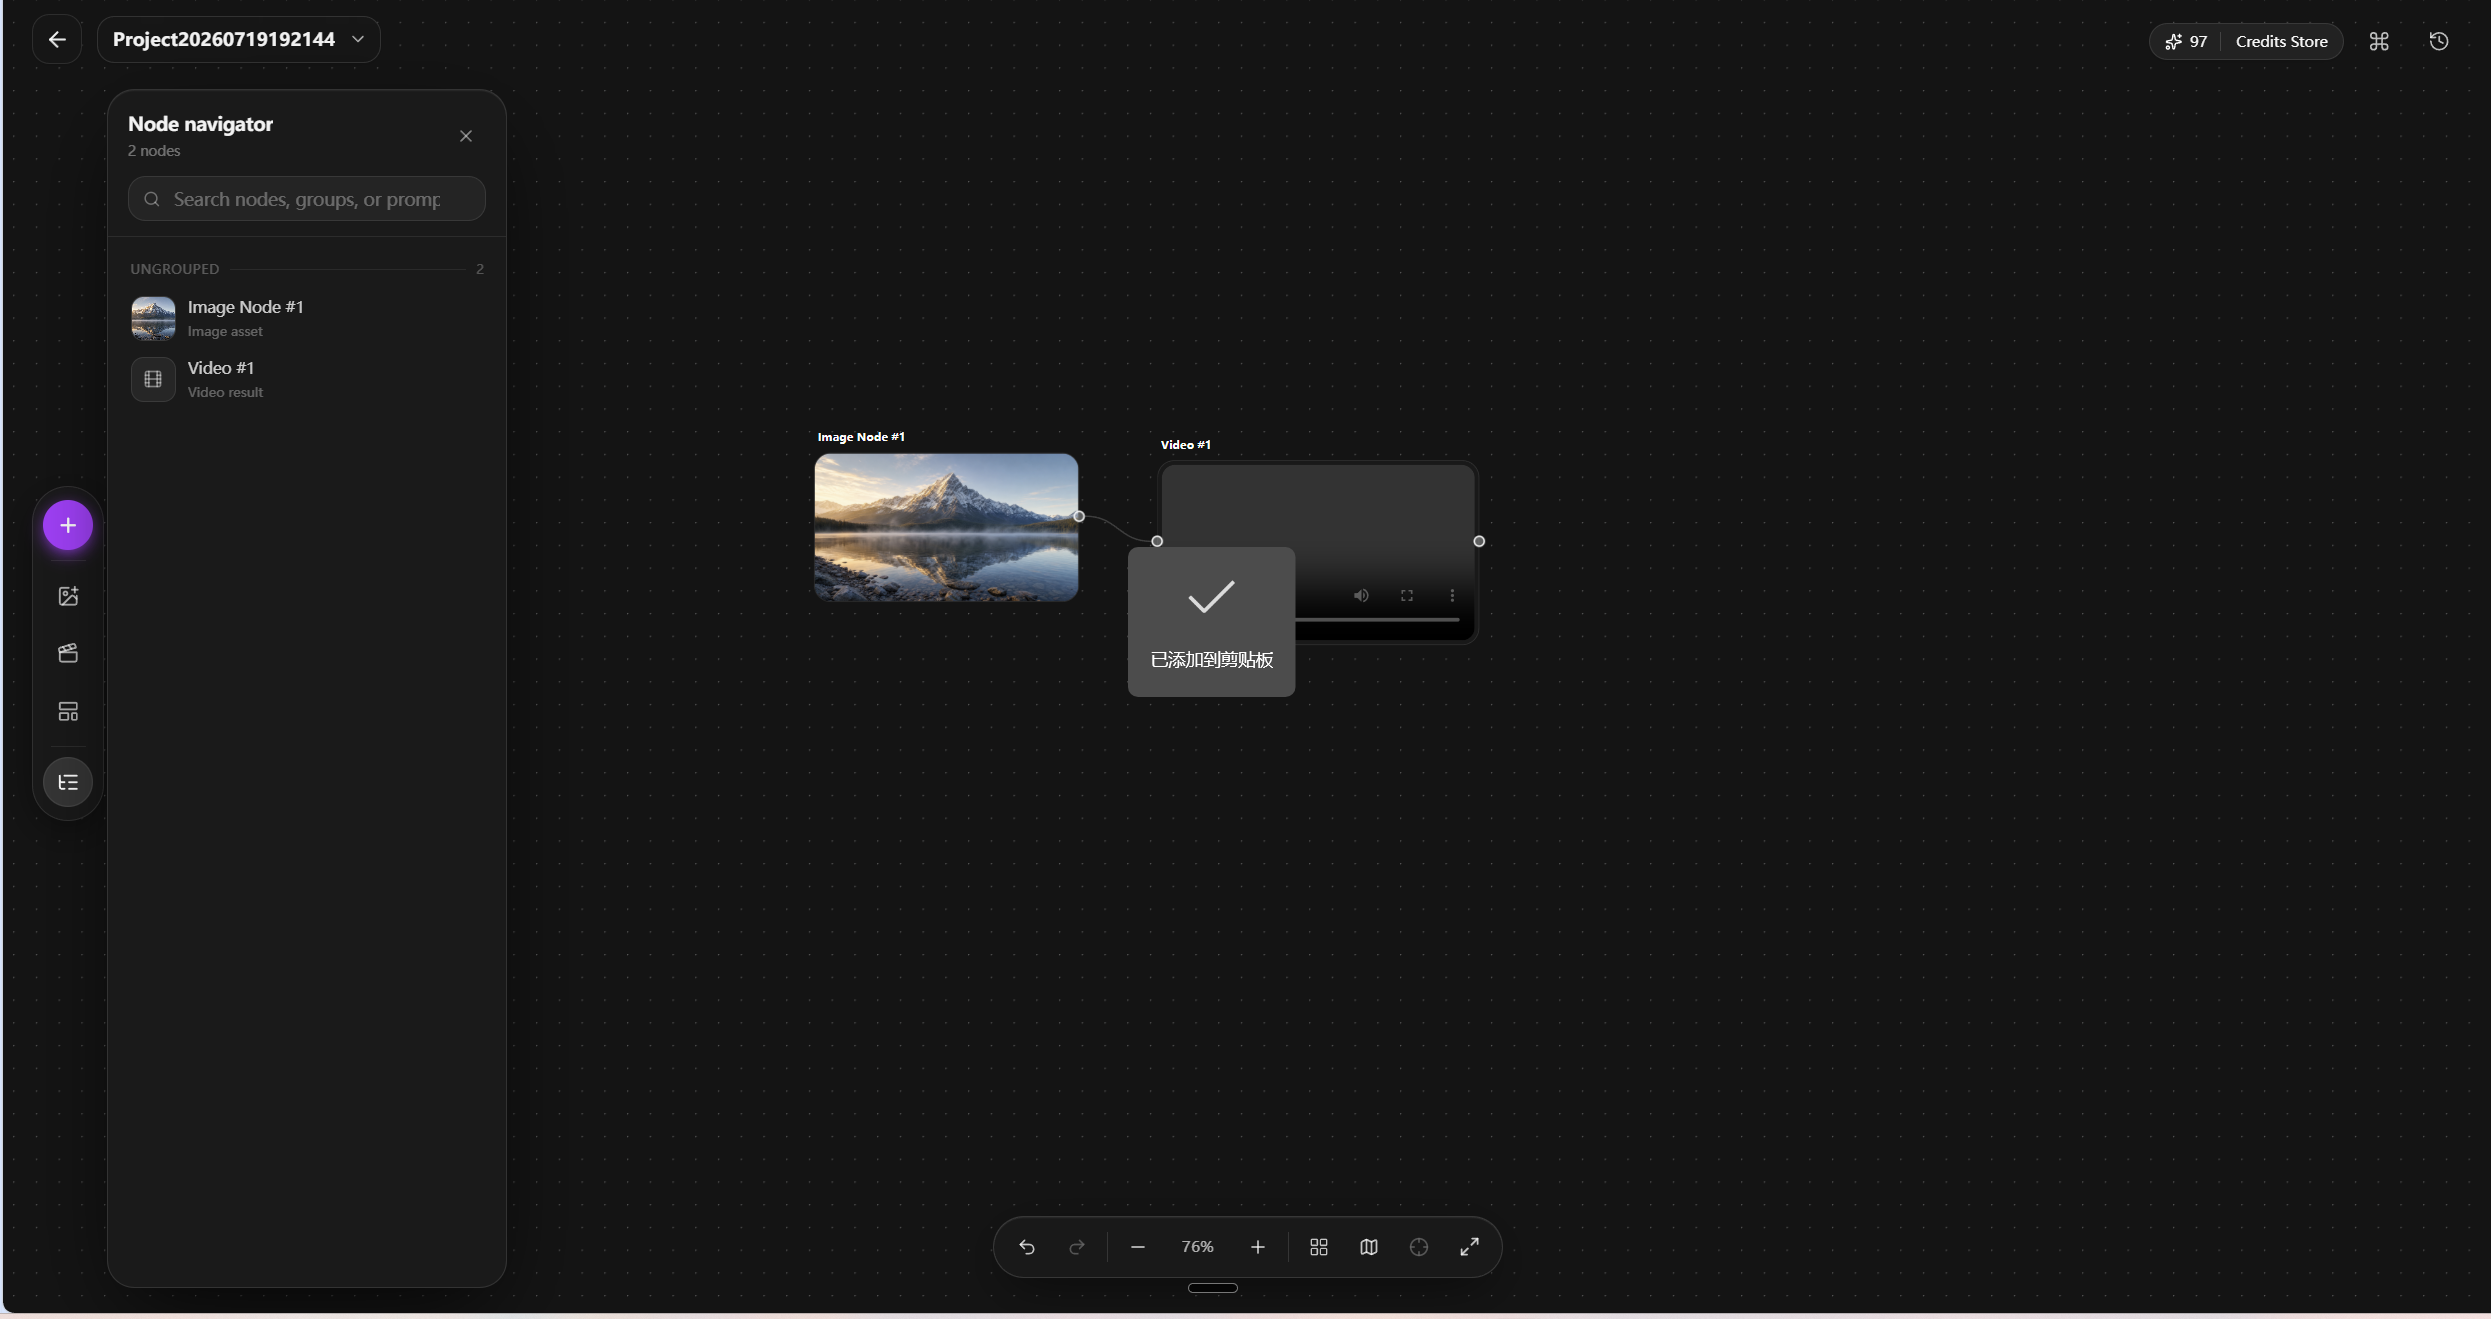
Figure 7-2 Infinite Canvas editor
7.3 Add Nodes
Click the purple + button in the left toolbar to add:
Insert Image Node: An image nodeInsert Video Node: A video nodeInsert Audio Node: An audio nodePick from Library: An asset from the Asset Library
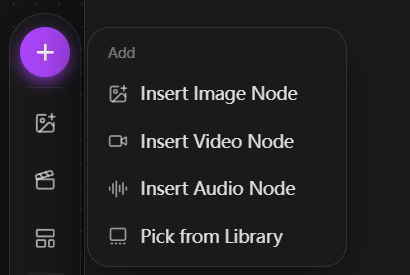
Figure 7-3 Canvas Add menu
7.4 Add Assets from the Asset Library
- Click the
+button in the left toolbar. - Select
Pick from Library. - Select assets from Characters, Scenes, Props, or Audio.
- Select one or more assets.
- Click
Use selected assetsto add them to the canvas.
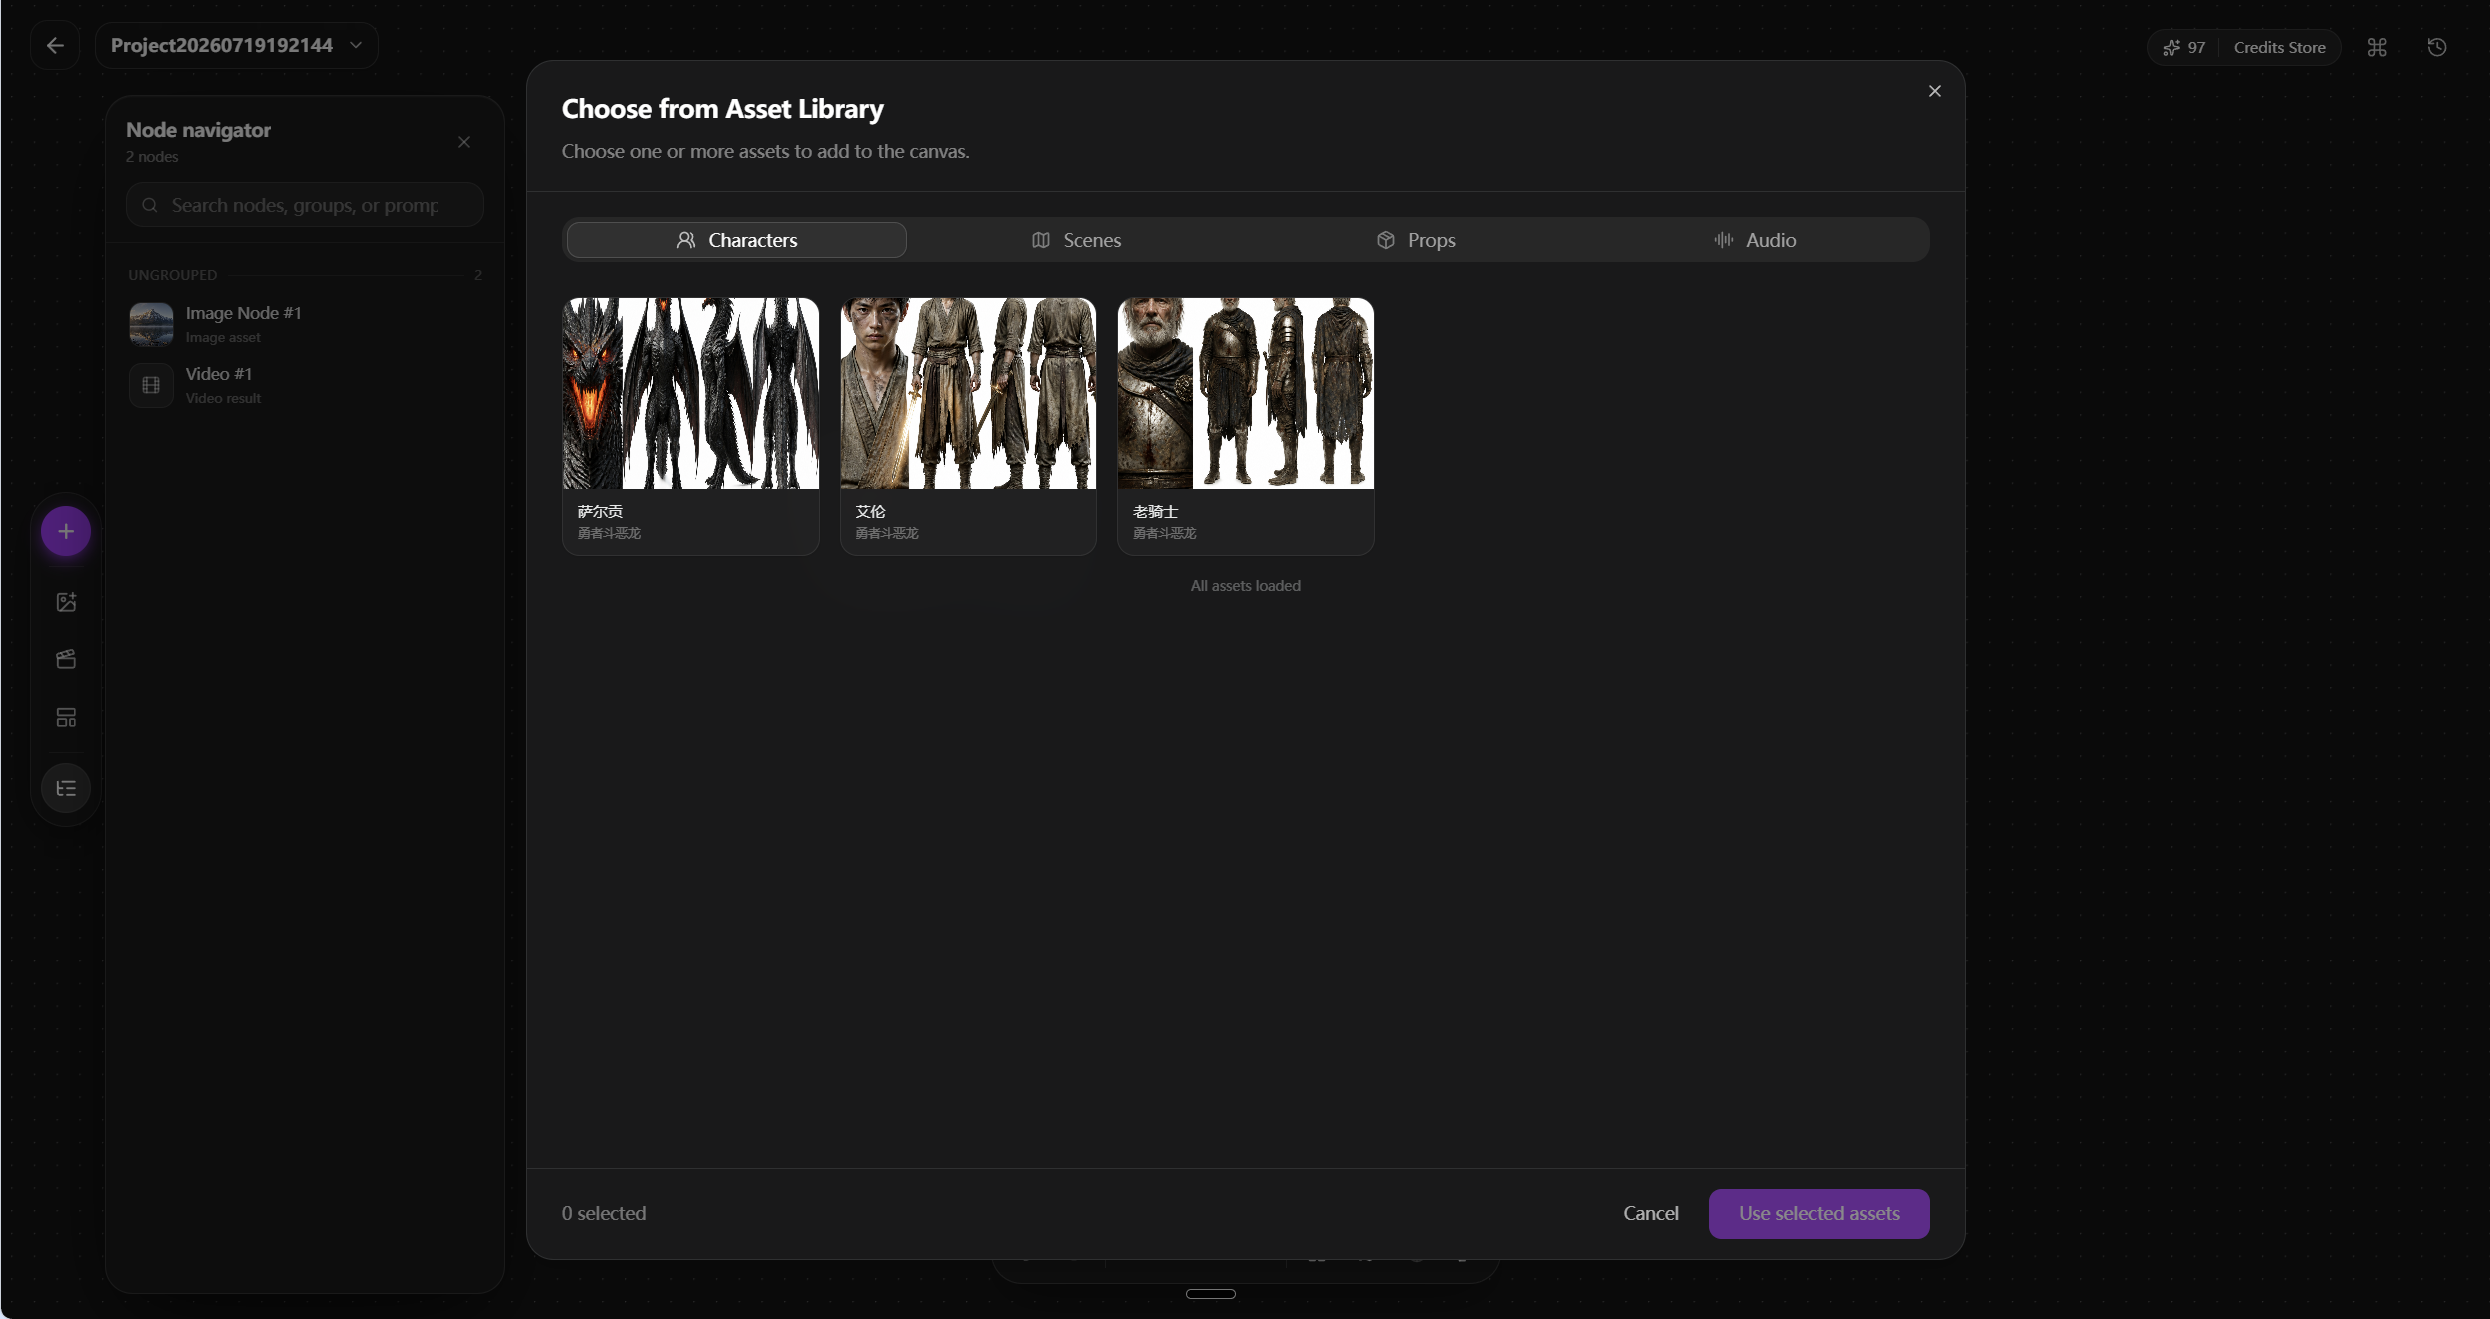
Figure 7-4 Selecting and adding assets from the Asset Library
7.5 Image Generation
Click the image creation control in the left toolbar and select Image Generation to create an image generation workflow on the canvas.
To save a Canvas image and synchronize it as a virtual asset, select the image node and use Add to Asset Library on the right side of its top toolbar. See 6.7 Virtual Asset Library for details.
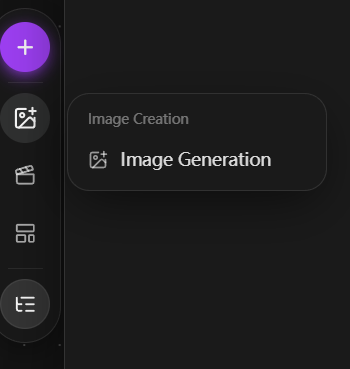
Figure 7-5 Canvas image generation entry
7.6 Video Generation
Click the video creation control in the left toolbar to choose one of the following workflows:
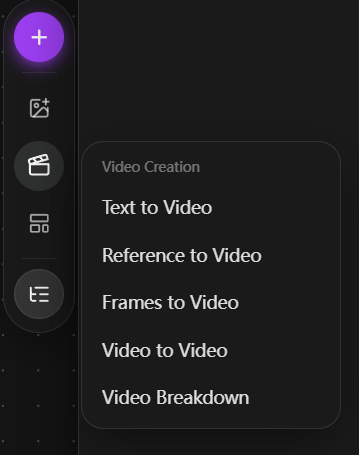
Figure 7-6 Canvas video generation workflow entry
Text to Video
Generate video from a text description.
Reference to Video
Generate video with reference assets.
Frames to Video
Generate video from frame assets.
Video to Video
Generate a new version from an existing video.
Video Breakdown
Break down a video into assets or nodes for subsequent use.
7.7 Connect Nodes
Canvas nodes include input and output connection points. Drag from a connection point to connect an upstream asset to a downstream generation node.
For example, connect an image node to a video node to use the image as a video generation input. When generation is complete, preview the result in the video node.
7.8 Canvas Templates
Canvas provides ready-made node workflows to help you start quickly.
Available templates include:
Video face swap: Video face-swap workflowCharacter turnaround: Character turnaround workflowStoryboard: Storyboard workflow
Filter templates by type or search by keyword. Selecting a template adds its ready-made node workflow to the canvas.
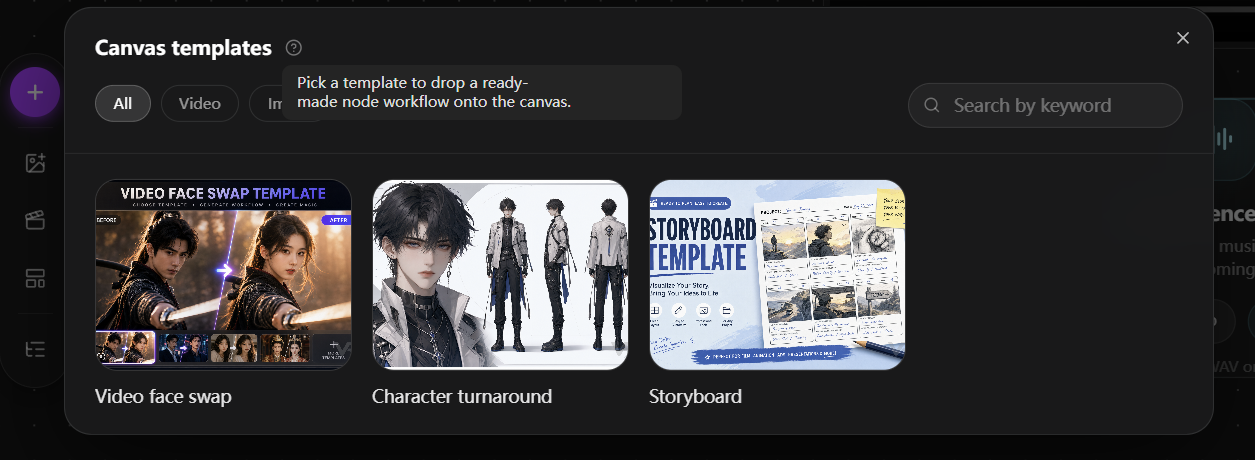
Figure 7-7 Canvas templates
7.9 Node Navigator
Node Navigator helps you browse and locate nodes on the current canvas. It can:
- Display the number of nodes.
- Search nodes, groups, or prompts.
- Distinguish image assets, video results, and audio assets.
- Display ungrouped nodes.
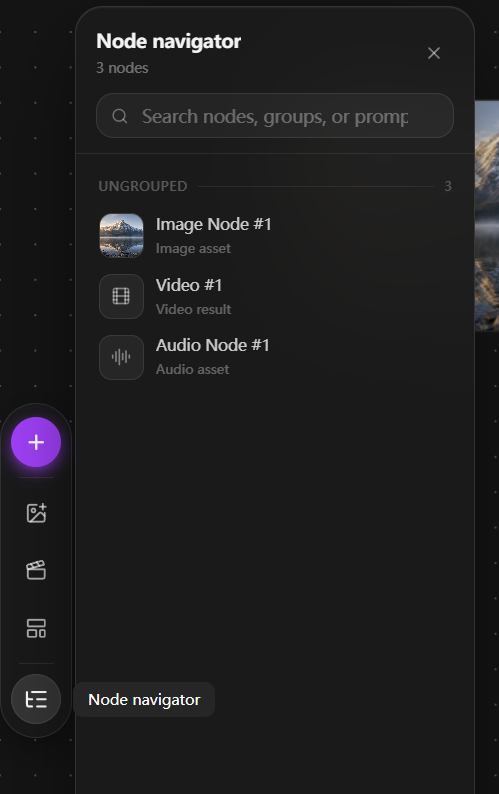
Figure 7-8 Node Navigator
7.10 Saving and Generation History
Click Open generation history in the upper-right corner to open the generation history panel. Switch between Images and Videos to view records for the current project.
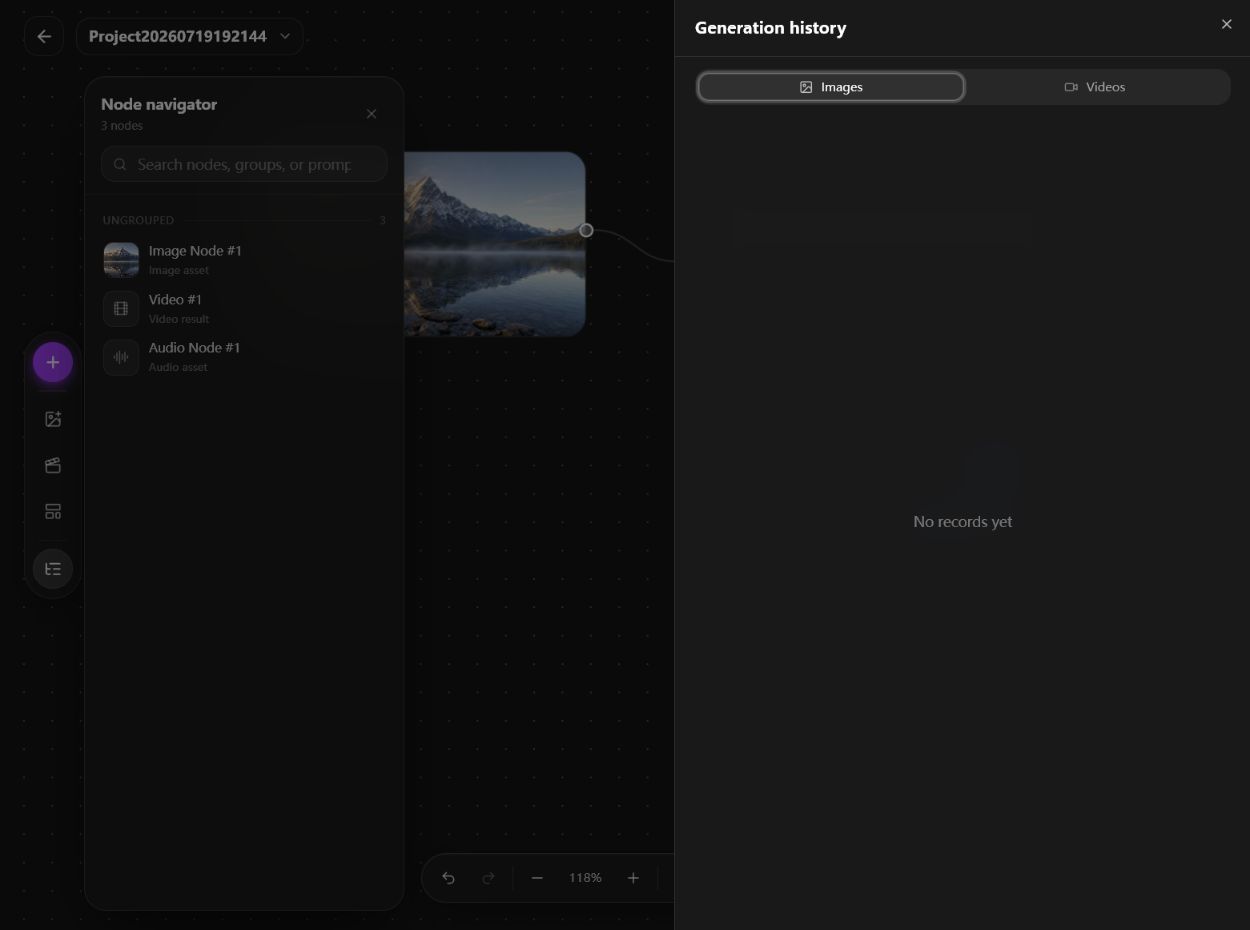
Figure 7-9 Canvas generation history panel
7.11 Team Collaboration
The Canvas home-page space selector provides access to personal and team spaces. Select Create team, then enter a team name and collaboration description to create a shared workspace for projects and assets.
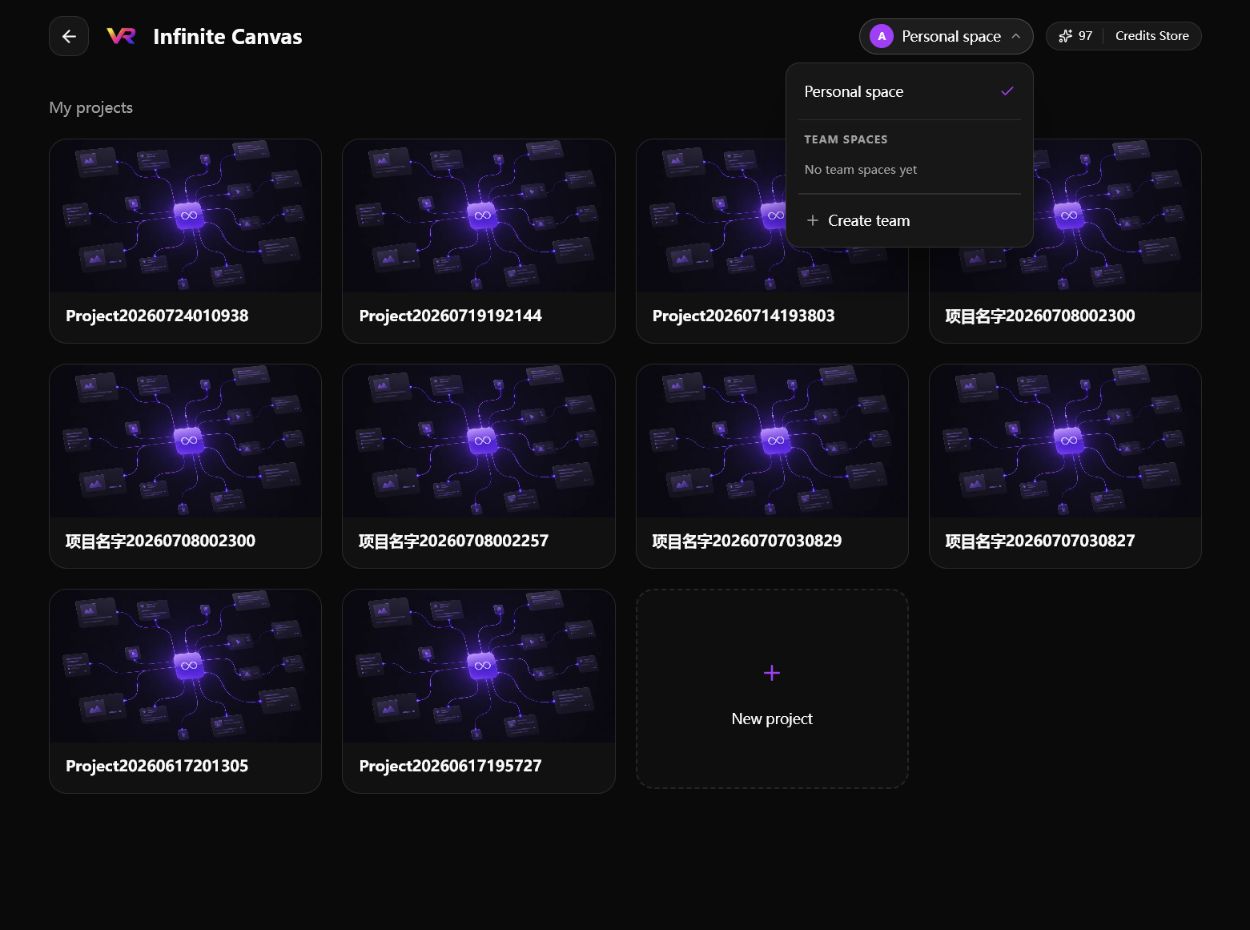
Figure 7-10 Canvas space selector
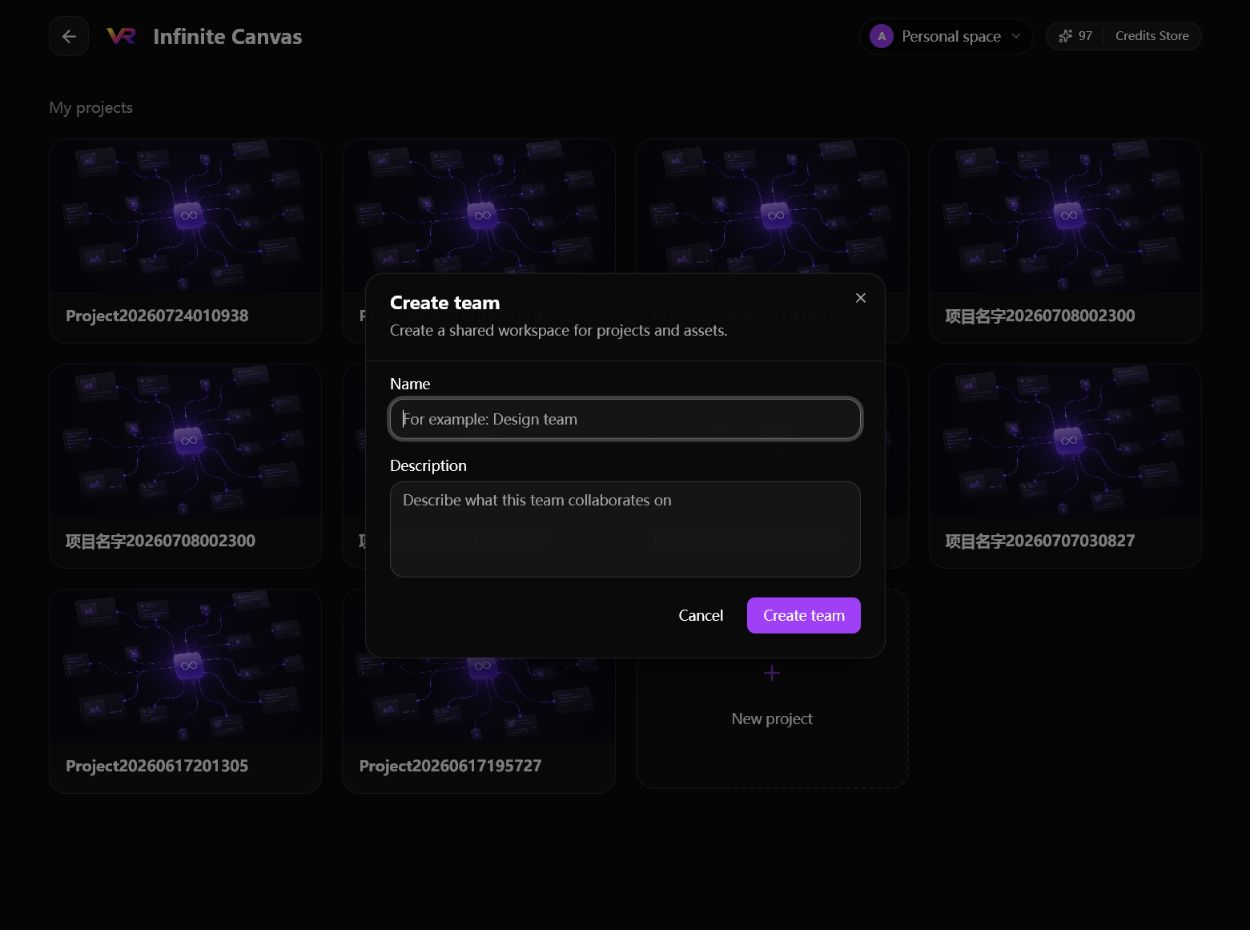
Figure 7-11 Create a team workspace
8. Image and Video Generation
8.1 Image Generation
The shot workspace provides Image Gen and Video Gen modes. Use the mode selector in the lower-left corner to switch modes.
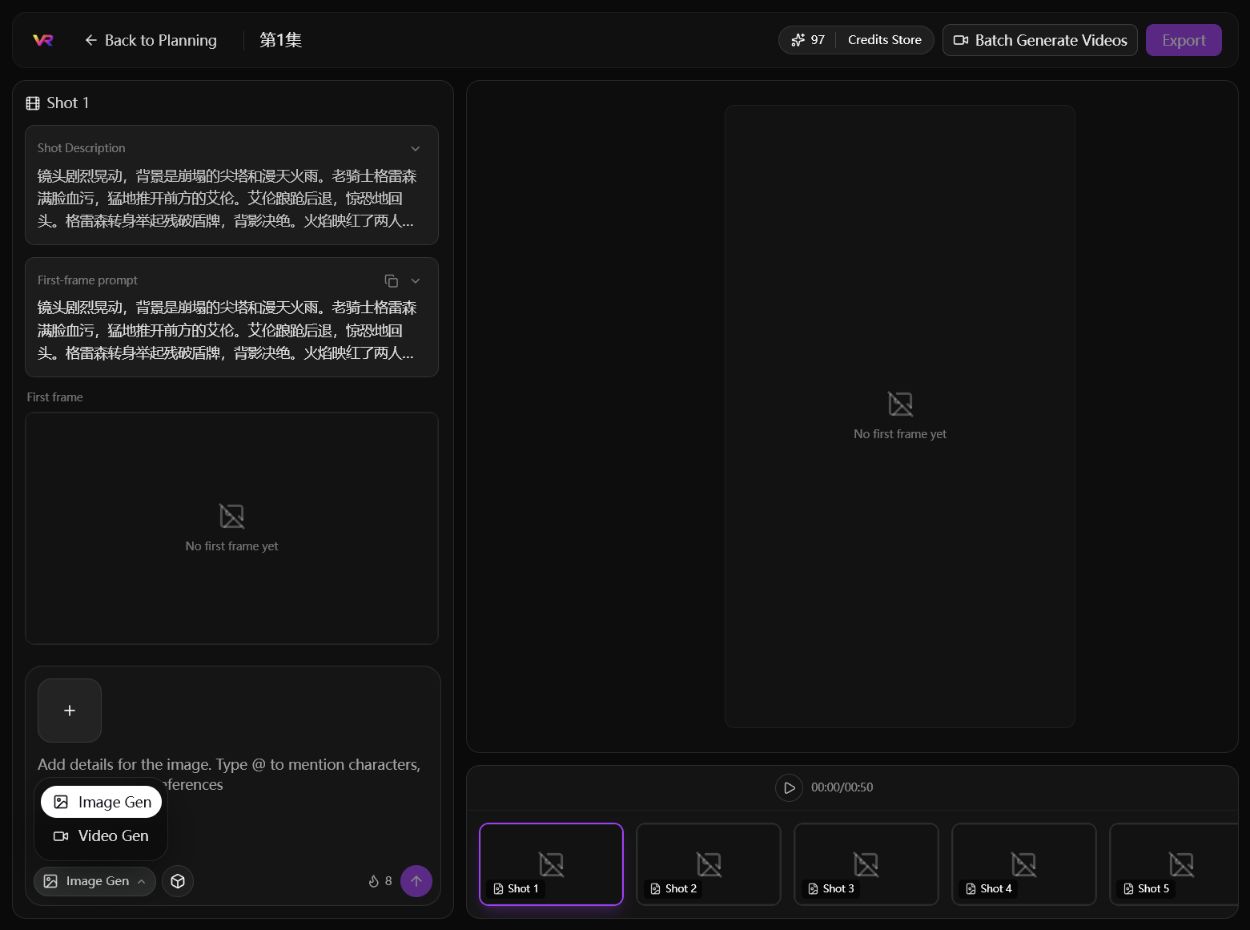
Figure 8-1 Image and video generation modes
Image generation mode creates the first frame of a shot. Edit the first-frame prompt, upload reference images, reference assets, and select an aspect ratio and image model. Review the estimated Credits displayed on the page before submitting.
8.2 Video Generation
Video generation mode creates an individual shot video from a shot prompt, first frame, ending frame, or reference images. Settings include aspect ratio, duration, and model. Credit usage may vary by model and duration.
Submit an individual shot task from the input area on the left. To process multiple shots, use batch generation at the top of the page.
8.3 View Generation Progress
After submitting a task, view its status in the selected shot's preview area. Completed videos appear in the preview area on the right and are added to the shot timeline at the bottom.
8.4 Regenerate Content
If a result does not meet your requirements, revise the shot prompt, reference assets, or generation settings, then submit the task again. Regeneration consumes additional Credits, so review the estimated usage before submitting.
9. Video Editing and Export
9.1 Preview Video
The right side of the shot workspace contains the video preview area. The bottom timeline displays the shot order and total duration for the current episode. Click a shot card to preview its result, or click Play to preview from the timeline.
9.2 Reorder and Trim Shots
9.3 Voice, Subtitles, and Music
9.4 Export a Complete Video
The Export control is located in the upper-right corner. It remains unavailable when the project does not yet contain exportable video. After generating the required shot videos, use this control to export the complete content.
9.5 Download an Individual Asset
10. Credits
Credits are used for image, video, and other AI generation tasks. The current balance is displayed on the home page, in Infinite Canvas, and on Credits pages.
10.1 View Credit History
Open Credits History to review earned and spent Credits.
The page provides the following filters:
All: All recordsEarned: Credit earningsSpent: Credit usage
Each record includes the operation type, Credit amount, status, and time. Common record types include:
- Generate Video
- Generate Scene Image
- Generate Character Image
- Generate Project Cover
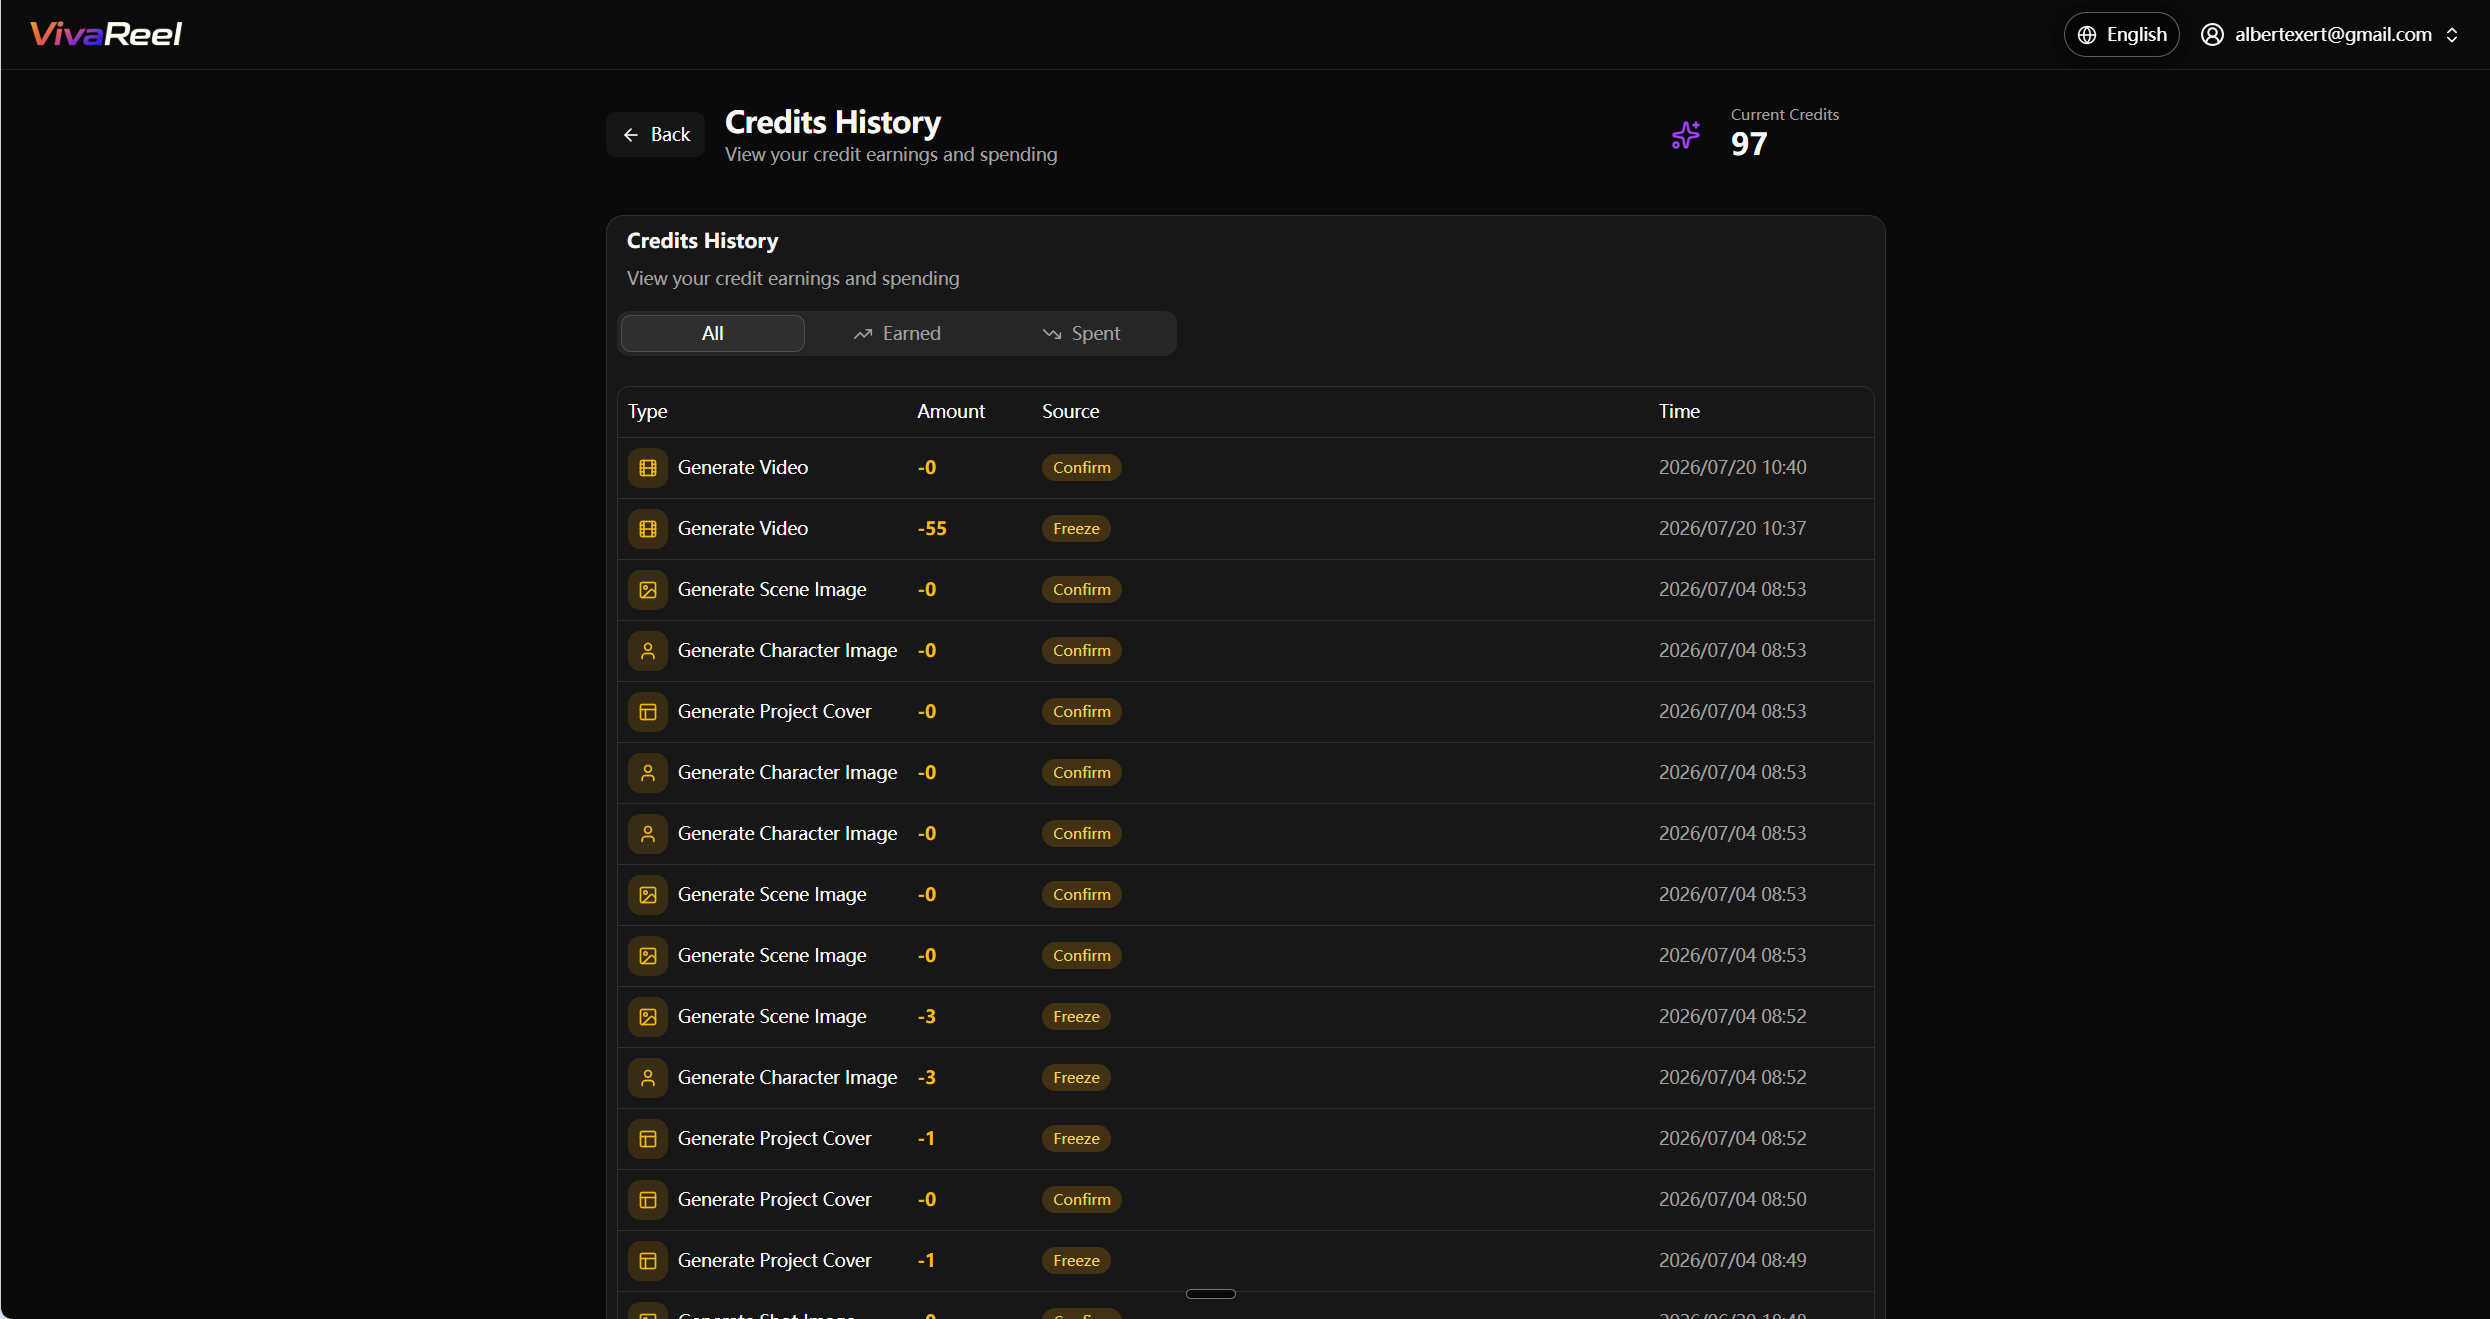
Figure 10-1 Credit history and filters
10.2 Credit Statuses
Credit records may contain the following statuses:
FreezeConfirm
10.3 Purchase Credits
Click Credits Store to open the purchase page. VivaReel offers the following one-time packages:
| Package | Credits | Price | Best for |
|---|---|---|---|
| Experience Plan | 30 | US$1.00 | First-time trial |
| Starter | 360 | US$9.99 | Idea exploration and small creative tests |
| Creator | 1,140 | US$29.99 | Episode production and ongoing iteration |
| Studio | 3,850 | US$99.99 | Batch production and team workflows |
Packages, prices, discounts, taxes, and estimated generation quantities are subject to the current information displayed in the Credits Store.
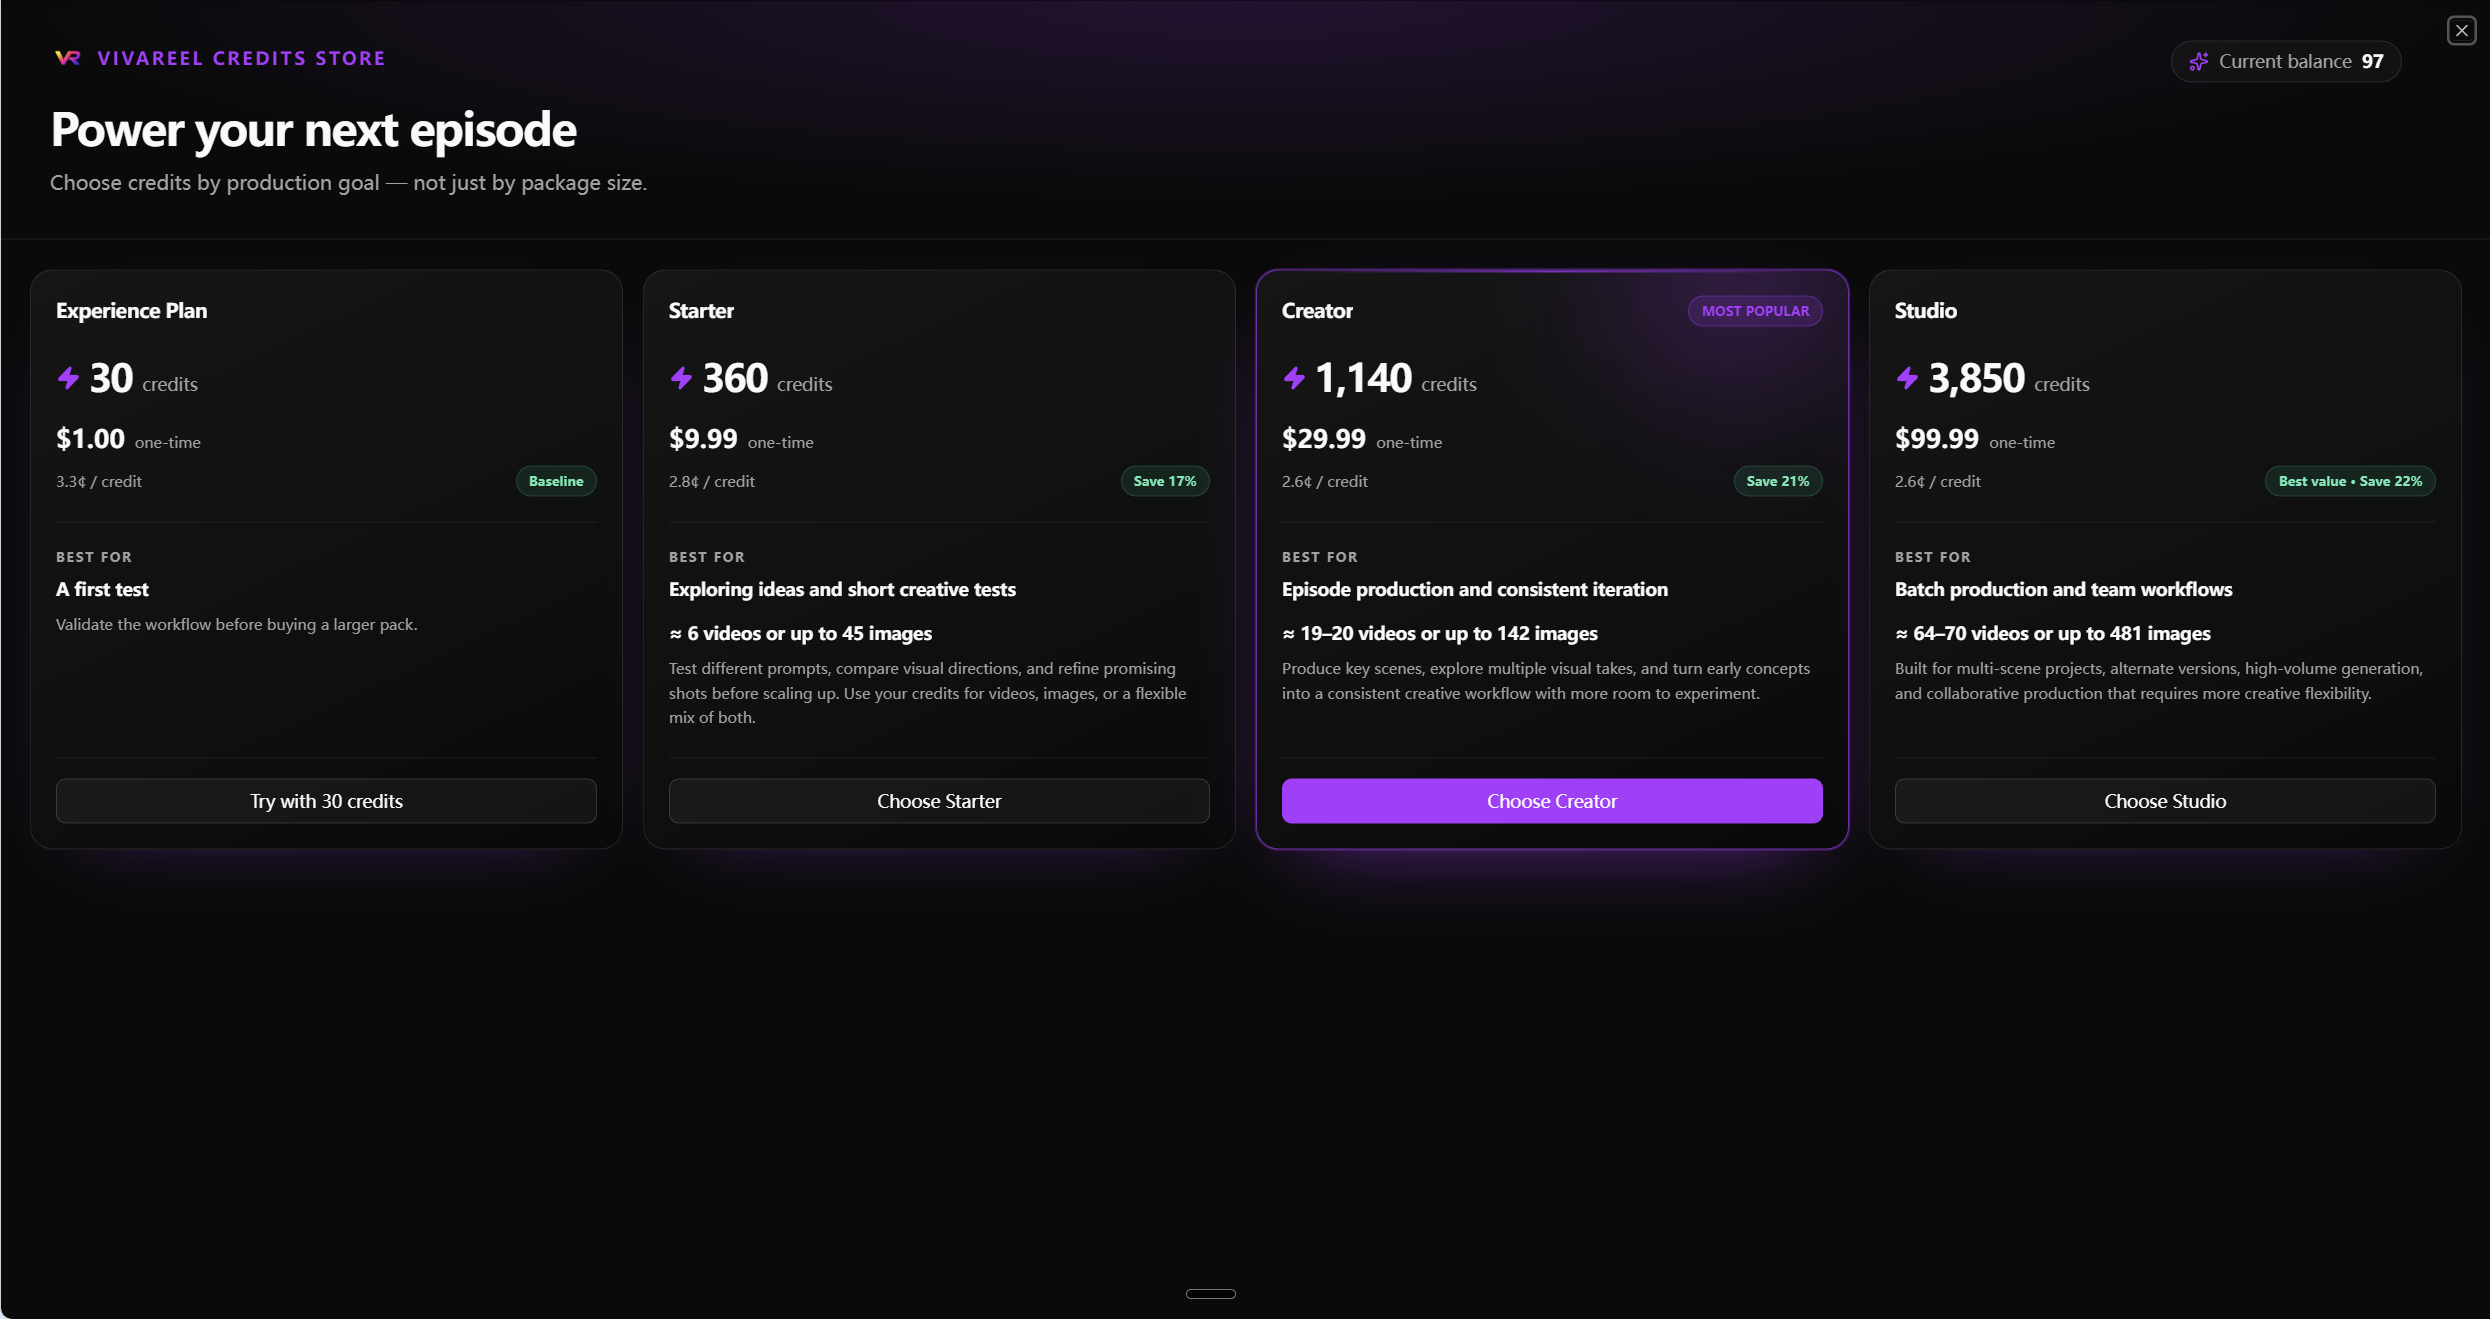
Figure 10-2 Credits Store package page
10.4 Payment, Validity, and Refunds
11. Developer Platform
The VivaReel Developer Platform provides an API Console and API Docs.
11.1 API Console
The API Console includes:
- API Keys
- Account Overview
- Billing Details
- Orders
- Usage Stats
- Call Logs
- Webhooks
- Docs
Billing pages provide account summaries, billing details, and orders. Data pages provide entry points for viewing usage statistics and call logs from the previous 7, 30, or 90 days.
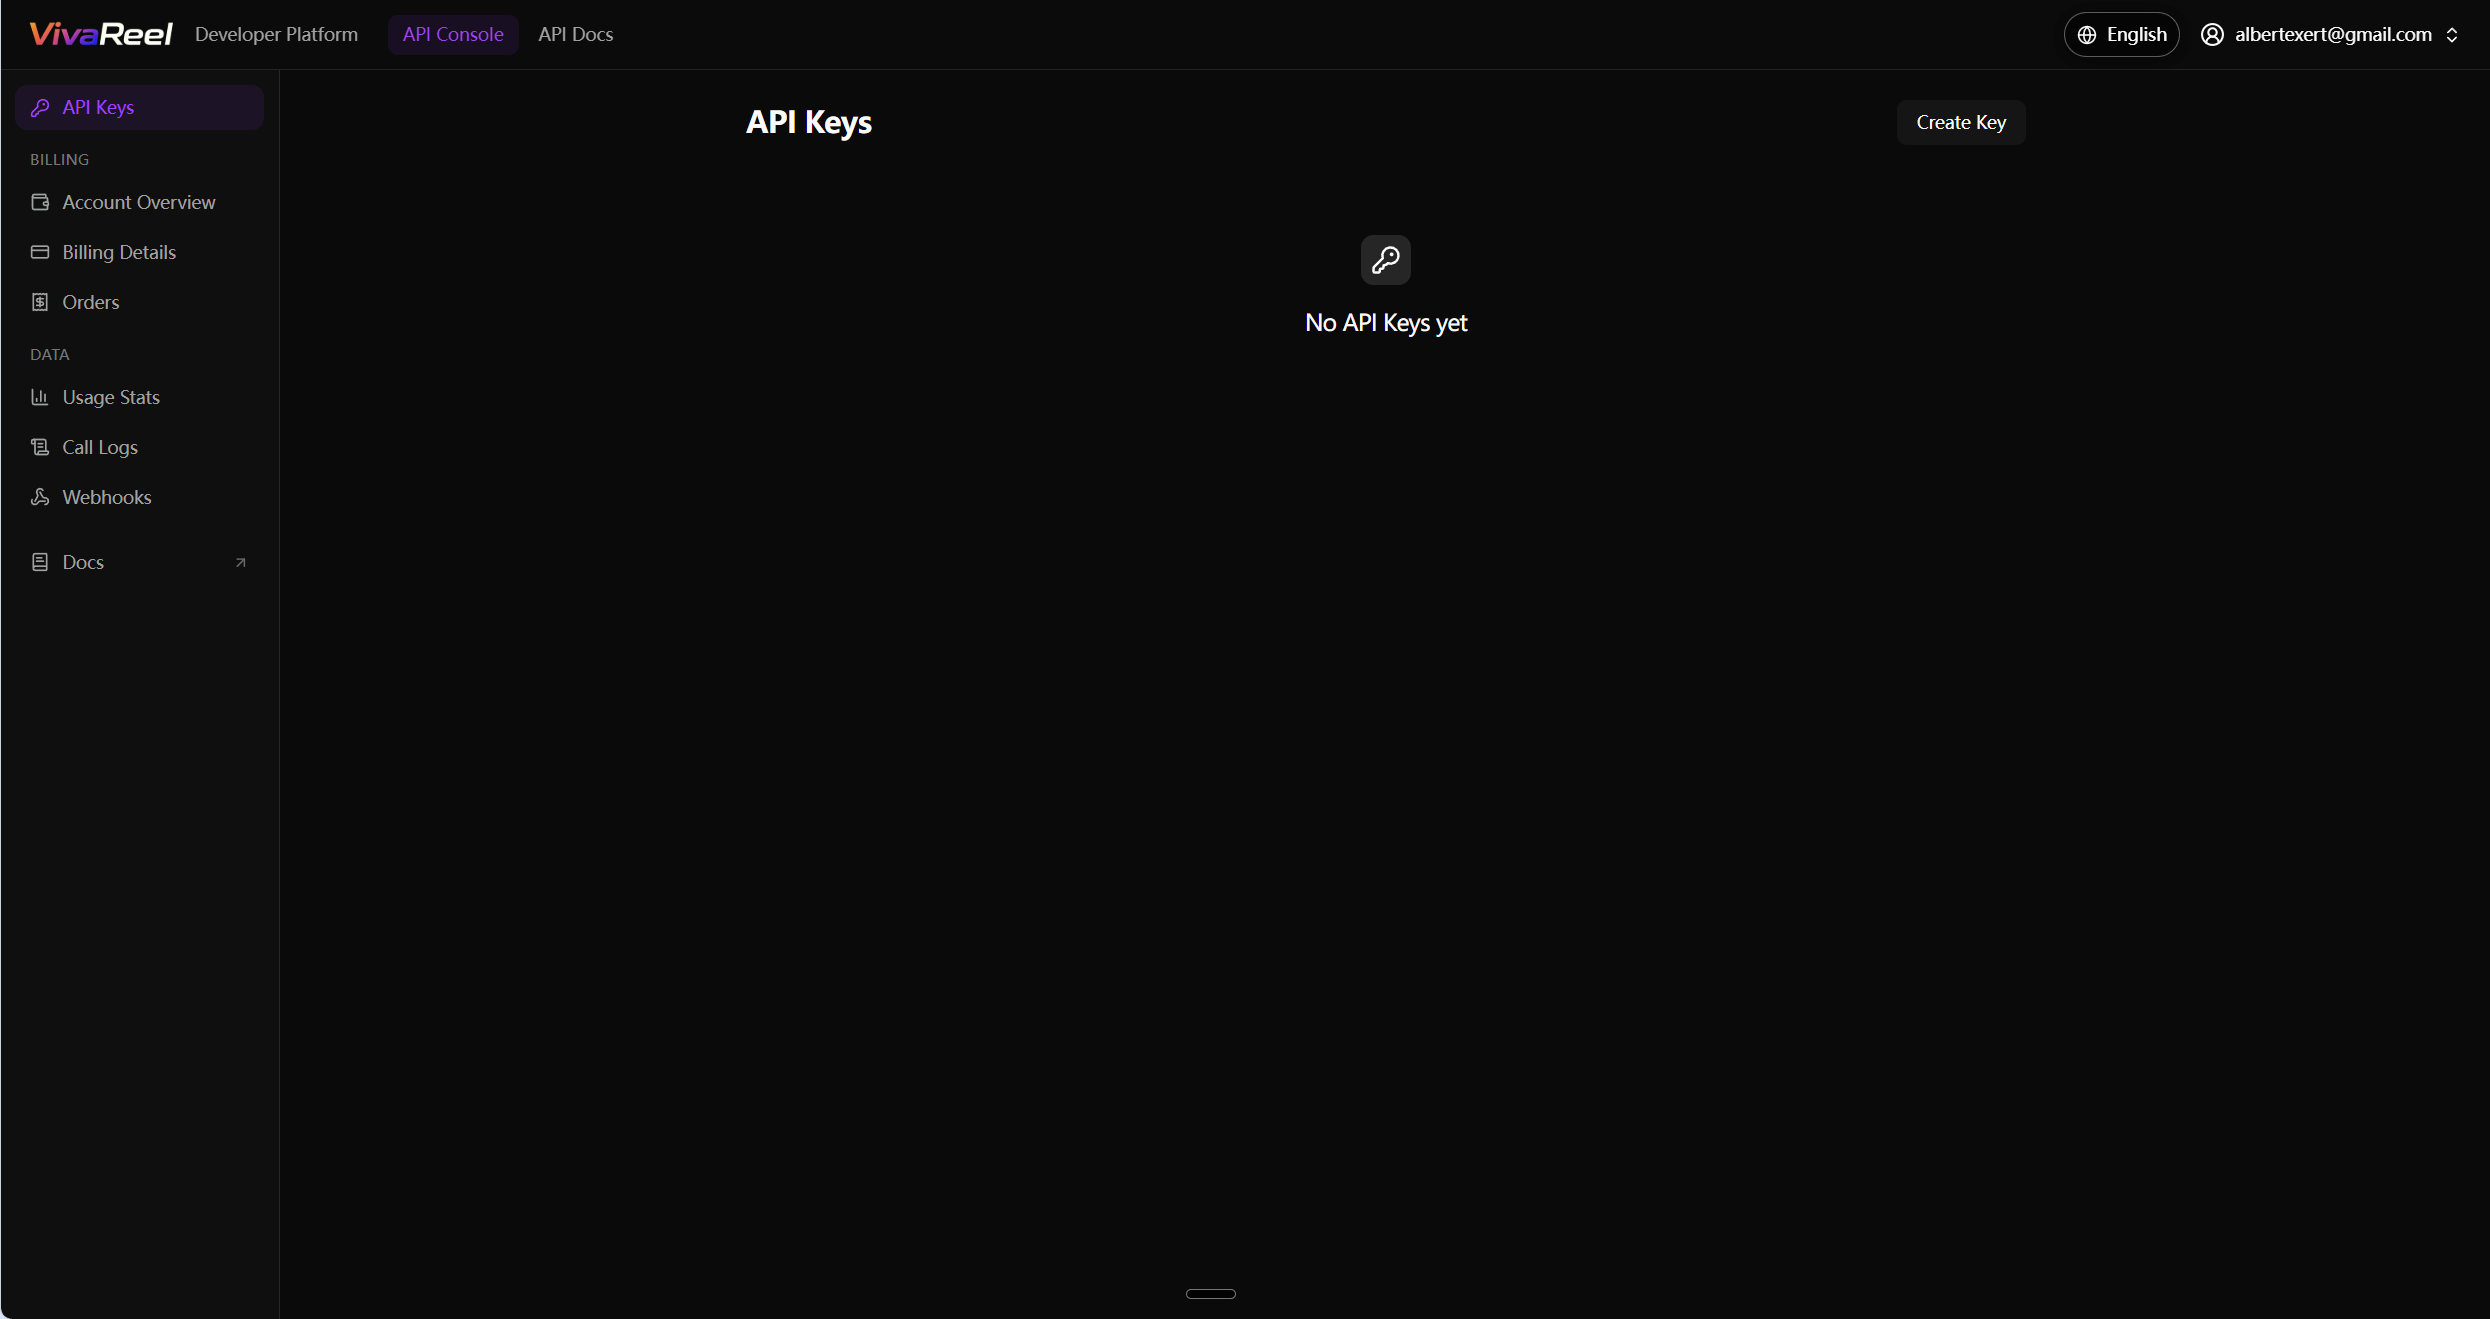
Figure 11-1 Developer Platform API Console
11.2 Create an API Key
- Open the Developer Platform.
- Open
API Console. - Select
API Keys. - Click
Create Key.
An API Key is a sensitive credential. Never include a real key in public documentation, frontend code, screenshots, logs, or source repositories.
11.3 API Capabilities
API Docs include the following endpoints:
- Generate image
- Generate video
- Replace character in video
- Get task status
- Upload file
- List models
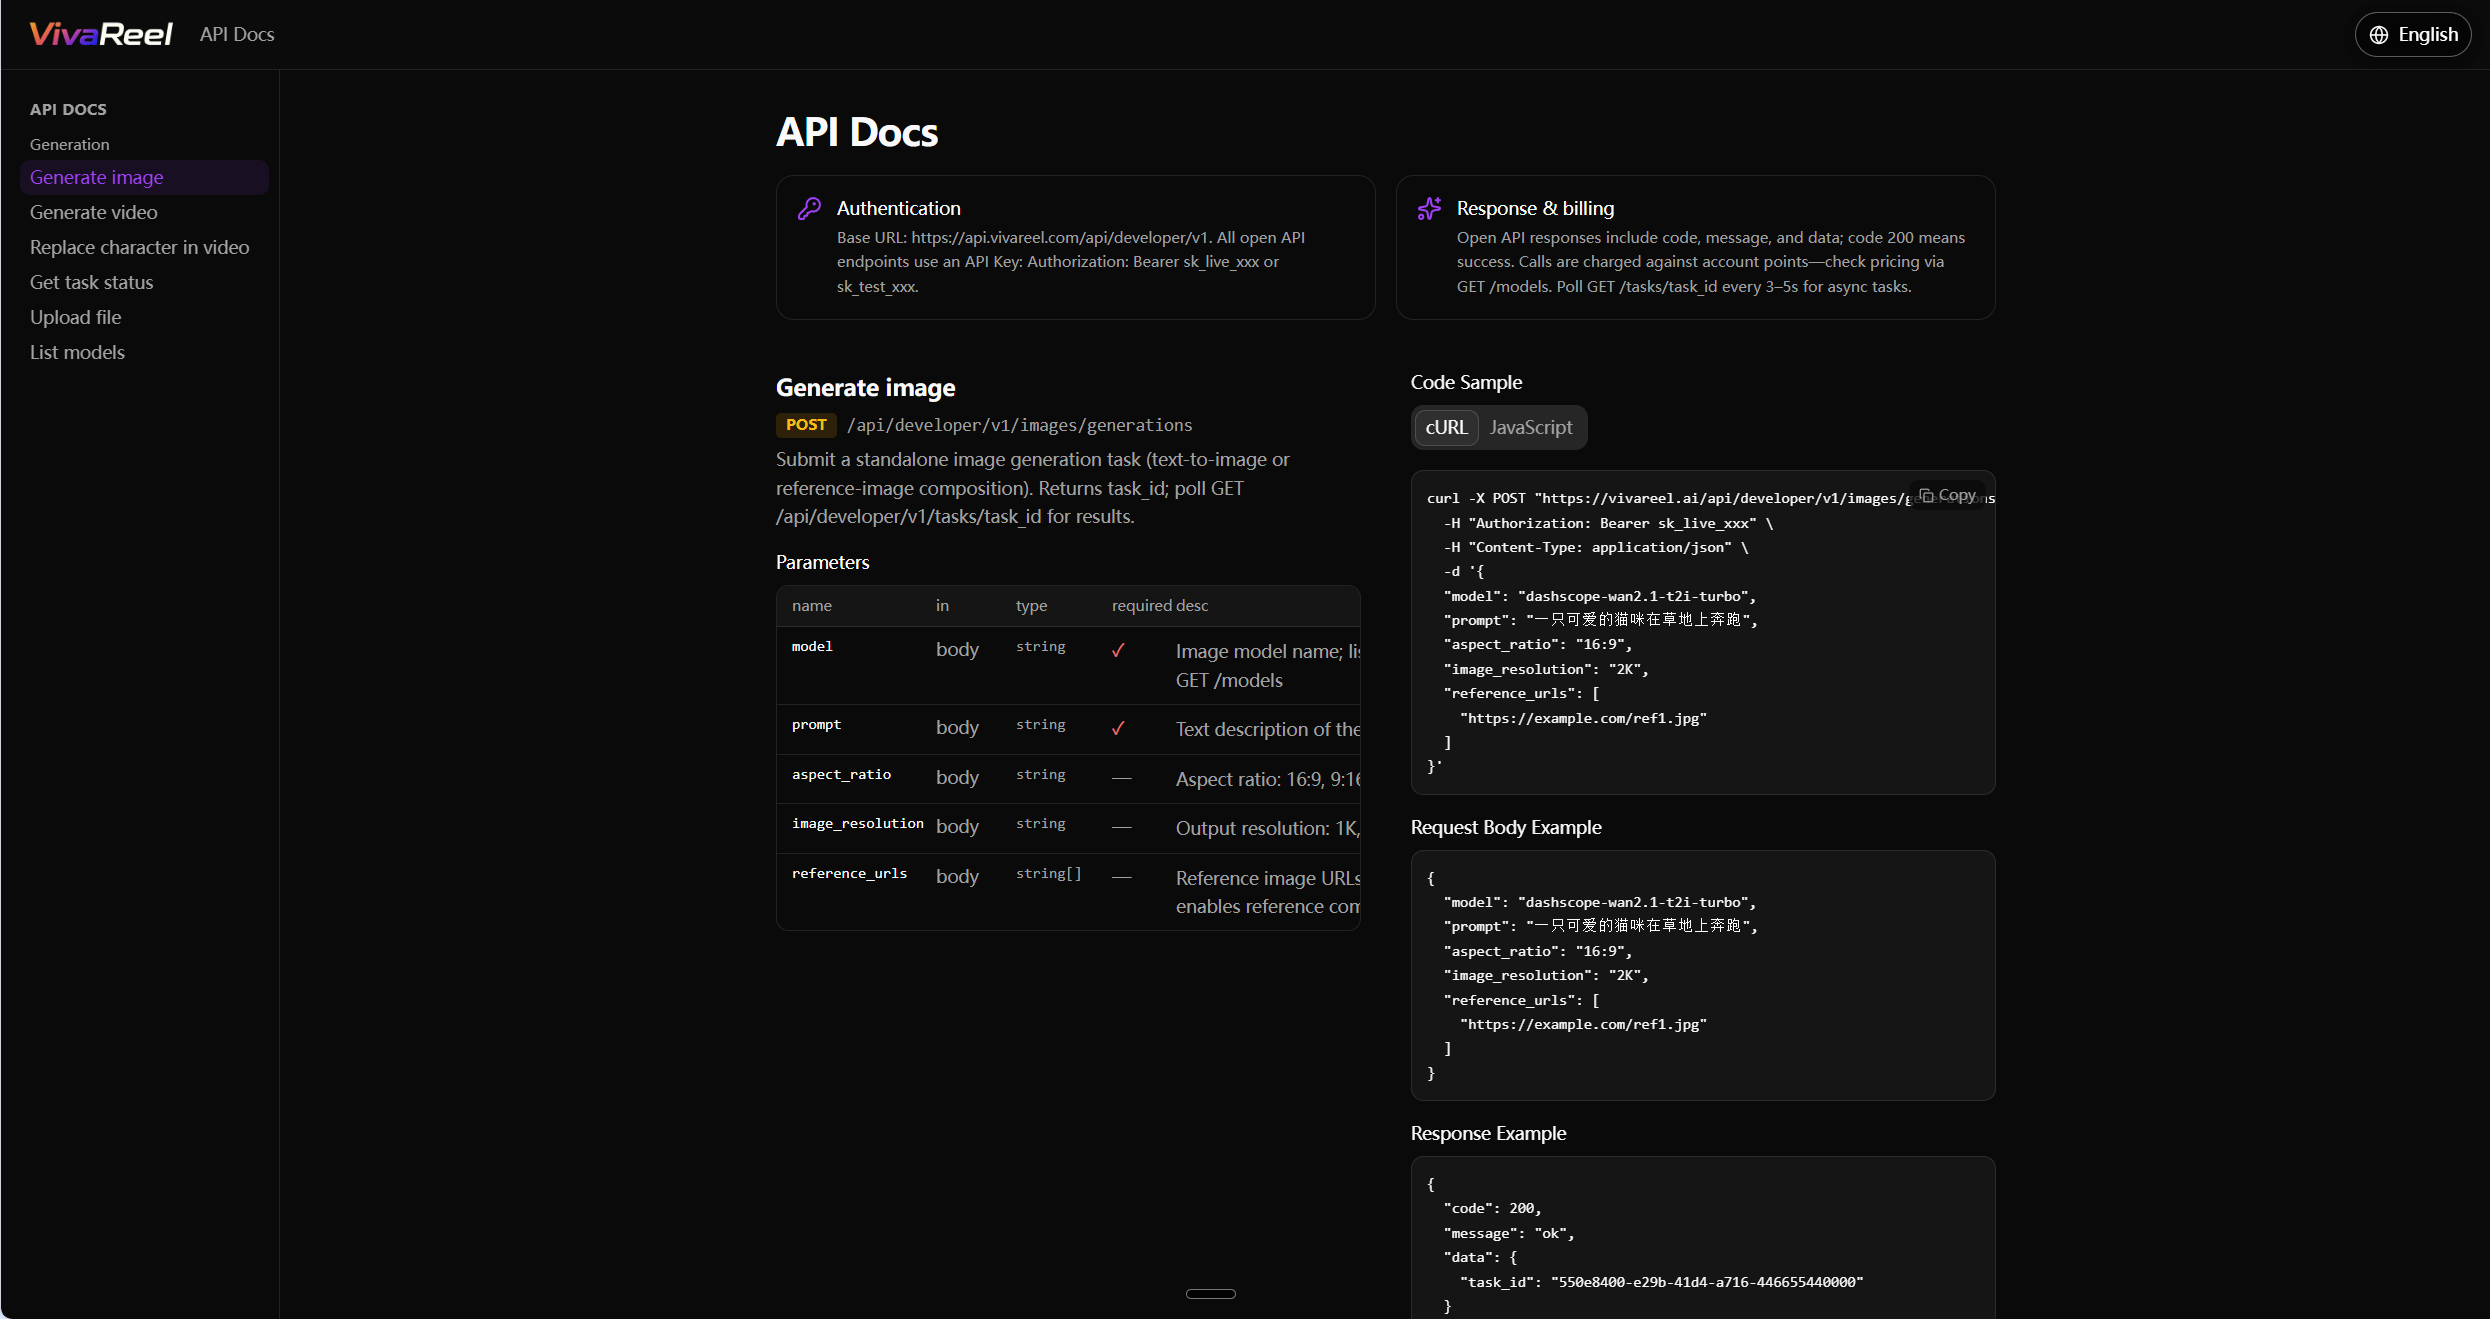
Figure 11-2 API endpoint descriptions and code examples
11.4 API Authentication
The API uses Bearer Token authentication. Include a valid API Key in the request header when calling an endpoint.
11.5 Asynchronous Tasks
Image and video generation use asynchronous tasks. After a task is created, the API returns a task_id. The client queries the task status endpoint to retrieve the result.
The recommended polling interval is 3–5 seconds.
11.6 Image Generation Endpoint
The image generation endpoint supports text-to-image generation and reference-image composition.
Main parameters include:
| Parameter | Required | Description |
|---|---|---|
| model | Yes | Image model name |
| prompt | Yes | Image generation prompt |
| aspect_ratio | No | Output aspect ratio |
| image_resolution | No | Output resolution |
| reference_urls | No | List of reference image URLs |
API Docs provide cURL and JavaScript examples, plus sample request and response bodies.
11.7 Video Generation Endpoint
The video generation endpoint is POST /api/developer/v1/videos/generations. Requests use Bearer Token authentication and pass generation parameters as JSON. After submission, retrieve the asynchronous result through the task status endpoint.
All-in-one models such as Wan 3.0 can complete text-to-video, first-frame / first-last-frame image-to-video, and mixed image / video / audio reference generation on the same endpoint. Official Wan 3.0 mode and material-combination rules are documented in the Wan3.0 Video Generation API Reference. VivaReel maps those capabilities to the following fields.
Main parameters include:
| Parameter | Required | Scope | Description |
|---|---|---|---|
| model | Yes | Common | Video model name from GET /models. Typical values: wan-3.0 or dashscope-wan3.0-video |
| motion_instruction | Conditional | Common | Prompt / motion instruction. Required for text-to-video, all-modal reference, editing, and extension. You can mention Image 1, Video 1, or Audio 1 |
| aspect_ratio | No | Common | 16:9, 9:16, 4:3, or 3:4 |
| duration_seconds | No | Common | Output duration in seconds. Check duration_range / max_duration_seconds from GET /models |
| capability | No | Common | first_frame, flf2v, or image_reference. Omit or null to infer from fields (prompt only = text-to-video) |
| image_url | No | Common (mode-specific) | First-frame image URL for first_frame / flf2v. Do not send together with reference_* fields |
| last_frame_url | No | Common (mode-specific) | Last-frame image URL for flf2v. Not supported by HappyHorse |
| reference_urls | No | Common (reference mode) | Reference image URLs for all-modal reference |
| reference_video_urls | No | Multi-model | Seedance / Wan3 semantics / Wan2.7 R2V / VivaReel2.0 |
| reference_audio_urls | No | Multi-model | Seedance / Wan3 semantics / Wan2.7 R2V / minimax-H3 |
| resolution | No | Wan3 semantics | 480P, 720P, or 1080P |
| audio | No | Wan3 semantics | Whether to generate audio |
| seed | No | Wan3 semantics | Random seed for reproducible results |
| prompt_extend | No | Wan3 semantics | Whether to expand the prompt |
| smart_duration | No | Wan3 semantics | Smart duration; default false |
| watermark | No | dashscope-wan3.0-video only | Whether to add a watermark |
| enable_thinking | No | dashscope-wan3.0-video only | Enable thinking |
| document_url | No | dashscope-wan3.0-video only | Document reference URL |
| web_url | No | dashscope-wan3.0-video only | Web page reference URL |
Do not mix first-frame / last-frame inputs with reference images, videos, or audio in the same request. First-frame modes do not accept driving audio; use all-modal reference instead.
API Docs provide cURL and JavaScript examples, plus sample request and response bodies.
11.8 Response Codes and Billing
API responses contain code, message, and data. Response code 200 indicates a successful request. API calls consume Credits. Use the List models endpoint to verify available models and current billing information.
12. Legal, Privacy, and Content Safety
12.1 Terms of Service
VivaReel's Terms of Service cover:
- Scope and changes
- Account registration and use
- The Services
- Acceptable use
- User content and license
- Intellectual property
- Third-party services
- Fees and Credits
- Suspension and termination
- Disclaimers and limitation of liability
- Governing law and dispute resolution
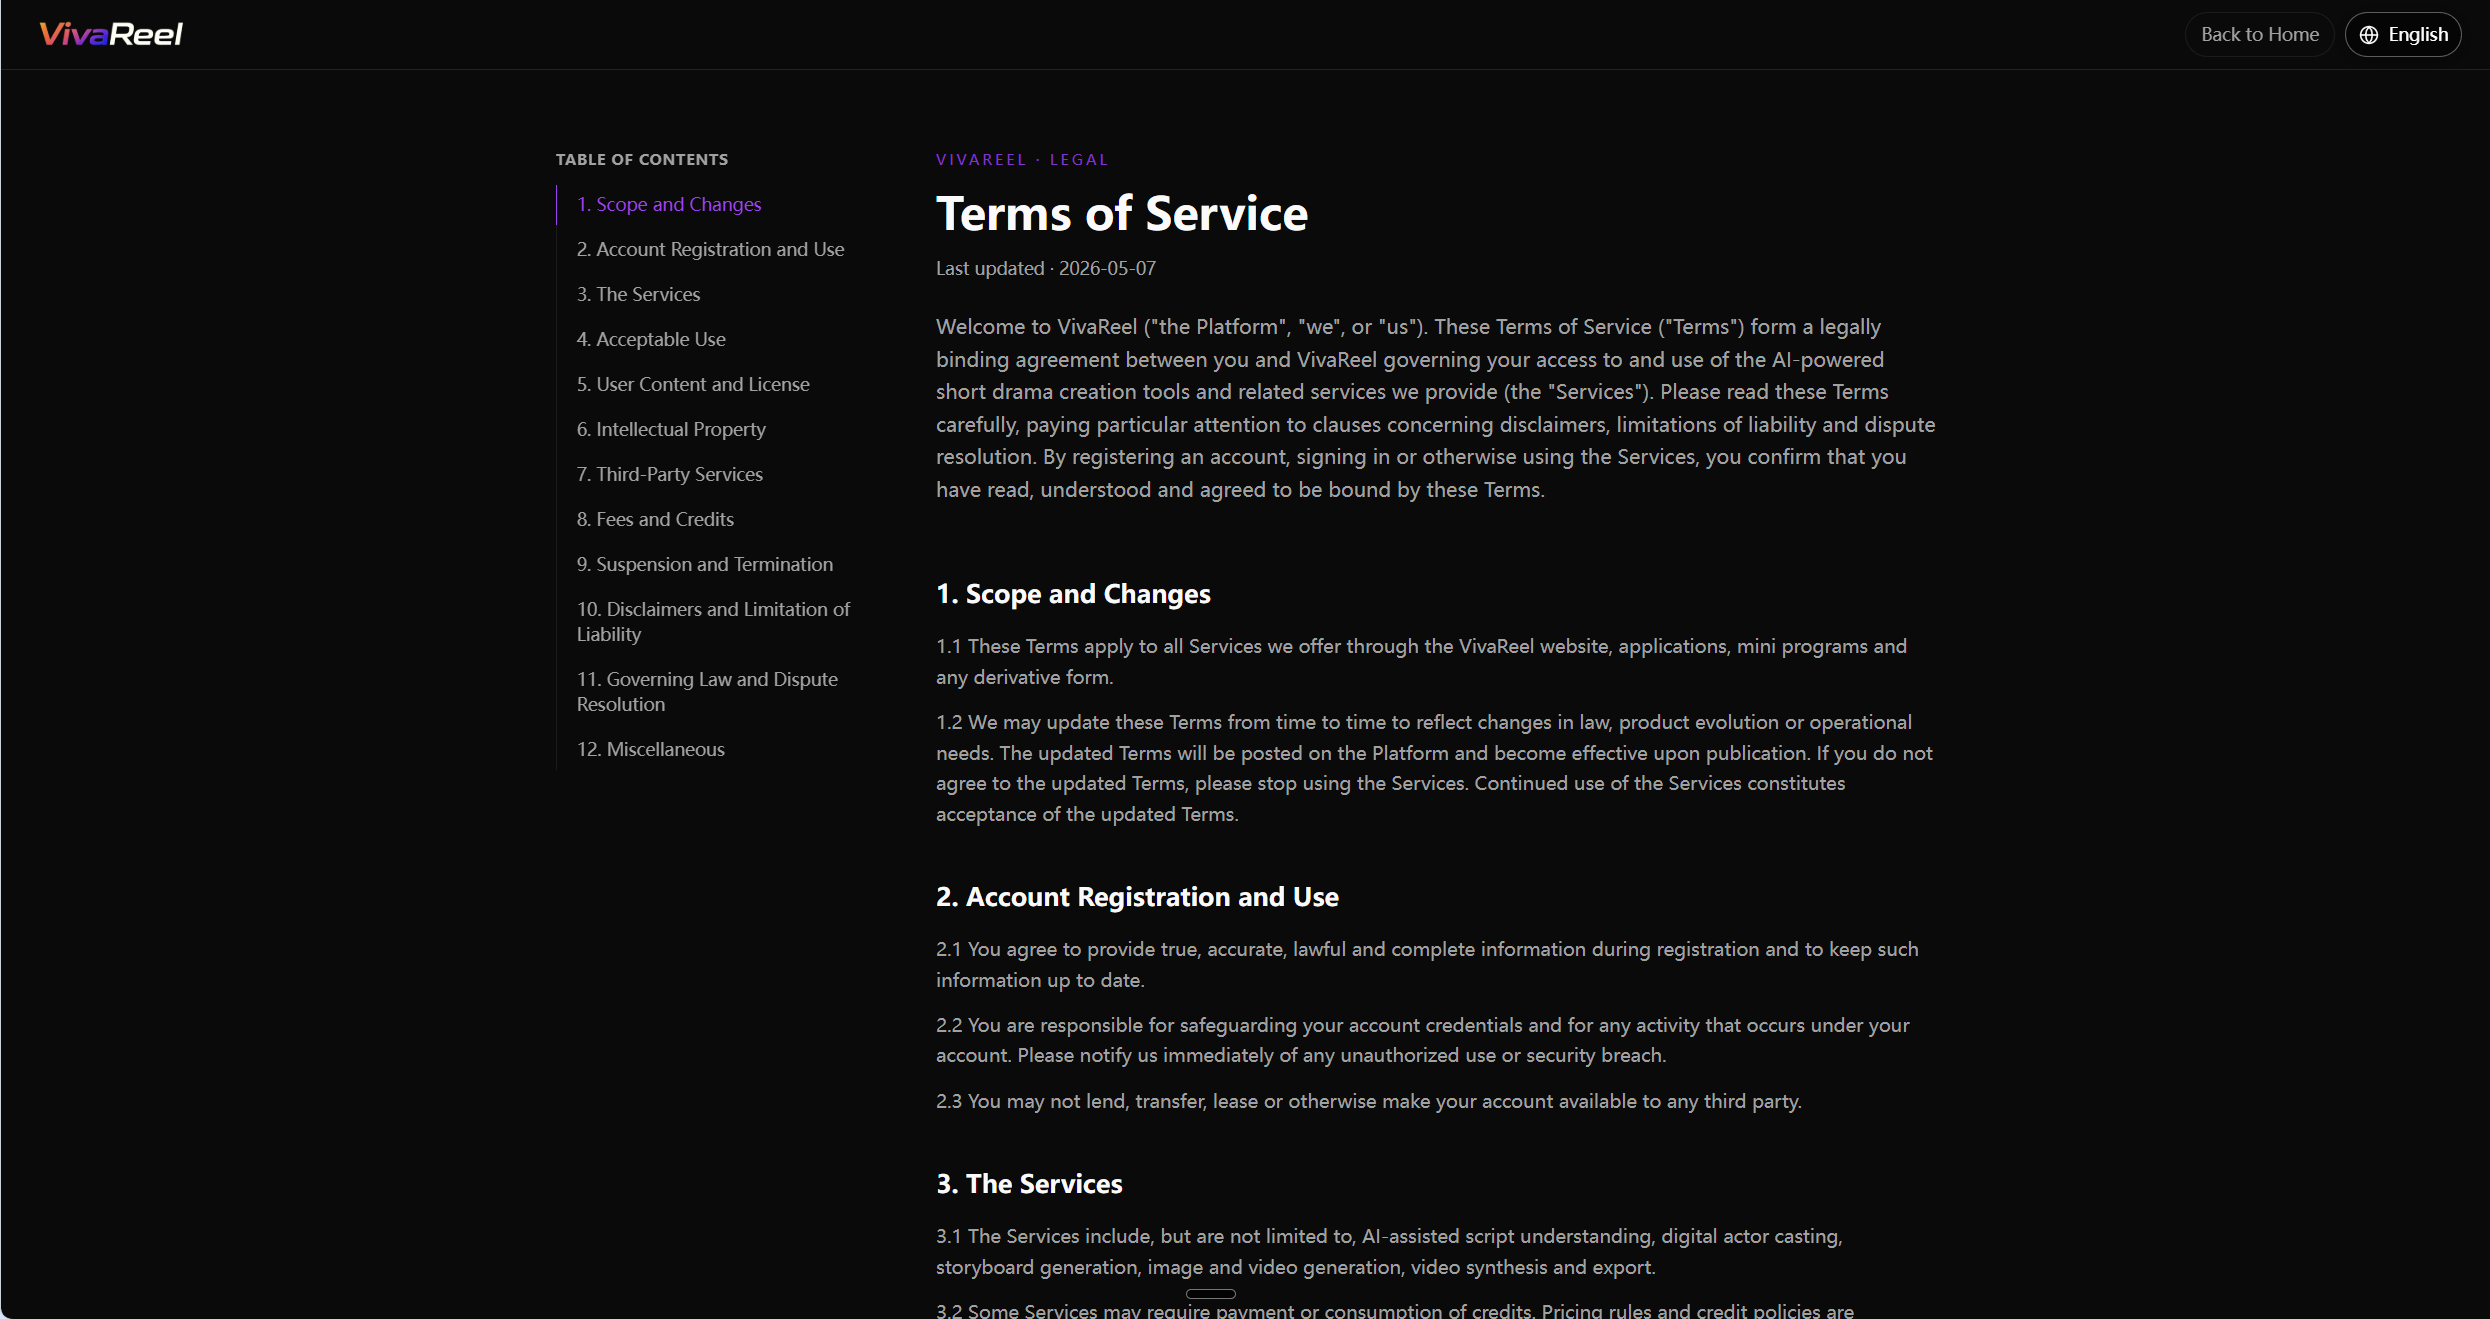
Figure 12-1 VivaReel Terms of Service page
12.2 Privacy Policy
VivaReel's Privacy Policy covers:
- Information collected
- How information is used
- Cookies and similar technologies
- How information is shared, transferred, and disclosed
- Data storage and security
- User rights
- Children's privacy
- Cross-border data transfers
- Policy updates
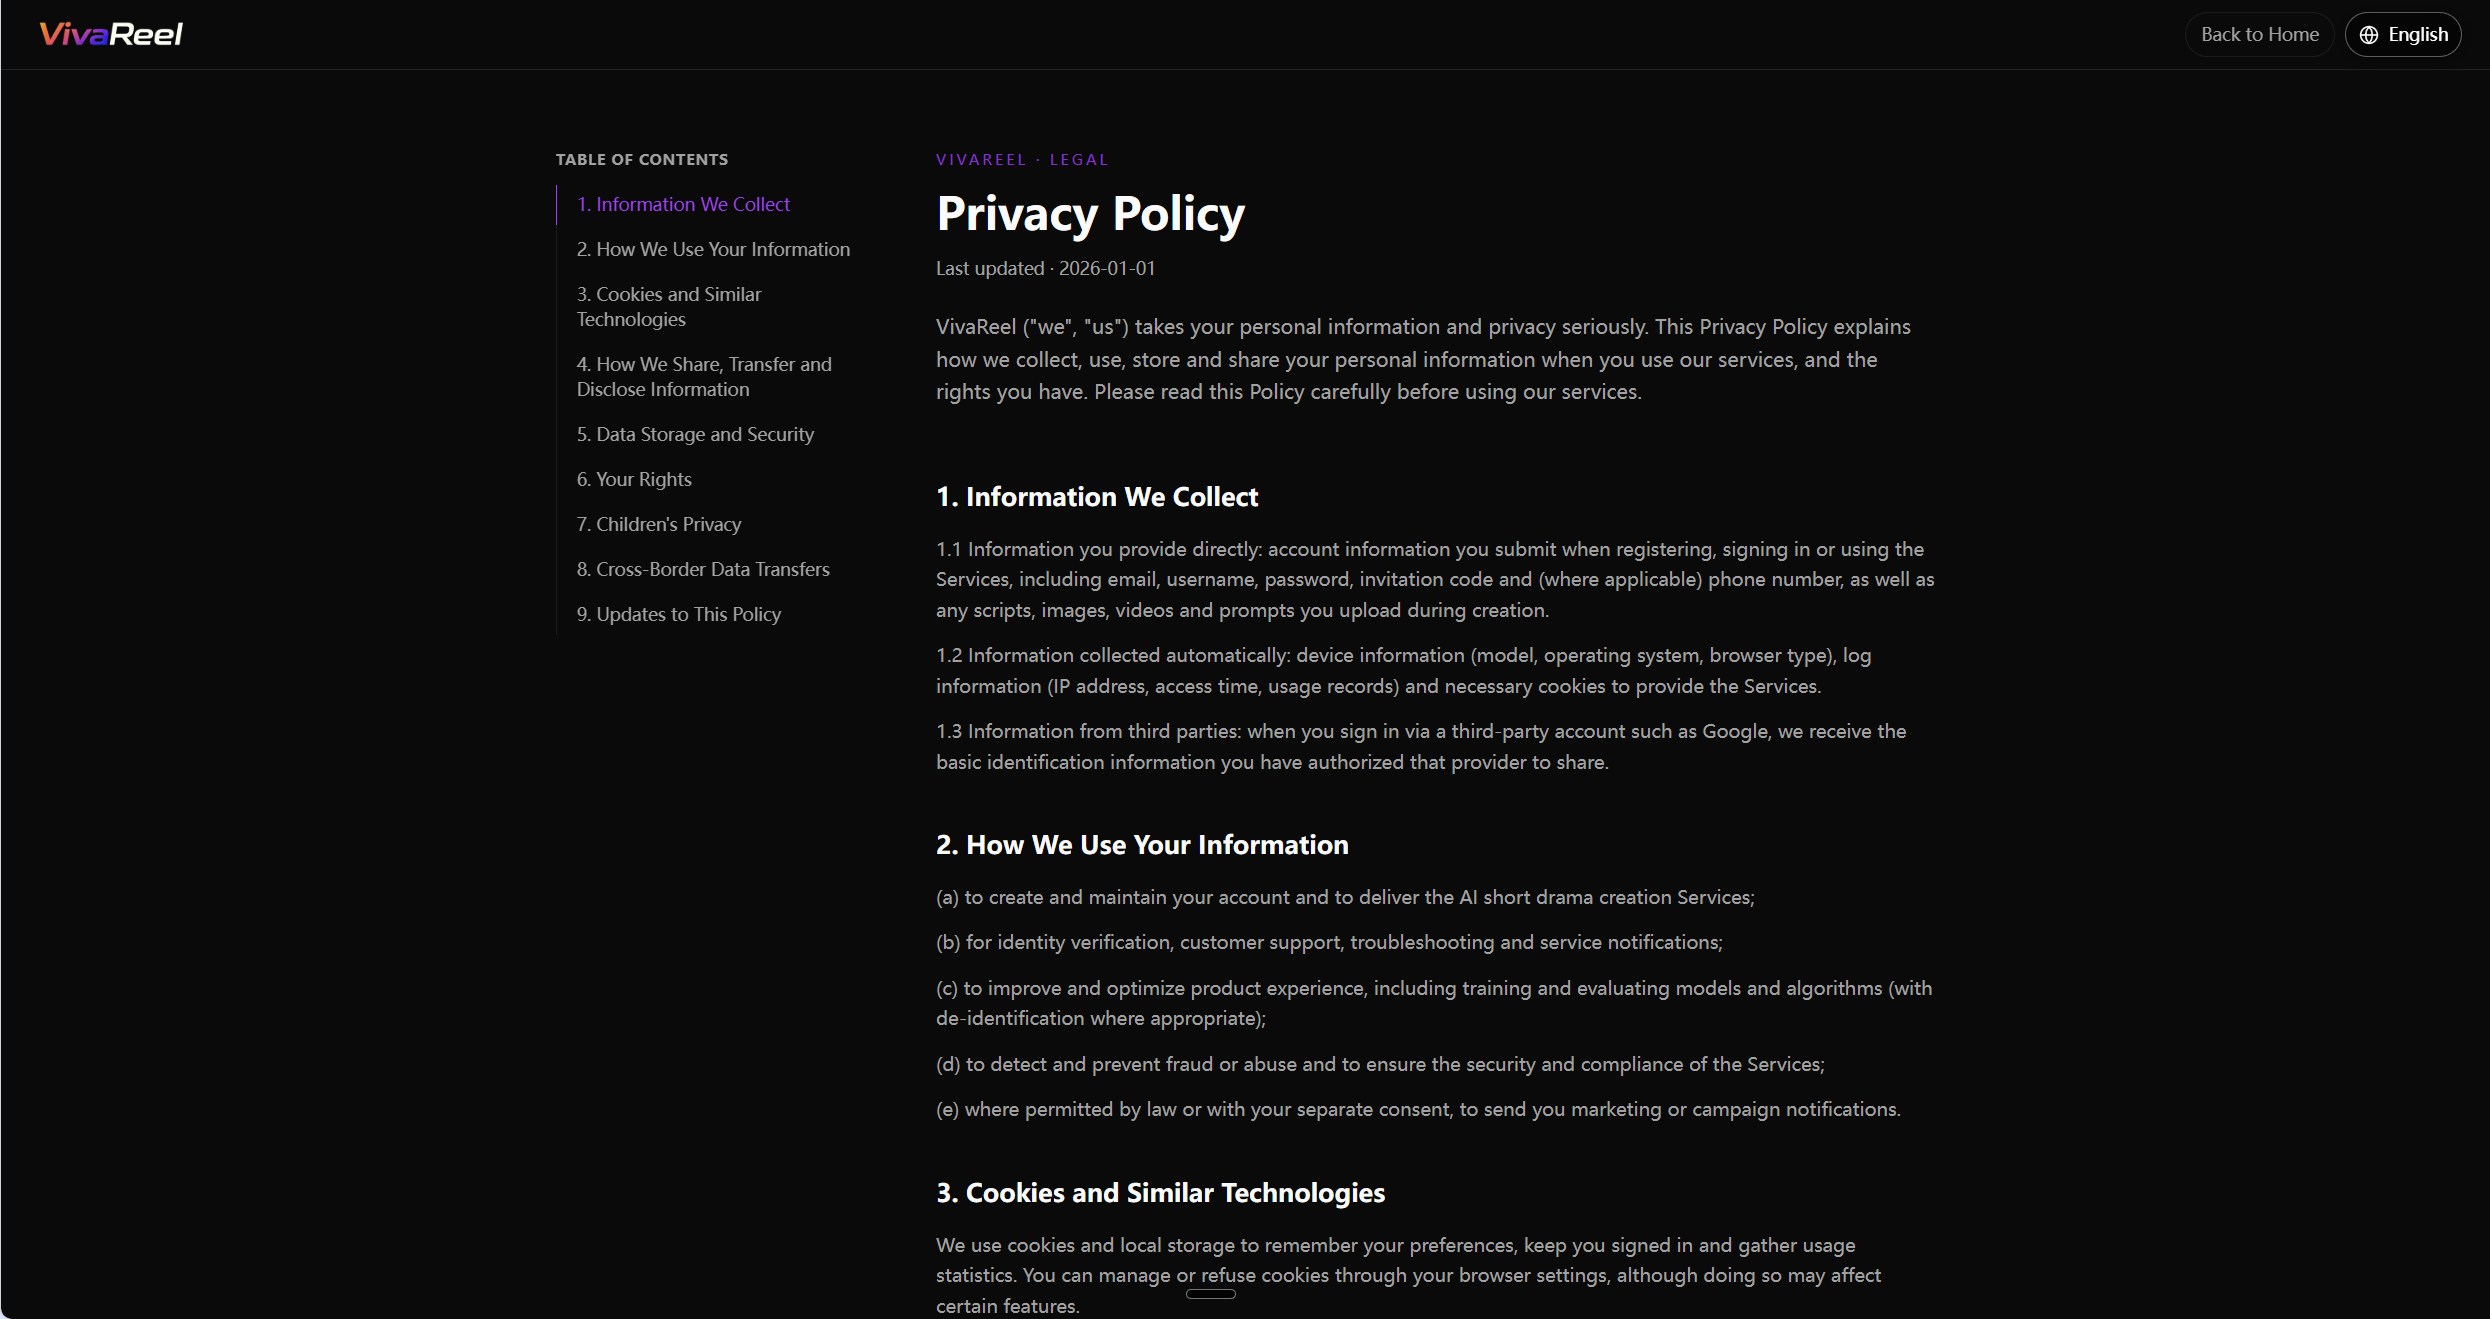
Figure 12-2 VivaReel Privacy Policy page
12.3 Uploaded Content and Copyright
Users must have the legal right to use uploaded scripts, images, videos, audio, character likenesses, and other reference materials.
Before publishing AI-generated content, review:
- Factual accuracy
- Copyright
- Likeness and publicity rights
- Trademark rights
- Personal privacy
- Content rules of the target publishing platform
12.4 Unauthorized Registrations and Prohibited Content
To maintain a safe, fair, and reliable platform environment, VivaReel is strengthening its risk-control measures regarding account registration, referral code usage, Credits, and content generation.
The Following Activities Are Strictly Prohibited
- Registering accounts using fake email addresses, temporary email services, or email addresses not under the user's actual control.
- Using scripts, automated tools, device farms, or other methods to register or control multiple accounts in bulk.
- Abusing referral codes, Credits, campaign rewards, promotional benefits, or other platform privileges.
- Generating, uploading, or sharing pornographic, nude, sexually suggestive, R18, adult-oriented, or otherwise inappropriate content.
- Generating, uploading, or sharing graphic violence, abuse, self-harm, terrorism, extremism, hate speech, discrimination, criminal activity, antisocial content, or content that seriously violates public order and accepted social standards.
- Generating, uploading, or sharing politically sensitive, misleading, inflammatory, illegal, or other high-risk content in violation of applicable laws, regulations, or platform rules.
- Attempting to bypass platform moderation or safety restrictions by modifying prompts, splitting tasks, using alternative wording, switching accounts, or using any other circumvention method.
Enforcement Measures
Depending on the nature, severity, and associated risks of the violation, VivaReel may take measures including, but not limited to:
- Issuing warnings.
- Removing or blocking content.
- Terminating generation tasks.
- Freezing or removing Credits.
- Restricting platform features.
- Suspending account access.
- Temporarily or permanently banning accounts.
Where illegal activity or other matters requiring legal action are involved, VivaReel may retain relevant records and cooperate with the appropriate authorities in accordance with applicable laws and regulations.
Referral Codes and Associated Accounts
If a violating account was registered using a referral code, VivaReel may conduct a risk review of the referring account and other associated accounts. This review may include registration relationships, referral code usage, Credits transfers, devices, login activity, and operational behavior.
If a referring account is found to have organized, assisted, encouraged, knowingly tolerated, or benefited from unauthorized registrations or other violations, VivaReel may also impose restrictions, freeze benefits, suspend access, or permanently ban the account. An account will not automatically be considered in violation solely because it is linked through a referral code. However, it may still be subject to necessary risk assessment and verification.
User Responsibilities and Appeals
Users must ensure that all registration information is accurate and valid and are responsible for all activities conducted through their accounts. Please do not rent, lend, sell, or share your account or referral code, and do not assist others in bypassing platform moderation or safety systems.
If you believe enforcement action was taken in error, you may submit an appeal through VivaReel's official customer support channels. Please provide your account information, the enforcement notice, and any relevant supporting materials.
This notice takes effect immediately upon publication. VivaReel reserves the right to update this notice and related governance policies in accordance with applicable laws, regulatory requirements, and platform operational needs.
Thank you for helping us maintain a safe, fair, and responsible creative community.
VivaReel Team
13. Frequently Asked Questions
13.1 A Generation Task Has Not Completed
13.2 Generation Failed but Credits Are Still Frozen
13.3 An Asset Cannot Be Uploaded
13.4 Canvas Nodes Cannot Be Connected
13.5 A Generated Asset Cannot Be Found
Check the Characters, Scenes, Props, and Audio categories in the Asset Library. Also confirm that the correct personal or team space is selected.
13.6 A Video Cannot Be Exported
14. Support and Feedback
14.1 Help Center
The logged-in home page provides a Help entry.
14.2 Contact Support
14.3 API Technical Support
When reporting a problem, provide the account identifier, project name, task time, task ID, page screenshot, error message, and browser information. Never send a password or complete API Key.
15. Participating in Platform Activities
VivaReel platform activities combine registration, targeted activity Credits, work submission, submission history, and results on one activity page. Opening dates, rules, registration fields, submission requirements, Credit applicability, and result visibility are determined by the relevant activity page.
Activities do not provide public voting or online judge scoring. Works are judged offline. The platform collects submissions, preserves submission records, and displays results published by the activity operator.
15.1 Open an Activity and Understand Its Status
Click Activity in the platform's left navigation bar to open the Activity Center.

Figure 15-1 Activity entry in the left navigation bar
The left side of the Activity Center displays available activity cards with dates, status, and other summary information. Select a card to display its key visual, name, dates, introduction, rules, registration status, and submission status on the right. Some activities may also be accessible through home-page cards or platform announcements; use the entries displayed by the platform.
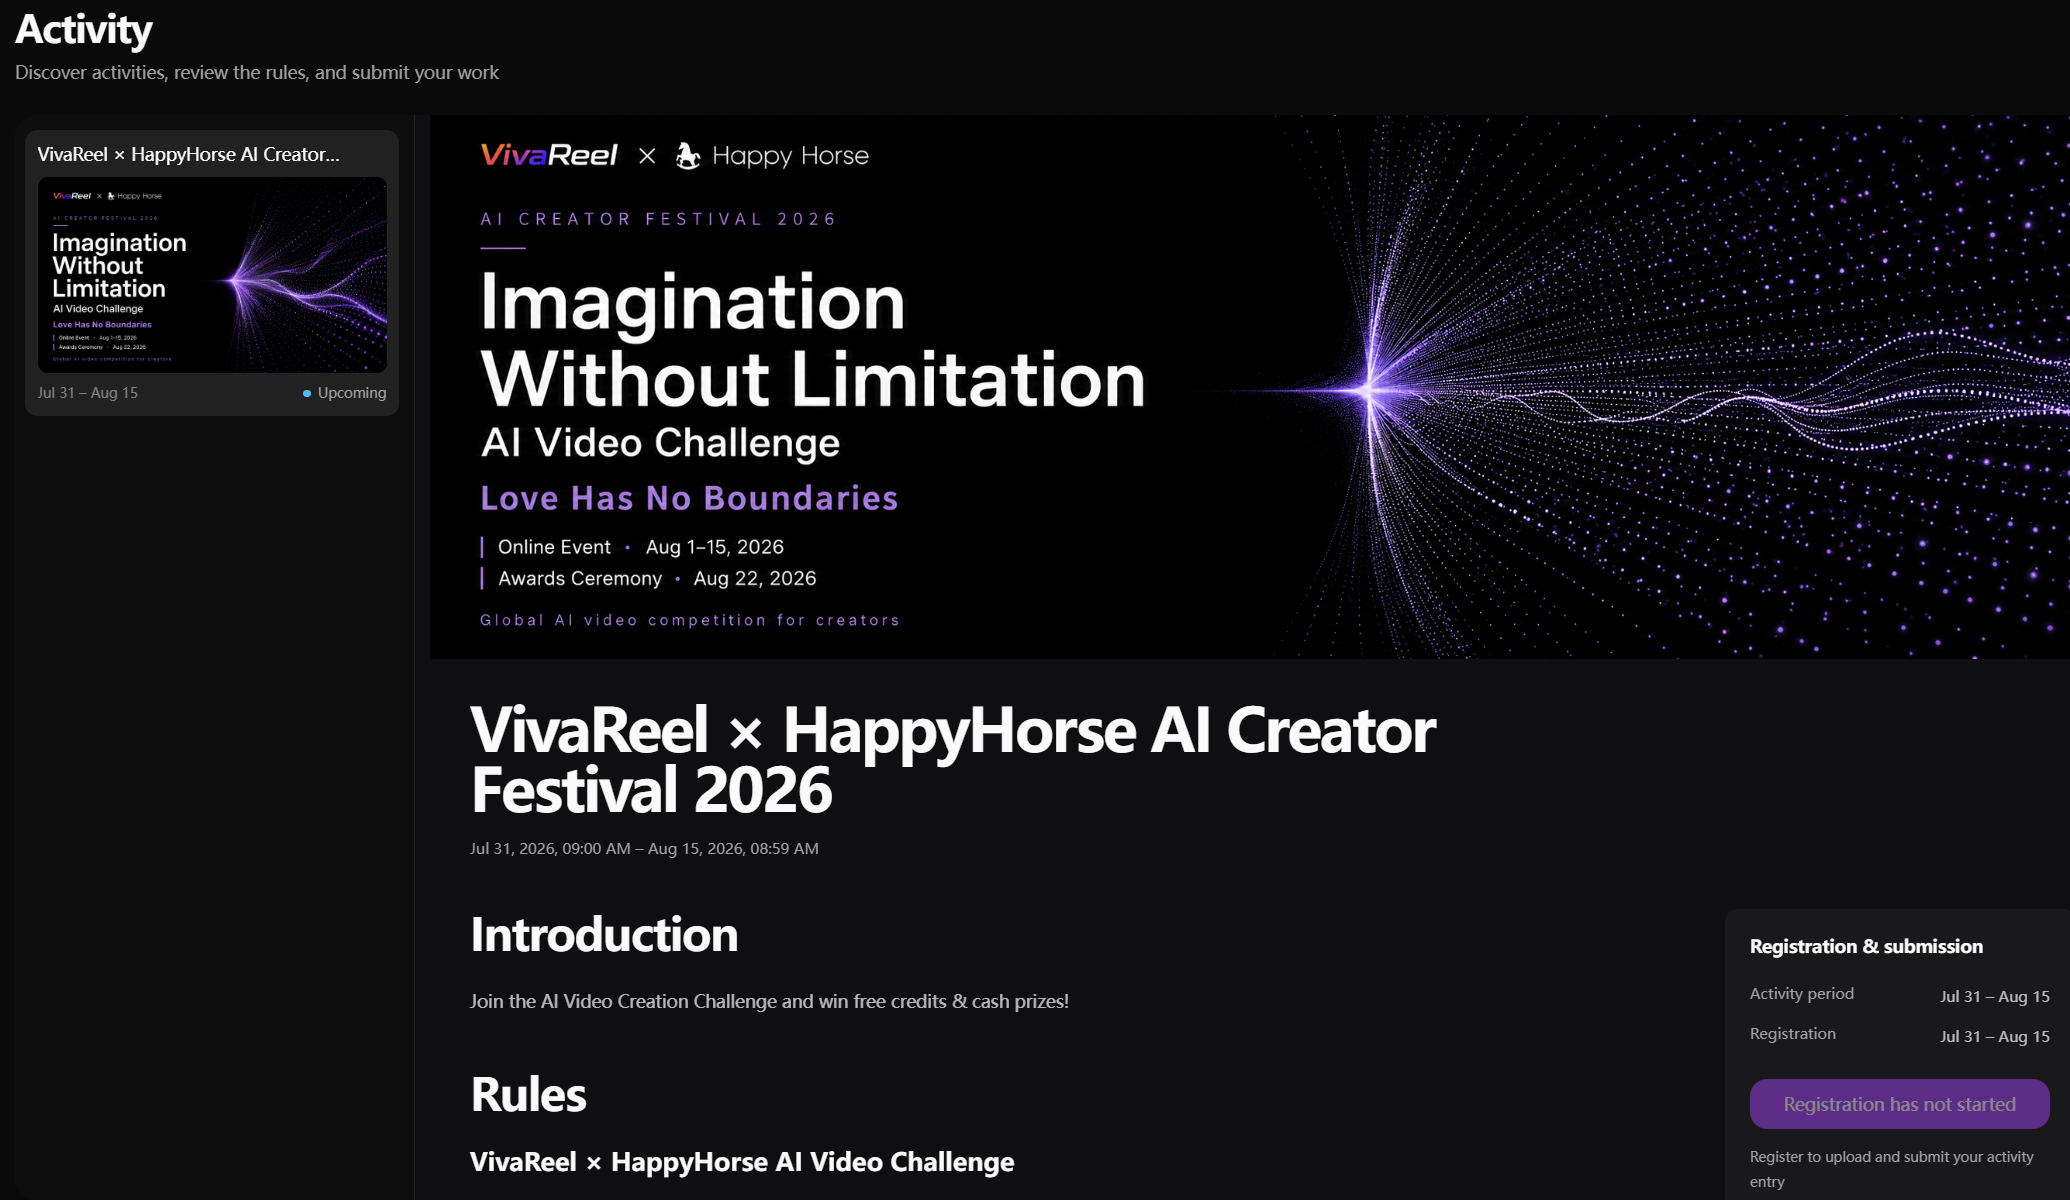
Figure 15-2 Activity Center list and activity details
The available content and actions depend on the user's status:
| User status | Available content or actions |
|---|---|
| Not logged in | Activity introduction, dates, rules, and login or registration entry |
| Logged in but not registered | Registration fields, declaration confirmation, and registration button |
| Registered but no work submitted | Activity Credits, Credit purchase entry, activity guide, and work submission button |
| Work submitted | Latest Submission ID, submission time, work information, history, and resubmission entry |
| Activity ended | Ended status, submission history, and results displayed according to activity settings |
Registration and submission open after the activity begins. New registrations and submissions stop after the activity ends. Users who have already submitted may still view their submission records and any published results.
15.2 Register for an Activity
- Log in to VivaReel and open the relevant activity page.
- Verify the UID and account email associated with the account.
- Complete any additional fields required by the activity, such as name, team, organization, or country/region. Required fields are marked on the page.
- Review the targeted Credits awarded for registration, their applicable scope, and their expiration date.
- Select the activity declaration checkbox. Use the rules entry to read the complete declaration.
- Click the registration button to complete registration.
The UID is automatically associated with the current account and cannot be changed on the registration page. The declaration checkbox is cleared by default; registration cannot be completed until it is selected. After successful registration, the page displays the registered state, activity Credits, and a Submit Work entry.
Reopening the activity with the same UID does not create another registration or award the registration Credits again. Successful registration itself does not generate a registration confirmation email.
15.3 Targeted Activity Credits
Targeted activity Credits can only be used with the models or features configured for that activity. They are managed separately from regular Credits. After registration, the platform awards the activity's registration Credits. The activity page displays the balance, source, permitted use, and expiration date.
When viewing Credit balance details, the platform separately displays General credits and Targeted credits, making it easier to confirm which type of Credits is available.
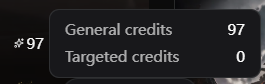
Figure 15-3 General and targeted Credit balances
Registered users may purchase targeted Credit packages offered for the activity. Before purchasing, confirm the number of Credits, price, applicable scope, and common expiration date. Activity operators may also issue Credits to registered users; operator-issued Credits do not count toward the purchase leaderboard.
Registration awards, purchased Credits, and operator-issued Credits share the same expiration date. This date may differ from the activity end date. Unused Credits are removed after expiration. The platform sends expiration reminders and expiration notices according to the activity configuration.
15.4 View the Activity Purchase Leaderboard
The main logged-in pages provide an entry to the activity purchase leaderboard. Click the floating icon to open a compact panel showing the top three users and the current user's rank, with an entry to the full leaderboard.
The leaderboard is ranked by the cumulative amount actually paid for targeted activity Credit packages during the activity:
- The leaderboard updates shortly after a successful payment.
- Users with the same cumulative amount share a rank; subsequent ranks skip the appropriate number of positions.
- Refunds reduce the corresponding cumulative amount. Free operator-issued Credits do not count.
- The leaderboard only reflects activity Credit purchases and does not affect judging or awards.
- Other users' UIDs are masked. The current user can see their complete UID and a clear current-user indicator.
15.5 Submit and Resubmit Work
After registering, click Submit Work on the activity page to upload a local video file. Video duration, format, file size, and the number of permitted submissions are determined by the activity rules. Before submitting, verify the account email displayed on the page; submission confirmation emails are sent to this address.
Every successful submission generates a unique Submission ID. A resubmission generates a new Submission ID and makes the latest successful submission the currently valid work. Previous successful submissions remain in history and are marked as superseded.
A failed upload does not generate a successful Submission ID and does not replace the previously valid work. The activity page displays:
- Submission ID
- Work name
- Submission time and status
- Current valid work indicator
- Submission history
15.6 Submission Confirmation and Activity Results
After the first successful submission and every successful resubmission, the platform sends a Submission Confirmation Email to the email address associated with the account. The message includes the activity name, work name, Submission ID, submission time, current status, activity entry, and an explanation of the latest valid submission.
An email delivery problem does not affect the submission result. Use the submission status on the activity page as the authoritative record. After the activity ends, operators enter the results based on offline judging. Depending on the activity settings, the platform may publish an award list, show individual results only to participants, or display no results yet.
16. Offline Event Registration and Payment
Offline event registration and payment is a separate activity module for displaying event information, collecting attendee details, completing payment, and sending payment confirmation emails. Luma is responsible for registration validation and on-site check-in. VivaReel does not synchronize attendee data with Luma and does not generate electronic tickets, QR codes, or PDF tickets.
16.1 Open an Offline Event Page
The registration and payment page may be accessed from a VivaReel activity page, an external link on Luma, or a public link provided by the organizer. Logged-in users and guests can both complete payment.
The page displays the event cover, name, introduction, date, time and time zone, location, organizer, contact information, final price, and Luma entry. Organizers may also display an agenda, speakers, and partners, and may configure the page language and payment entry status separately.
If you have registered on Luma, use the same email address when paying through VivaReel. This reminder is provided for manual verification only; the system does not automatically compare email addresses across the two platforms.
16.2 Three-Step Registration and Payment Process
- Review event information: Read the event introduction, schedule, price, and related information.
- Enter attendee details: Complete the attendee form. You can return and edit it before payment.
- Review and pay: Verify the attendee details, event information, and final amount, accept the required terms, and complete payment.
The page continuously displays the current step. When the payment entry is closed, users may still view event content and the Luma entry but cannot start or submit payment.
16.3 Enter Attendee Details
| Field | Required | Description |
|---|---|---|
| Salutation | Yes | Select a preset title such as Mr, Ms, Dr, Prof, or Prefer not to say |
| First Name | Yes | Attendee's first name |
| Last Name | Yes | Attendee's last name |
| Yes | Manually entered event registration email; basic email-format validation applies | |
| Job Title | No | Job title |
| Company / Organisation | No | Company or organization |
For logged-in users, the payment record is associated with the VivaReel UID, but the account email is not automatically entered. The event registration email must still be entered manually. Guests do not need to create a VivaReel account; the registration email serves as the primary identifier for the payment record.
16.4 Payment Rules
Each order is for one attendee, and each event offers one type of paid attendance. The price is configured by the organizer and denominated in US dollars (USD). The page displays the final payment amount without separately itemizing service fees or taxes.
Supported payment methods include credit card, debit card, Apple Pay, and Google Pay. Before submitting payment, the user must acknowledge that completed payments cannot be canceled or refunded and must agree to the Privacy Policy and payment terms. Payment cannot be submitted until all required confirmations are selected.
Only one successful payment record is retained for the same VivaReel UID or registration email address. Failed or incomplete payments do not consume the purchase eligibility. If a successful record already exists, the platform prevents another payment and asks the user to contact the organizer.
16.5 Payment Result and Confirmation Email
While payment is processing, the page displays a processing status and prevents duplicate submission. If payment fails, the attendee information is retained so the user can try again. A failed payment does not create another attendee record.
The payment success page displays the event name, attendee name, registration email, payment amount, order number, and a message confirming that the payment email has been sent. It also provides a Go to Luma entry.
The Payment Confirmation email is sent to the event registration email. It includes the event name, attendee name, registration email, payment amount, payment time, order number, payment status, Luma entry, organizer contact information, and no-refund notice. The email is a payment receipt, not a Luma admission ticket, formal invoice, or tax receipt.
16.6 After Payment
The initial release does not provide self-service editing of attendee details, order lookup, cancellation, refunds, or payment record export. If a name, email address, or other registration detail is incorrect, contact the organizer using the details on the event page.
If payment succeeds but the confirmation email is temporarily not delivered, the order remains governed by its actual payment status. It is not treated as a failed payment or duplicate charge.